
10 Hybrid Wall Mounted Tool Storage Ideas for Australia (Keter ready)

The quickest, most reliable route to a tidy workshop wall is a hybrid system: pegboard or slatwall at bench height for the tools you grab daily, backed up by a French cleat run for anything heavy. Below you’ll find ten wall-mounted tool storage ideas to pick from, a breakdown of which core system suits your tools, and the mounting rules that keep it all on the wall.
TL;DR:
- Using pegboard for daily hand tools requires roughly a one-inch gap behind for hooks, which may not work if mounted flush against a stud wall without spacers.
- Slatwall panels are better suited for heavier or bulkier tools because their horizontal rails support more robust accessories.
- French cleats offer maximum flexibility and strength for irregular or heavy tools but must be mounted into studs or plywood backing for safety.
- Planning your layout on paper before drilling helps avoid misfits, especially around obstacles like doors, windows, and outlets.
- Regular maintenance, including cleaning, fastener checks, and label updates, is essential to keep a tool wall safe and organized over years.
Table of Contents
- Ten wall mounted tool storage ideas you can build this weekend
- Which core wall system suits your tools: pegboard, slatwall or French cleat?
- How do you plan a wall before you start drilling?
- What are the non-negotiable mounting and safety rules?
- What tradecraft actually makes a tool wall work long term?
- How do you keep a tool wall in good condition over the years?
- Which Keter products fit into a hybrid wall setup?
- Three weekend projects to get you started
- Sources
- FAQ
Ten wall mounted tool storage ideas you can build this weekend
Every idea below fits somewhere in a zoned wall: Everyday tools at grabbing height, Power tools in their own strip, and Occasional gear up high where it’s out of the way but not out of reach.
- Pegboard with silhouette outlines. Best for hand tools you use constantly. Easy difficulty. Trace each tool’s outline in marker so it goes back exactly where it belongs. Everyday zone.
- Slatwall panel zone. Suits heavier hand tool sets and bins. Medium difficulty. Space horizontal rails evenly and test bracket fit before committing. Everyday to Power zone.
- French cleat run. Ideal for irregular or heavy items like circular saws and sanders. Medium to hard difficulty. Build cleats from ¾ inch plywood for real strength. Power zone.
- Magnetic tool strip. Great for screwdrivers, chisels, and metal hand tools. Easy difficulty. Mount at eye height so grabbing a tool takes a glance, not a search. Everyday zone.
- PVC drill holders. Perfect for cordless drills and impact drivers. Easy difficulty. Cut PVC pipe at an angle so the tool slides in and out without snagging. Power zone.
- Fold-down shelf or work surface. Suits a small garage that doubles as a workspace. Medium difficulty. Hinge it to a stud line so it can bear real weight when open. Power zone.
- Long-handled tool rack with spring clips. Ideal for rakes, shovels, and brooms. Easy difficulty. Space clips wide enough that handles don’t jam together. Occasional zone.
- Labelled bin rail. Good for fasteners, offcuts, and small parts. Easy difficulty. Use clear bins so you can spot contents without opening every one. Occasional zone.
- Hanging charger station. Suits households with several cordless tools. Medium difficulty. Run power leads along the wall, not across the floor, to avoid trip hazards. Power zone.
- Mobile wall-mounted cart. Best for tools you move between the wall and a work site. Medium difficulty. Choose a cart that clips into your wall system so it never sits in the way. Power to Occasional zone.
Pro Tip: Start with the three tools you reach for every single project and build their spot first. The rest of the wall will organise itself around that habit.
Which core wall system suits your tools: pegboard, slatwall or French cleat?
Pegboard is the cheapest, most flexible option for lighter hand tools, but it needs roughly a 1 inch gap behind the panel so hooks have clearance, which rules out mounting it flush against a stud wall without spacers, as detailed in this garage tool wall guide. Slatwall costs more per panel but takes heavier accessories through its horizontal slotted rails, making it the better pick once you’re storing anything bulkier than screwdrivers and pliers. French cleats offer the most customisability of the three and suit heavy or oddly shaped tools best, provided the cleat itself is backed into studs or plywood, as outlined in this wall mounted workshop storage guide.
Most garages do better with a mix rather than picking just one:
- Pegboard or slatwall at bench height for daily hand tools, where quick swaps matter more than raw strength.
- French cleats for power tools, tool cases, and anything over a few kilograms.
- Pre-made panels suit a first attempt or a rental; DIY cleats suit a known, settled tool collection.
- Rearranging a cleat wall costs almost nothing, since pieces just lift off and move; pegboard hooks are nearly as forgiving, while slatwall brackets take slightly more effort to reposition.
How do you plan a wall before you start drilling?
A good wall storage layout starts on paper, not on the wall. Skipping this step is how people end up with a beautiful pegboard that’s two centimetres too high for the drill press beside it.
- Inventory your tools. Measure the bulkiest items and group everything by how often you use it and roughly how big it is.
- Map the wall itself. Note stud spacing, door swings, window positions, and power outlets before you sketch anything.
- Sketch your zones. Put Everyday tools at 90 to 150cm off the floor for the fastest reach, Power tools between 60 and 120cm, and Occasional items higher up where a step stool is fine.
- Test-fit with paper templates. Trace hook and bracket positions onto paper and tape them to the wall before drilling a single hole, following the workflow in this layout planning guide.
- Leave spare capacity. Keep 20 to 30% of your hooks and shelf space empty so a new tool doesn’t force a full replan.
What are the non-negotiable mounting and safety rules?
A wall storage system is only as strong as what’s behind the panel, and this is where most DIY projects fail quietly, until something heavy comes off the wall.
- Mount heavy holders straight into studs, or fix a plywood backer across several studs first. Drywall-only anchors simply aren’t rated for a loaded cleat or a full pegboard of tools, a point confirmed in this tool organiser wall guide.
- Use masonry anchors only on brick or besser block walls; standard drywall anchors on that surface won’t hold.
- Space lag screws every 30 to 40cm along a cleat strip, and use structural screws into doubled studs for the heaviest sections.
- Keep charger stations and any powered fittings clear of moisture and away from where a falling tool could land on the cord.
Statistic snapshot: Leaving 20 to 30% spare hook space, as recommended in the garage tool wall guide, is a simple habit that prevents most of the overcrowding that leads to overloaded, unsafe sections further down the track.
What tradecraft actually makes a tool wall work long term?
The single habit that separates a tidy wall from a cluttered one isn’t the system you choose. It’s whether every tool has one specific spot it always goes back to.
Shadow outlines and dedicated single-tool hooks are what keep a wall organised six months in, not just on installation day. A tool with a designated silhouette gets put back; a tool tossed onto a shared shelf doesn’t.
That single insight, backed by observations in the garage tool wall guide, is why a hybrid layout works better than committing to one system. Modular pegboard panels and stackable storage units made from durable, recyclable resin hold up well in garages exposed to changing conditions, and they’re designed to click together so you can add capacity without re-planning the whole wall. Assembly is straightforward, and the panels wipe clean rather than needing repainting like a timber board.
How do you keep a tool wall in good condition over the years?
A wall storage system needs a bit of upkeep to keep working the way it did on day one. Dust and workshop grime settle into hooks and brackets faster than most people expect, especially in a garage that also stores garden gear.
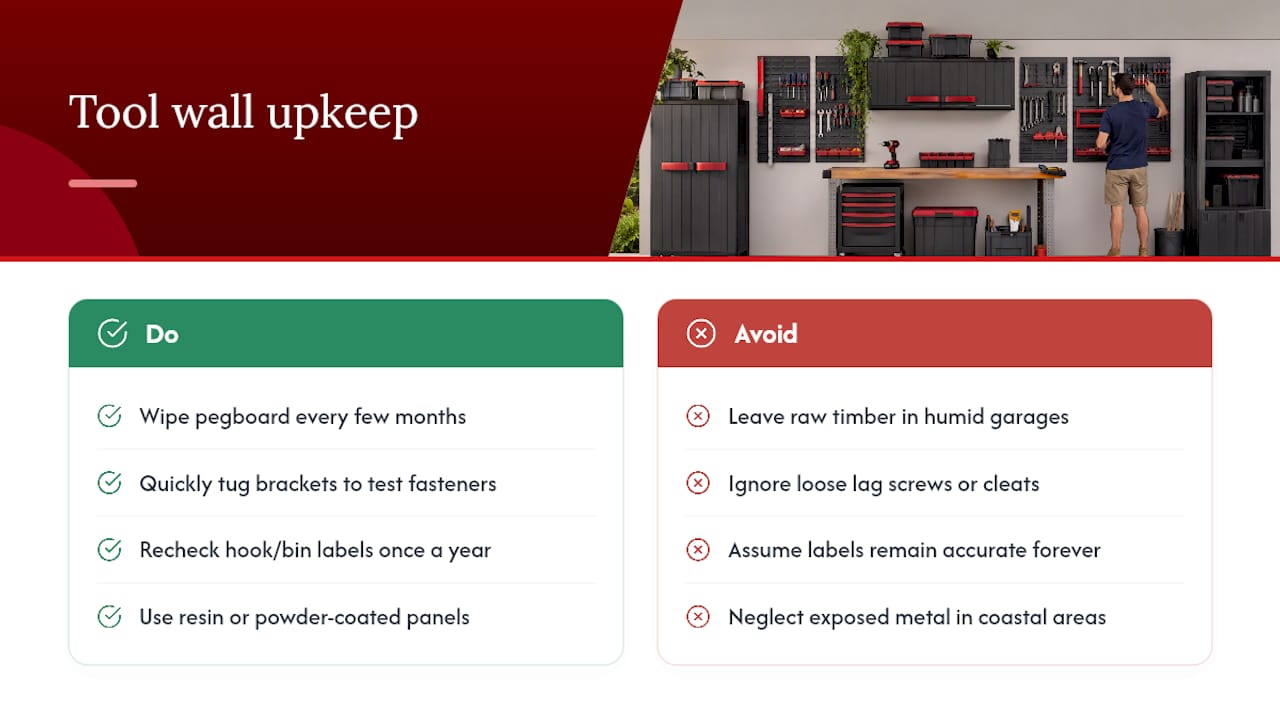
Wipe down pegboard panels and slatwall rails every few months with a damp cloth. Resin and powder-coated steel handle this far better than raw timber, which can warp or splinter over time if it sits in a humid garage. Check that lag screws and cleat fasteners haven’t worked loose, particularly after a year of everyday knocks and tool swaps. A quick tug on each bracket takes seconds and catches a problem before a tool ends up on the floor.
Recheck your hook and bin labels once a year. Tool collections shift, you buy new gear, and a label that made sense last year might not match what’s actually hanging there now. If you’re in a coastal area, keep an eye on any exposed metal fittings for corrosion. Resin-based panels and fittings sidestep this problem entirely, which is one reason they hold up better than bare steel pegboard in a humid shed. Small, five-minute checks like these are what keep a wall storage system running smoothly for years rather than needing a full rebuild.
Which Keter products fit into a hybrid wall setup?
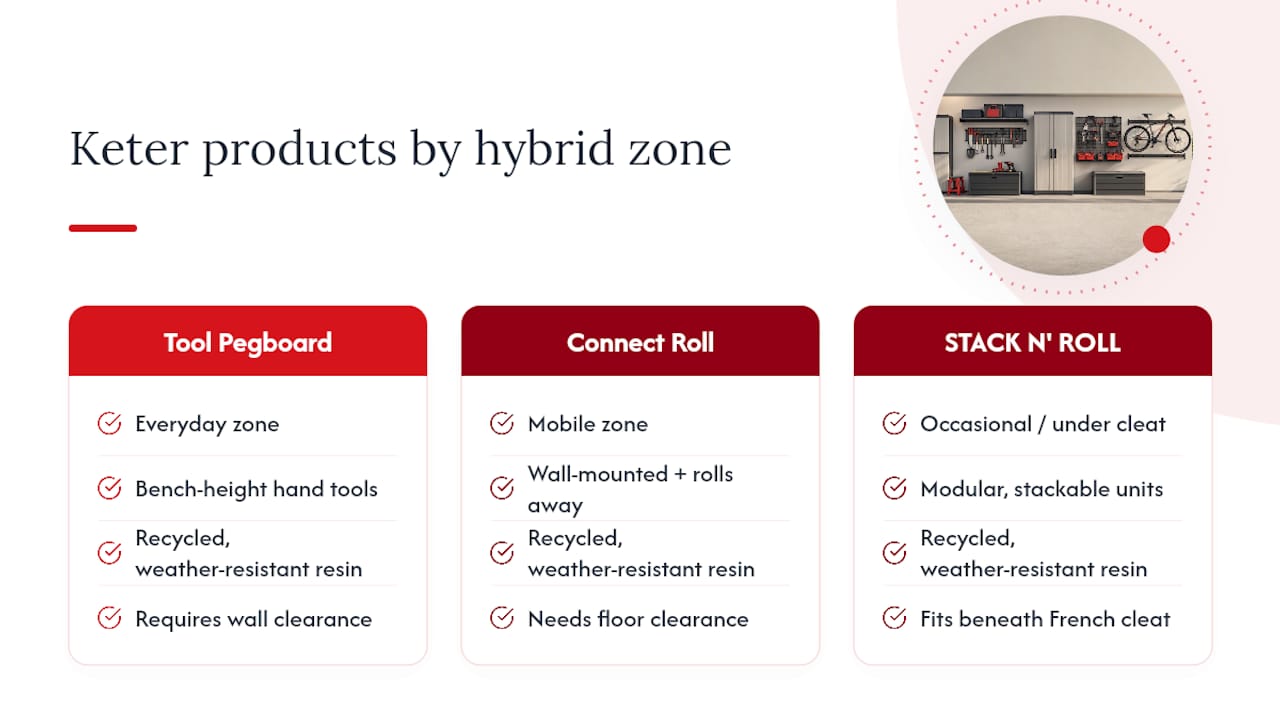
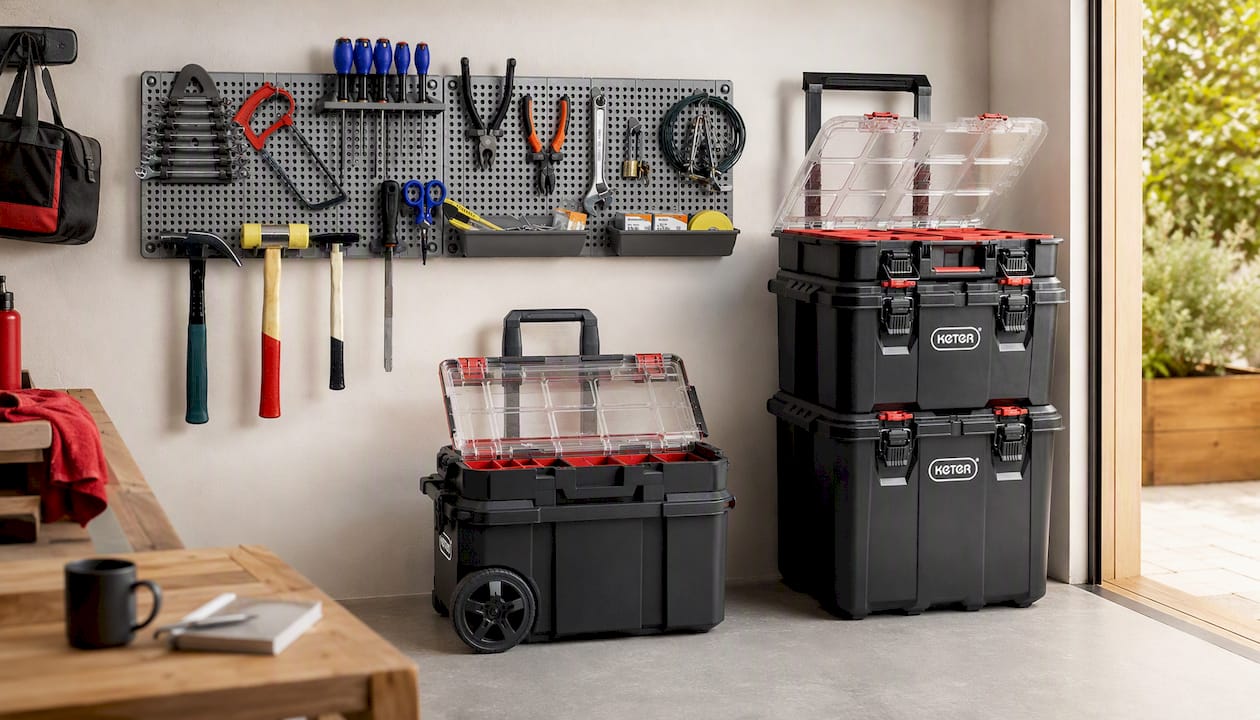
If you’d rather start with ready-made pieces than build every bracket from scratch, three Keter products map neatly onto the hybrid layout covered above. The Keter Tool Organizer Pegboard suits the Everyday zone perfectly, giving hand tools a clean, weather resistant home at bench height without needing spacers cut and fitted yourself. For tools you move between the wall and a job site, the Keter Connect Rolling Tool Storage System rolls out from the wall setup and back again, which suits anyone who does side jobs or works away from the main garage.
For readers juggling a mix of bins, small parts, and stackable storage, the Keter STACK N’ ROLL System slots into the Occasional zone or sits beneath a French cleat run, giving you modular, stackable capacity that expands as your tool collection grows. All three are built from recycled, recyclable resin, so they shrug off the humidity swings that warp timber shelving in an uninsulated garage.
Before you order anything, measure your wall space and confirm what you’re mounting into, whether that’s stud, plywood backer, or masonry, since a rolling unit needs floor clearance while a pegboard needs wall clearance behind it. If you’re combining several storage types across a wider utility space, this home organisation systems guide is a useful reference for keeping different zones visually consistent. Head to Ketergroup to check current sizing and availability before you commit to a layout.
Three weekend projects to get you started
You don’t need to build the whole wall in one go. Start with a pegboard above your bench: mark stud lines, fix furring strips for clearance, mount the panel, then trace outlines around your five most-used tools. The following weekend, add a single French cleat strip for one power tool, cutting the cleat from ¾ inch plywood and fixing it into at least two studs. For project three, mount a PVC drill holder and a small fold-down shelf together as a charger station, keeping cords tidy and off the floor. Each project takes a few hours and builds toward the same hybrid wall.
— Liza
Sources
- Garage Tool Wall — Garage Storage Guide
- Wall Mounted Tool Storage Layout Planning — PowerValid
- DIY Tool Organizer Wall Plans You Can Build This Weekend – Value Tools Co
FAQ
How can I store tools on a wall?
Mount a pegboard or slatwall panel at bench height for everyday hand tools, then add a French cleat strip for anything heavier, fixing both into studs or a plywood backer rather than drywall alone.
What are some DIY ideas for tool storage?
Magnetic strips for metal hand tools, PVC pipe holders for drills, spring clips for long-handled tools, and a plywood French cleat run for power tools are all low-cost projects you can finish in a weekend.
What is the best tool wall storage system?
There’s no single best system. Pegboard suits light hand tools and tight budgets, slatwall handles heavier loads with modular brackets, and French cleats offer the most flexibility for heavy or irregular items, so most garages do best with a hybrid of two or three.
What is the cheapest way to store tools?
Pegboard is generally the most affordable core system, since a single panel and a set of hooks can organise dozens of hand tools without the material cost of slatwall or the build time of a cleat system.


