
Match Keter Shed Footprints to Lumen Targets for DIY Workshops

An LED‑first, layered lighting plan beats every other approach for shed usability and running costs. For most sheds, that means LED battens as the main light source, grid or high‑bay fixtures if your shed has a tall roofline, and task or motion sensor lights added around benches and entry points. Any permanent wiring needs to meet AS/NZS 3000 and should go through a licensed electrician, full stop.
TL;DR:
- LED battens are the most cost-effective and practical main lighting option, but tall sheds benefit from grid or high‑bay fixtures to reduce shadows.
- Proper fixture placement, such as running battens lengthwise and adding dedicated task lights, is more important than lumen count in avoiding shadows and glare.
- Power wiring must comply with AS/NZS 3000 standards and be installed by a licensed electrician, especially for permanent setups.
- Solar or battery-powered lights suit basic illumination, but they are limited to low-power use and not suitable for running power tools continuously.
Table of Contents
- Shed lighting options that actually work in a workshop
- How to choose the right lumens and colour temperature
- Getting the wiring and power source right
- Matching lighting plans to common Keter shed footprints
- What actually matters in a shed lighting plan
- Set up your shed the right way from the start
- Sources
- FAQ
Shed lighting options that actually work in a workshop
Not every fixture built for a house ceiling survives shed life. Dust, heat, damp, and the occasional dropped spanner all take their toll, so the fixtures worth buying are the ones designed for that abuse while still throwing enough light to see what you’re doing.
LED battens are the workhorse of shed lighting, and for good reason. They’re cheap to run, spread light evenly across a bench or floor area, and you’ll find them at pretty much any hardware store or electrical supplier. A single 1200mm batten mounted centrally handles a small storage shed easily; run two or three in parallel down a longer workshop and you avoid the dim patches that a single bulb always leaves in the corners. LED battens and task lighting are common practical picks for sheds because they’re simple to install, whether you’re plugging into an existing GPO or having them hardwired.
Grid or high‑bay systems solve a problem battens can’t: shadows in a busy workshop. If you’ve got a tall‑roofed shed or a bench where you’re constantly leaning over work, a single overhead batten throws your own shadow right across what you’re doing. Grid and multi‑source systems reduce that shadowing by lighting the space from multiple points rather than one. High‑bay fixtures, originally designed for warehouses, work well in sheds with 3 metre‑plus ceilings where a standard batten sits too far from the work surface to be genuinely useful.
LED strip lighting earns its place under shelving and along benchtops, not as your main light source. Stick a strip under an overhead shelf and you’ve suddenly got even illumination on whatever’s stored beneath it, without a bulky fixture eating into headroom. It’s cheap, low profile, and easy to run off a small transformer.
Portable and clamp work lights are the fixture nobody plans for and everyone ends up buying. They’re battery or plug‑in, they clamp onto whatever’s nearby, and they fill in the gaps your fixed lighting misses, particularly if you’re working right up against a wall or under a car.
Motion sensor lights do double duty as convenience and security. Mounted near a shed entry, they light your path in without you fumbling for a switch, and they double as a basic deterrent if your shed backs onto a side yard or laneway. Worth pairing with a broader look at shed security if that’s a genuine concern for your property.
Natural light through polycarbonate panels or a skylight is free and flattering, but only during daylight hours, and cutting a hole in an existing roof for a skylight is a job worth costing out properly before you commit. It’s a nice supplement, never a standalone plan.
A few things trip people up regardless of fixture choice:
- Cheap fixtures without an adequate IP rating fail fast in dusty or damp sheds.
- A single centred light always leaves shadowed corners on wider benches.
- Fixtures mounted too close to a metal roof run hotter and can shorten LED lifespan.
- Warm white bulbs look cosy but make it harder to spot colour or detail on close work.
How to choose the right lumens and colour temperature
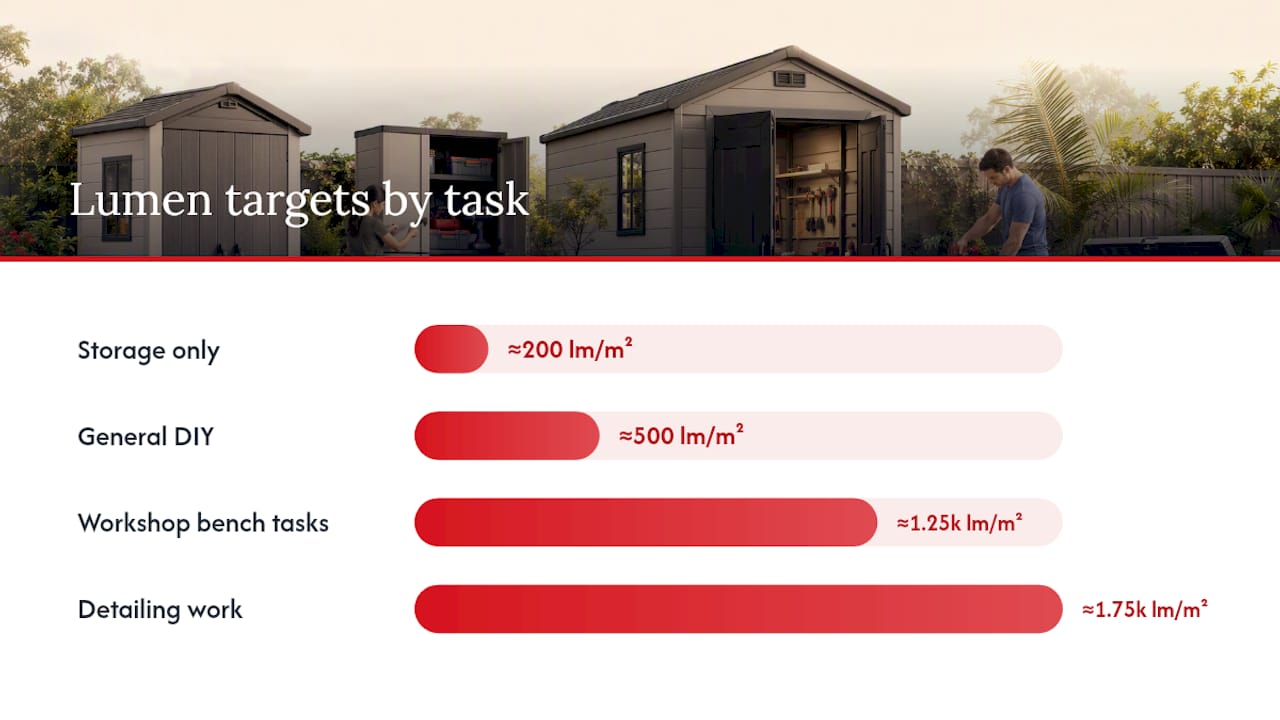
Getting the brightness right comes down to matching lumens to what you’re actually doing in the shed, not guessing and hoping. Design lumen targets give you a genuinely useful starting point:
- Storage only — around 200 lumens per square metre is plenty for finding the lawnmower or grabbing a paint tin.
- General DIY — aim for 400 to 600 lumens per square metre for casual bench work and hobby projects.
- Workshop bench tasks — step up to 1,000 to 1,500 lumens per square metre for serious tool work, sanding, or anything needing steady focus.
- Detailing work — fine painting, model making, or close inspection work wants 1,500 to 2,000‑plus lumens per square metre.
Pro Tip: Colorbond or timber‑lined sheds soak up more light than a painted interior does, so bump your lumen target up a notch if your ceiling and walls are dark or unfinished.
Colour temperature matters almost as much as brightness. Experts recommend 5000 to 6500K daylight‑white globes for anything involving colour matching or fine detail, since warmer 3000K globes flatten contrast and make it harder to spot flaws in your work. Save the warmer tones for a shed you’re using as a relaxed hangout rather than a workspace.
Placement rules matter as much as lumen count. Run battens lengthwise along the shed rather than across it, offset fixtures from directly above your usual standing spot so you’re not casting your own shadow over the bench, and always combine an ambient overhead light with a dedicated task light for close work. The AS/NZS 1680 standard sets out broader interior lighting guidance worth a look if you’re kitting out a serious home workshop.
Getting the wiring and power source right
Plug‑in setups through an existing GPO handle most light hobby use fine. If you’re running power tools regularly, adding a welder, or treating the shed as a permanent workshop, hardwiring is the better long‑term option, and it’s worth doing properly the first time rather than retrofitting later. Solar plus battery kits work well for sheds without easy mains access, but be realistic. They suit lighting and small charging loads, not a bench grinder running for hours.
- Permanent wiring must comply with AS/NZS 3000 and legally requires a licensed electrician.
- RCD protection is non‑negotiable on any shed circuit.
- DIY wiring work can void your home insurance if something goes wrong.
- Choose fixtures with a solid IP rating for dusty or hot Colorbond sheds.
Pro Tip: When you call an electrician, ask them to quote both a GPO‑fed circuit and a dedicated hardwired circuit with RCD protection. Comparing the two upfront saves a second callout later if your power needs grow.
Matching lighting plans to common Keter shed footprints
Lighting a shed properly starts with knowing its footprint and roofline, and that’s where matching your fixtures to your actual shed pays off. A Keter Manor 4x6 or similar compact footprint suits a single plug‑in batten mounted centrally. Something in the Cortina 9x7 or 11x7 range has enough floor space to benefit from two parallel battens or a small grid kit spanning the workshop zone.
For a compact storage setup like the Store It Out Prime 880L, a single small fixture or even a battery clamp light is often all you need since it’s built for storage rather than bench work. Keter’s sheds use recyclable resin panels that assemble without structural framing overhead, which generally makes surface‑mounted battens straightforward to fit without cutting into roof sheeting. Our step‑by‑step assembly guide covers the roof and ceiling details worth knowing before you plan cable runs.
What actually matters in a shed lighting plan
Most shed lighting advice online treats brightness as the only variable that matters, and that’s the part I’d push back on hardest. Lumens matter, sure, but placement is where most home setups actually fail. A single centred batten at the “right” lumen count still throws a shadow across your bench the moment you lean over it, and that’s the failure I see recommended past most often.
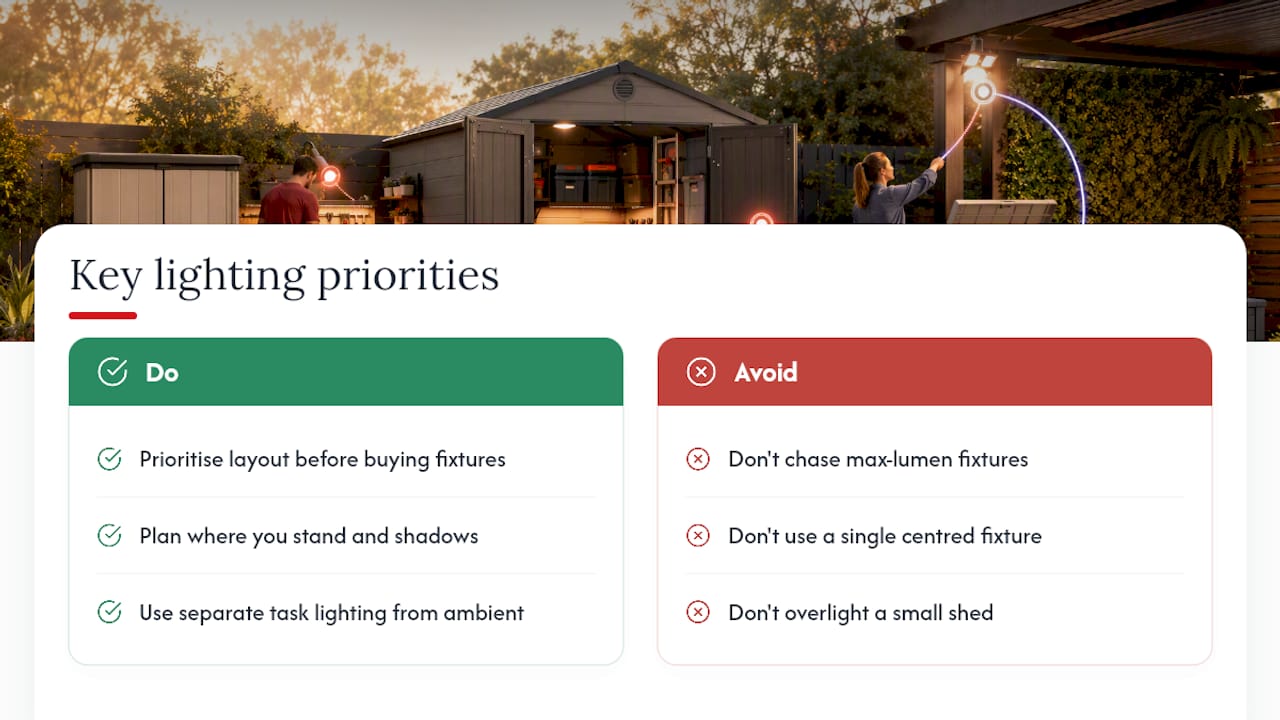
The other overrated fix is chasing the brightest fixture available “just in case.” A workshop doing occasional hobby projects doesn’t need detailing‑grade lumens, and overlighting a small shed just means glare and heat you didn’t need. Match the light to the task, not the other way around.
If I had to prioritise one thing for a reader setting up a shed from scratch, it’s this: sort your layout and placement before you buy a single fixture. Work out where you stand, where shadows will fall, and whether you need task lighting separate from ambient overhead light. The fixture choice, LED batten versus grid versus strip, matters far less than getting that placement logic right first.
— Liza
Set up your shed the right way from the start
Getting your lighting plan sorted is only half the job if the shed itself isn’t set up to make the most of it — for detailed fixture placement and lumen guidance, see this garage lighting ideas guide from Montreal Lighting & Hardware. Ketergroup builds garden sheds and storage solutions from recycled, weather resistant resin that’s genuinely straightforward to assemble yourself, which means you’re not fighting a difficult install before you even get to running a batten overhead.
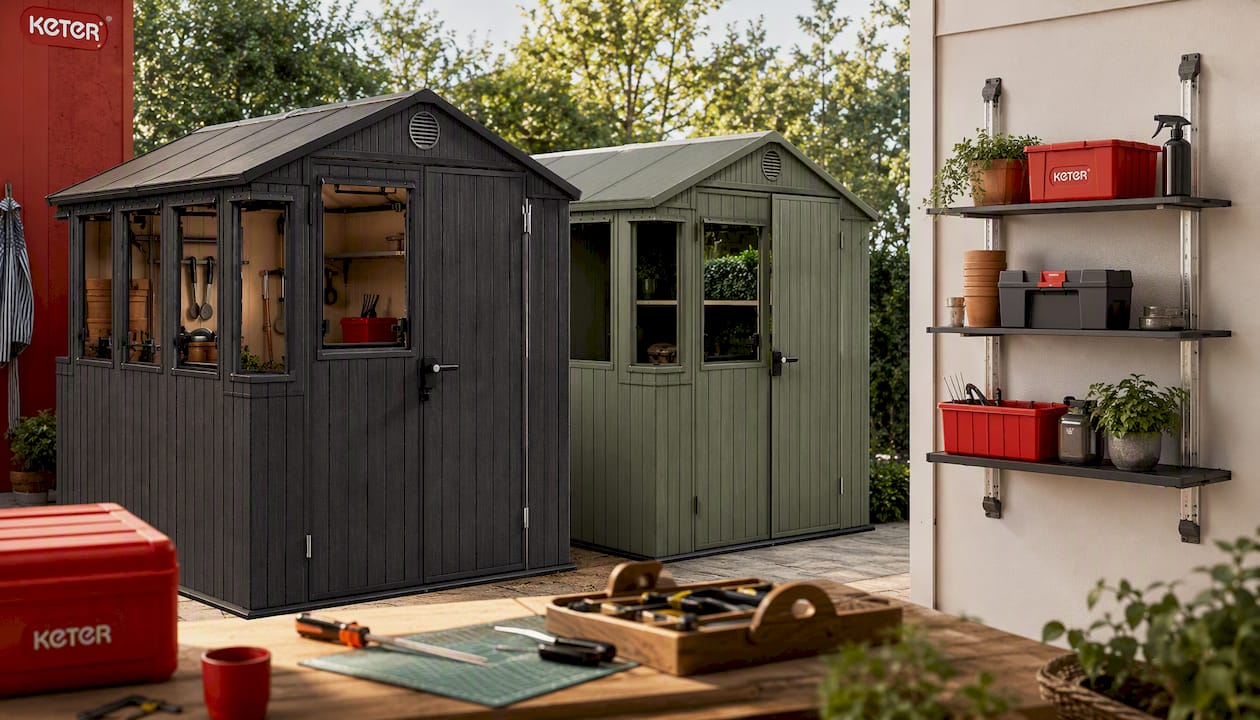
Whether you’re after a compact option like the Store It Out Prime 880L for tucking away garden gear, or a full workshop footprint like the Cortina 11x7, every Keter shed is designed with clean interior panels that make surface‑mounted lighting easy to fit without cutting into structural framing. Have a browse of the Keter shed range and match a footprint to your lighting plan before you buy.
This article is general information, not a substitute for advice from a qualified lawyer. Consult a qualified legal professional about your own circumstances before acting on anything here.
Sources
- Best shed lighting australia: LED options for every shed | HexSpace
- Lighting and power ideas for backyard workshop sheds | ShedBlog
FAQ
What is the best type of lighting for a shed?
LED battens are the best all‑round choice for most sheds, offering even coverage and low running costs; taller workshops benefit from adding a grid or high‑bay fixture to cut down on shadows.
What are the best lighting options for a shed?
A layered mix works best: LED battens for ambient light, task or strip lighting over benches, and a motion sensor light near the entry for convenience and basic security.
What type of lighting is best for inside a shed used as a workshop?
For bench tasks, aim for 1,000 to 1,500 lumens per square metre in 5000 to 6500K daylight white, paired with a dedicated task light to avoid casting shadows over your work.
What are the best ways to add lights to my shed?
Plug‑in battens are the simplest option for light hobby use; permanent hardwired lighting suits regular workshop use but must be installed by a licensed electrician to meet AS/NZS 3000.
Can I use solar lights for a shed with no power connection?
Solar and battery lighting kits work well for basic illumination in sheds without mains access, though they’re better suited to lighting than to running power tools for extended periods.


