
Under deck storage ideas that actually work in Australia

The most practical under deck storage ideas for Australian homes combine modular weather resistant resin boxes with built-in pull-out drawers, giving you flexible, low-maintenance storage that handles humidity, UV, and sudden downpours without constant upkeep. If your clearance is tight, start with a freestanding resin storage box. If you have 750mm or more, a pull-out drawer system or hinged access panel opens up a whole new level of under deck organisation.
Here is a quick snapshot of what works and when:
- Resin storage boxes — suits any clearance from around 500mm; no building work needed
- Pull-out drawers — needs at least 400mm clearance; best for tools, cushions, and everyday gear
- Hinged or removable access panels — suits 600mm and above; great for seasonal items
- Sliding panels or hidden hatches — suits 500mm and above; clean look, good for narrow spaces
- Pull-out tool racks — suits 400mm and above; keeps long-handled tools upright and accessible
- Storage benches — suits 600mm and above; doubles as seating along deck edges
- Walk-in enclosure or small shed — needs 2000mm or more; full storage room under a high deck
- Raised shelving — suits 750mm and above; maximises vertical space for bins and boxes
Clearance triggers at a glance: Australian industry practice recommends a minimum of 750mm for general usable storage, 400mm as the threshold for functional pull-out drawers, and 2000mm or more for walk-in enclosures.
Key takeaways
The most durable, low-maintenance under deck storage for Australian homes combines weather resistant resin boxes for immediate use with built-in pull-out drawers or hinged panels where clearance and budget allow.
| Point | Details |
|---|---|
| Clearance determines your options | 400mm suits pull-out drawers; 750mm opens up most solutions; 2000mm+ enables a walk-in enclosure. |
| Resin outperforms timber under decks | Resin resists moisture and UV without annual sealing, making it the practical choice for Australian conditions. |
| Drainage comes first | Grade the ground away from the house and plan drainage before enclosing any under deck space. |
| Use corrosion-resistant hardware | Stainless or galvanised fixings and slides rated to 45kg per pair prevent premature failure in humid or coastal environments. |
| Ketergroup resin boxes are a ready-made solution | The 170G 643L, Glenwood 390L, and Signature 570L suit different clearance and capacity needs with no building work required. |
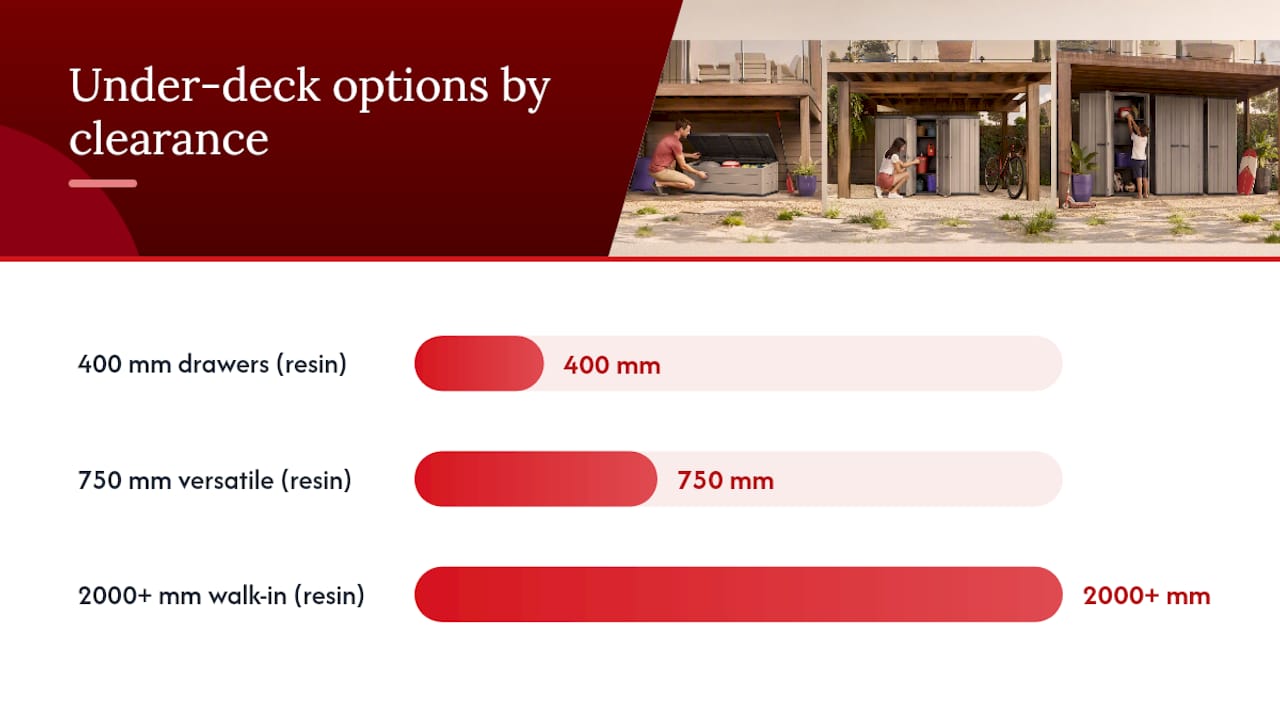
Table of Contents
- How to measure your deck and choose the right storage solution
- 8 practical under deck storage ideas for Australian homes
- How to build a pull-out drawer under your deck in a weekend
- What materials work best for Australian under deck storage?
- How to keep your under deck storage organised and in good shape
- Structural checks, safety, and when to call a professional
- Why resin and easy access are the right call for Australian homes
- Weather resistant resin storage from Ketergroup, ready for under deck life
- Sources
- FAQ
How to measure your deck and choose the right storage solution
Before you buy a single box or cut a single piece of timber, spend 20 minutes with a tape measure. The gap between the ground and the underside of your deck joists determines almost everything: what fits, what you can build, and whether you need a permit.
What to measure:
- Ground to the underside of the lowest joist (not the decking boards above)
- Joist spacing (typically 450mm or 600mm centres in Australian residential decks)
- Joist direction relative to your planned access point
- Post locations and any bracing that limits drawer travel or door swing
- Position of downpipes, conduit, or irrigation lines running through the space
Clearance and what it unlocks:
- Under 400mm — storage is very limited; flat, low-profile containers slid in from the side are about all that fits
- 400mm–750mm — pull-out drawers and low resin boxes work well; measure joist spacing carefully before ordering slides
- 750mm–2000mm — the most versatile range; hinged panels, shelving, benches, and larger resin boxes all become options
- Over 2000mm — walk-in enclosures or a freestanding shed can sit comfortably underneath
Access frequency matters just as much as clearance. Put everyday items (sports gear, the hose, gardening gloves) closest to the main entry point. Seasonal gear like Christmas decorations or camping equipment can sit deeper in the space, behind a hinged panel or at the back of a drawer. Plan your door or hatch swing before you build: a door that opens into a garden bed or swings into a pathway creates daily frustration.
Pro Tip: Before any build, check that the ground slopes away from the house foundation. Poor drainage under an enclosed deck leads to damp stored items even inside sealed cabinets. A 1-in-50 fall away from the house is the standard Australian residential drainage gradient.
8 practical under deck storage ideas for Australian homes
1. Pull-out drawers
Pull-out drawers are a practical under deck storage solution when you have sufficient clearance. They provide easy access and keep the storage area organised.
You need at least 400mm of clearance from ground to joist, and ideally 600mm for comfortable drawer depth. Fit corrosion-resistant slides rated to around 45kg per pair — stainless or heavy-duty galvanised — because cheaper slides seize up in humid coastal conditions within a season or two. A typical drawer box size fits common outdoor items such as cushions, pool toys, or garden tools laid flat.
Best for: cushions, tools, sports gear, pool accessories Clearance needed: 400mm minimum, 600mm+ preferred DIY or pro: DIYable in a weekend with sound joists and prepared materials
2. Hinged or removable access panels
A hinged panel cut into the deck fascia or skirting gives you a door into the under deck space without any structural change to the deck itself. The panel swings open on stainless hinges, you reach in, and it closes flush. Removable panels (held by turn-buttons or magnetic catches) are even simpler and suit spaces where you only need access a few times a year.
This approach works from about 600mm clearance upward and pairs well with freestanding resin boxes placed inside the space. The panel keeps the area tidy and concealed without locking you into a fixed drawer layout.
Best for: seasonal storage, concealing resin boxes, low-clearance spaces Clearance needed: 600mm+ DIY or pro: DIYable; a jigsaw and stainless hinges are the main tools
3. Freestanding resin storage boxes
The fastest under deck storage upgrade you can make is sliding a weather resistant resin box into the space. No building work, no permits, no structural questions. You can reposition or remove it any time. Modular freestanding resin boxes are a low-risk starting point that lets you test the space before committing to built-in solutions.
Resin boxes handle Australian humidity, UV, and coastal salt air far better than timber alternatives, which absorb moisture and need regular sanding and sealing. For under deck use, look for boxes with a raised base or place them on pavers to keep the base off damp ground.
Best for: cushions, garden gear, pool toys, general household overflow Clearance needed: matches box height; typically 500mm+ DIY or pro: no tools needed
4. Pull-out tool racks
A pull-out tool rack is a narrow, wheeled or sliding frame that holds long-handled tools upright: rakes, brooms, shovels, and hose reels. It slides out from behind a fascia panel on castors or heavy-duty slides, giving you access to the full rack without stepping into the under deck space.
These work well in spaces with 400mm–600mm clearance where a full drawer box would be too deep. Build the frame from treated pine (H3 or higher for any ground-contact members) with a plywood back panel and stainless hooks or clips for each tool.
Best for: garden tools, brooms, hose reels Clearance needed: 400mm+ DIY or pro: DIYable; a weekend project
5. Sliding panels and hidden hatches
Slatted screening with planned door placement is one of the cleanest ways to conceal under deck storage while keeping airflow moving through the space. Sliding panels run on a top track and a bottom guide channel, disappearing to one side when you need access. Hidden hatches cut into the deck surface itself work for very low clearance spaces where side access is impossible.
The key design rule: leave at least 50mm of open slat or vent gap at the top and bottom of any screening panel to prevent moisture from building up inside. Coastal homes should use stainless steel tracks and fixings throughout.
Best for: concealment, narrow side-access spaces, aesthetic-focused builds Clearance needed: 500mm+ for side panels; any clearance for deck-surface hatches DIY or pro: intermediate DIY; track alignment takes patience
6. Storage benches along the deck edge
A built-in bench along the perimeter of a raised deck can incorporate a hinged seat that lifts to reveal storage underneath. The bench sits at deck level, so the storage cavity is essentially the full depth between the bench seat and the ground. This works best where the deck edge is accessible from the garden and clearance is 600mm or more.
Build the bench frame from treated pine with a marine plywood seat, and line the interior with a moisture-resistant membrane. It doubles as seating for guests and keeps bulky items like outdoor cushions and kids’ toys within arm’s reach.
Best for: cushions, outdoor toys, entertaining gear Clearance needed: 600mm+ DIY or pro: intermediate DIY or carpenter
7. Walk-in enclosure or small shed
Where clearance exceeds 2000mm, the space under a high deck becomes a genuine room. A framed enclosure with a proper door, ventilation louvres, and a concrete or compacted gravel floor can store a ride-on mower, bicycles, large garden equipment, and bulk supplies. This is the most ambitious option and the one most likely to require a building permit from your local council.
A freestanding shed positioned within the under deck space is a lower-commitment alternative: no structural connection to the deck, no permit in most cases, and fully removable. Check your local council’s exempt development rules before framing anything into the deck structure.
Best for: large equipment, bikes, bulk storage Clearance needed: 2000mm+ DIY or pro: consult a qualified carpenter and your local council
8. Raised shelving and bin storage
Simple freestanding shelving units placed inside the under deck space, accessed through a hinged panel, make excellent use of vertical clearance in the 750mm–2000mm range. Powder-coated steel shelving or resin shelving units resist moisture better than raw timber. Use the lower shelves for heavy items (fertiliser bags, paint tins) and upper shelves for lighter, less frequently used gear.
Pair shelving with labelled, lidded storage containers for a system that stays organised through the year. Organising garden tools and supplies by category on dedicated shelves means you spend less time searching and more time in the garden.
Best for: general garden supplies, chemicals, seasonal items Clearance needed: 750mm+ DIY or pro: DIYable; flat-pack shelving units take under an hour
How to build a pull-out drawer under your deck in a weekend
A competent DIYer with sound joists and prepared materials can complete a basic pull-out drawer in a weekend. The result: a smooth-sliding, moisture-shedding drawer that sits flush with your deck fascia and holds up to around 45kg of gear.
Materials you will need:
- Marine plywood (18mm) or treated pine boards for the drawer box
- Treated pine (H3 or higher) for the support rails
- Stainless steel or galvanised drawer slides rated to at least 45kg per pair
- Stainless screws and bolts throughout (no bare steel in an outdoor environment)
- Exterior-grade wood glue
- Primer and exterior paint or timber sealer
- Ventilation mesh for the drawer base (optional but recommended)
Step-by-step build:
- Measure and mark. Confirm clearance from ground to joist underside. Mark the drawer opening on the fascia board. Allow 10mm clearance on each side for the slide hardware.
- Build the support rails. Fix two treated pine rails to the inside faces of adjacent joists, level and parallel, at the height that positions the drawer flush with the fascia. Use stainless coach screws into solid joist timber.
- Construct the drawer box. Cut marine plywood to size: two sides, a front, a back, and a base. Glue and screw the box together. Drill 10mm drainage holes in the base at 200mm centres so water cannot pool inside.
- Fit the slides. Attach the fixed slide member to the support rail and the moving member to the drawer box sides. Check alignment before final fixing — a drawer that binds on one side will wear the slides quickly.
- Seal and finish. Apply two coats of exterior primer and paint, or a penetrating timber sealer, to all exposed surfaces. Pay particular attention to end grain, which absorbs moisture fastest.
- Ventilate. Leave a 20mm gap between the drawer back and the rear of the cavity, or fit a small louvre vent in the fascia panel above the drawer, to keep air moving and prevent mould.
Time budget: one weekend for a single drawer. Safety note: never notch or cut into joists to create clearance. If the joists are too low, choose a lower-profile solution instead.
What materials work best for Australian under deck storage?
Resin is the low-maintenance choice for under deck storage in Australian conditions. It does not absorb moisture, it resists the UV exposure that degrades cheaper plastics, and it needs no annual sealing or sanding. Timber can look beautiful and suits a traditional deck aesthetic, but it requires genuine ongoing maintenance: sanding, resealing, and checking for rot every year, particularly in humid or coastal locations.
Material comparison at a glance:
- Resin/recycled plastic: moisture resistant, UV stable, no maintenance beyond a wipe-down, lighter weight, fully recyclable at end of life
- Treated pine (H3+): strong, widely available, cost-effective for framing; needs sealing and annual inspection; use H3 minimum for any member near ground contact
- Marine plywood: excellent for drawer boxes and panels; must be sealed on all faces and edges; heavier than resin
- Powder-coated steel shelving: strong and moisture resistant when the coating is intact; check for chips annually in coastal areas
Hardware specs that matter: use stainless steel or hot-dipped galvanised fixings throughout. Bare steel screws rust within months in a humid under deck environment, staining timber and weakening joints. For drawer slides, corrosion-resistant slides rated to around 45kg per pair are the practical minimum for tools and cushions.
Keter storage boxes for under deck use:
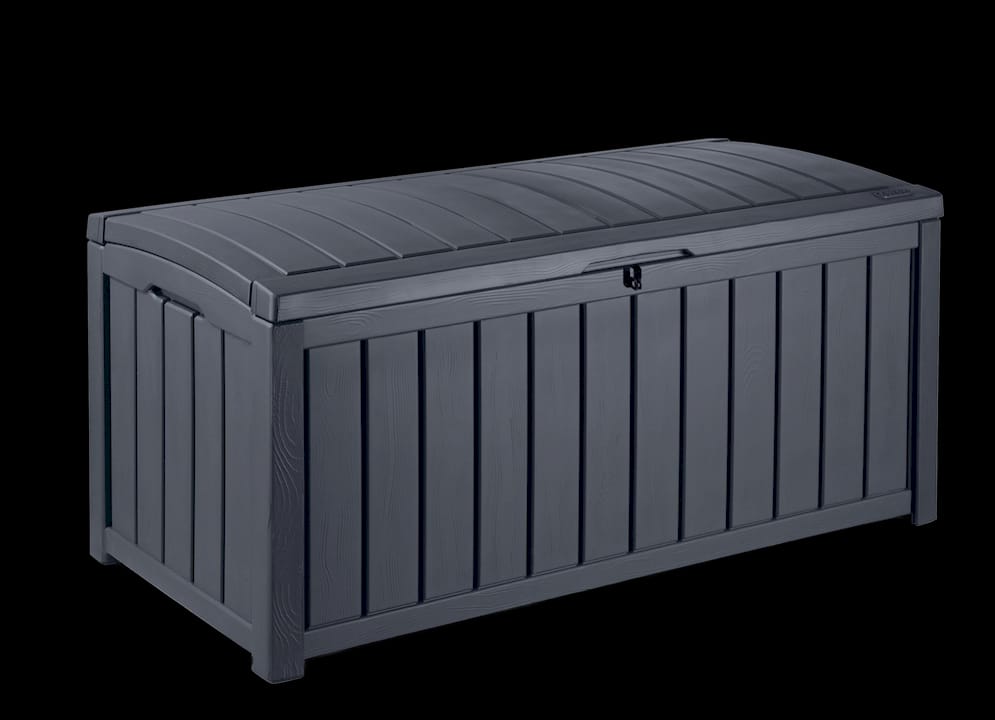
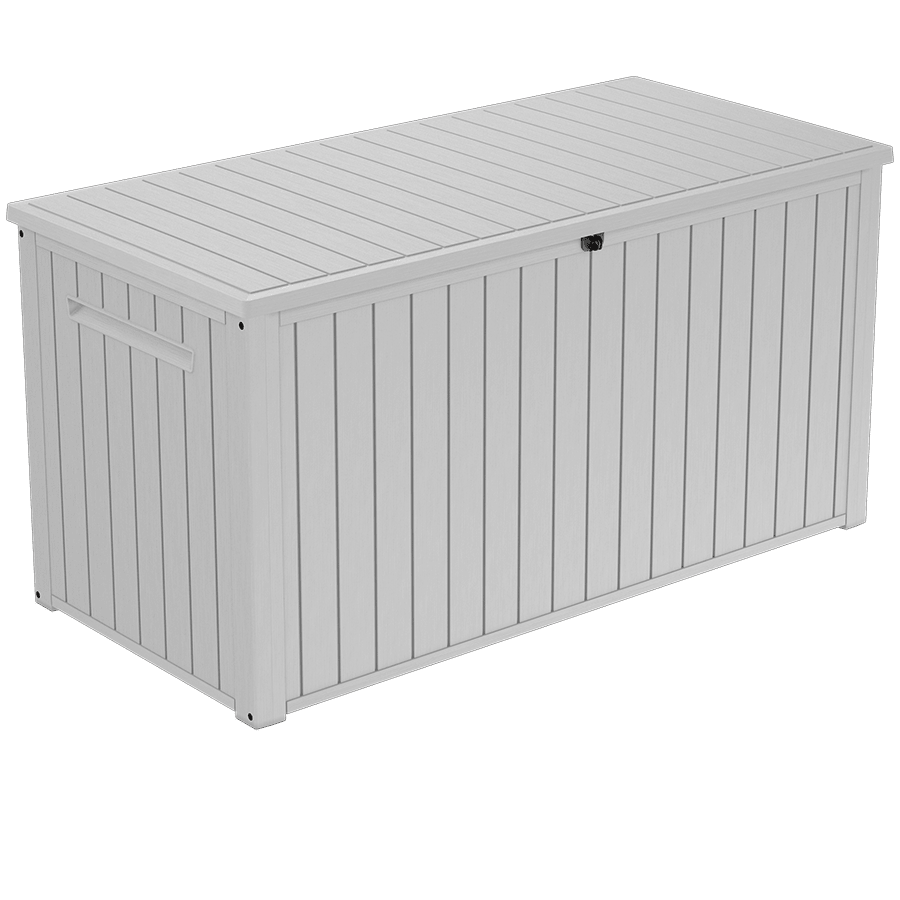
The Keter 170G Storage Box 643L is a large-capacity resin box suited to bulky items: outdoor cushions, pool gear, and large garden tools. Its weather resistant resin construction handles humidity and UV without any maintenance beyond an occasional rinse.
The Keter Glenwood 390L Storage Box sits in the mid-size range and fits comfortably in many under deck gaps. It suits shoes, tools, and everyday garden supplies, and its graphite finish looks tidy against most deck timbers.
For a wood-look finish with resin durability, the Keter Signature 570L Storage Box brings an ashwood aesthetic to a fully weather resistant box. It is a good fit where the under deck space is visible from the garden and you want the storage to look like part of the landscape rather than an afterthought. See the full Keter Signature range for styling notes.
Pro Tip: Raise any resin box off the ground on pavers or a timber bearer, even if the box base is already elevated. Direct ground contact in a damp under deck space can trap moisture under the base and encourage mould growth on the underside.
How to keep your under deck storage organised and in good shape
Good organisation under a deck starts with one principle: group items by how often you use them. Daily-use gear sits at the front, near the access point. Seasonal items go to the back or the highest shelf. That single habit prevents the common problem of everything ending up in a pile at the front while the back of the space becomes a forgotten graveyard for broken tools.
Organisation tips that actually help:
- Label every box and bin, including the lid, so you can read labels from above when the box is on a low shelf
- Store heavy items (fertiliser, paint) on the lowest shelf or directly on the ground to keep the centre of gravity low
- Use sealed, lidded containers for any chemicals or liquids to prevent spills spreading to other stored items
- Transparent bins for small items (fixings, garden ties, cable) let you see contents without opening every box
- Hang long-handled tools on stainless hooks fixed to a plywood panel rather than laying them flat, where they take up far more floor space
Seasonal maintenance schedule:
- Every three months: check ventilation gaps are clear of leaves and debris; inspect for pest activity (spider webs, ant trails, rodent droppings)
- Every six months: check drawer slides for corrosion or binding; wipe down resin boxes; inspect timber framing for soft spots or discolouration
- Annually: reseal any exposed timber surfaces; check all fixings for rust; clear drainage channels and confirm ground still slopes away from the house; inspect the underside of deck boards for moisture damage
Supplies worth keeping on hand: silicone sealant (for gaps around panels), moisture-absorbing sachets (inside sealed boxes in very humid climates), stainless self-tapping screws (for quick repairs), and a can of exterior timber sealer.
Pest control deserves specific attention in Australian under deck spaces. Spiders, ants, and rodents are drawn to sheltered, undisturbed storage areas. Raised bases on all boxes and shelving units remove the ground-contact hiding spots that pests prefer. Seal any gaps in fascia panels larger than 6mm — that is the threshold below which most common Australian rodents cannot squeeze through. Avoid storing food, pet food, or organic compost under the deck.
Structural checks, safety, and when to call a professional
Simple screening and freestanding resin boxes rarely need council approval. The moment you start framing walls, cutting into joists, or adding electrical or plumbing to the under deck space, you are likely crossing into work that requires a building permit and, in most states, a licensed tradesperson.
Structural checks before you start:
- Inspect every joist for rot, cracking, or movement. Probe suspect timber with a screwdriver: if it sinks in easily, the joist needs replacement before you add any load
- Check that existing posts and bearers are plumb and undamaged
- Confirm the deck was built to carry the load you plan to add; a deck designed for foot traffic may not be rated for heavy storage on its underside framing
- Verify that any drainage or services running through the space will remain accessible after your storage is in place
Never cut or notch a joist to gain clearance. Joists are structural members; notching them reduces their load capacity and can cause deck failure. If clearance is the problem, choose a lower-profile storage solution.
Before enclosing any under deck space or making structural modifications, consult a qualified carpenter and contact your local council to confirm whether a building permit is required. Requirements vary by state and by the size of the enclosure — what is exempt development in one council area may need approval in another.
When to hire a professional: framing a walk-in enclosure, any electrical work inside the space, replacing damaged joists, or if you are unsure about the deck’s structural condition. A qualified carpenter can assess joist integrity and advise on load distribution in an hour, which is far cheaper than repairing a deck that has been compromised by uninformed modifications.
Safety storage rules: never store combustible chemicals (petrol, solvents, aerosols) in a closed, poorly ventilated under deck enclosure. Keep a clear path to any electrical switchboards or water meters that sit in or near the space. And always keep access clear for council or insurance inspections.
Why resin and easy access are the right call for Australian homes
Most under deck storage advice focuses on what fits in the space. The more useful question is what survives the space over five or ten years.
Australian under deck environments are genuinely harsh. Coastal homes deal with salt-laden air that corrodes bare steel and degrades untreated timber within a couple of seasons. Inland homes face UV intensity that bleaches and cracks cheaper plastics. Subtropical and tropical climates add persistent humidity that turns an unventilated timber cabinet into a mould incubator. Resin storage, built from moisture-resistant, UV-stable recycled material, sidesteps most of those problems without demanding anything from you in return.
The access argument is equally practical. A beautifully built under deck enclosure that requires you to move three boxes to reach the fourth is a storage system you will stop using within a year. Designing for access first, whether that means pull-out drawers, a well-placed hinged panel, or simply leaving a clear path to the back of the space, is what separates storage that gets used from storage that becomes clutter.
Ketergroup’s focus on durable, recyclable resin products reflects exactly this logic: materials that perform in Australian conditions without the maintenance overhead, in designs that make access straightforward. That combination suits the Australian outdoor lifestyle better than a timber cabinet that looks great on day one and needs attention every summer.
Weather resistant resin storage from Ketergroup, ready for under deck life
Resin storage boxes from Ketergroup are built for exactly the conditions found under an Australian deck: humidity, UV, and the occasional splash from a downpipe. They need no painting, no sealing, and no annual maintenance beyond a wipe-down, which makes them a genuinely practical choice for homeowners who want storage that works without adding to the weekend to-do list.
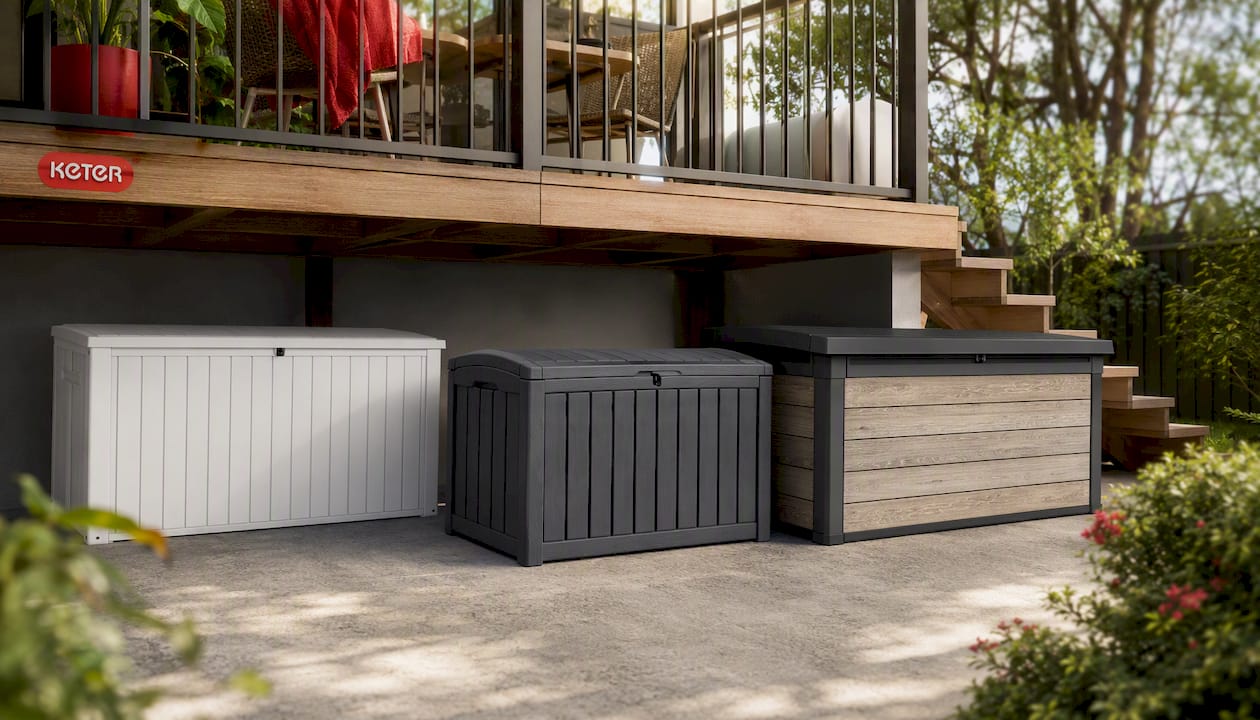
The Keter 170G Storage Box 643L handles large, bulky items like outdoor cushions and pool gear. The Keter Glenwood 390L fits neatly into mid-sized under deck gaps and suits everyday garden supplies. For a wood-look finish that blends with timber decking, the Keter Signature 570L delivers resin durability in an ashwood aesthetic. Before purchasing, measure your clearance and confirm the box dimensions fit your access point. Browse the full range at Ketergroup and find the right fit for your deck.
Sources
- How to Build DIY Under Deck Storage That Meets Australian Building Codes – Gardening Hub
- Resin deck boxes vs. wooden storage deck boxes - Keter US
- Outdoor storage solutions: decluttering your deck and patio – Bowies Constructions
- Under‑Deck Storage in Sydney: Smart ideas for a tidy outdoor area – 5 Star Decking
FAQ
What are the best storage options for under a deck?
Freestanding weather resistant resin boxes are the easiest starting point, requiring no building work. For decks with 400mm or more of clearance, built-in pull-out drawers offer the most convenient everyday access.
What can you do with the space underneath a deck?
You can use it for tool storage, outdoor cushions, pool gear, bikes, or seasonal items, depending on clearance. Spaces over 2000mm high can accommodate a walk-in enclosure or a freestanding shed.
How do you turn under deck space into storage?
Measure clearance first, then choose between freestanding resin boxes (no build required), pull-out drawers (400mm+ clearance), or hinged access panels. Sort drainage before enclosing the space to prevent damp.
What is the best thing to put under a deck to prevent moisture problems?
Grade the ground to slope away from the house, place any storage boxes on raised bases or pavers, and fit ventilation gaps in any screening panels. Resin boxes resist moisture without any additional treatment.
Do I need a permit to build storage under my deck?
Simple screening and freestanding boxes rarely need approval, but framing a walk-in enclosure or making structural changes usually does. Check your local council’s exempt development rules before starting any enclosed build.


