
Narrow side yard storage: the fit-first guide for Aussie homes

A slimline or side-entry storage unit with sliding doors, vertical shelving and a weather resistant resin or steel finish is the most practical solution for most narrow side yards. The key is measuring before you buy, not after.
Most side yards run between 0.9 m and 1.5 m wide, which rules out standard garden sheds immediately. What works in that range:
- Resin storage boxes like the Keter City Box 113L for very tight spots under 1.0 m wide, or the Store It Out Prime Shed 880L for compact but higher-volume needs
- Slimline resin sheds like the Keter Manor 4x6 Garden Shed (1.3 x 1.9 m) for yards with at least 1.5 m clearance
- Vertical storage accessories (hooks, overhead racks, pegboards) to make the most of height when floor width is limited
Key takeaways
A sliding-door slimline resin unit, measured to fit the narrowest point of your passage, is the most practical narrow side yard storage solution for most Australian homes.
| Point | Details |
|---|---|
| Measure at multiple points | Take width readings at three or more spots; the narrowest point determines the maximum shed width. |
| Choose sliding doors | Sliding doors need zero swing clearance, making them the right choice for passages under 1.5 m. |
| Prefer resin for tight delivery | Resin panels are light enough to carry through a standard gate without a pallet truck. |
| Check council thresholds | Most sheds under 10 m² and 2.4 m tall are exempt from approval, but confirm with your own council. |
| Ketergroup for narrow yards | The Keter Manor 4x6 and Store It Out Prime 880L are purpose-suited to side yard footprints and tight access. |
This article is general information, not a substitute for advice from a qualified lawyer. Consult a qualified legal professional about your own circumstances before acting on anything here.
Table of Contents
- What narrow side yard storage options actually suit tight spaces?
- How to measure your side yard before buying any storage
- Which materials and features work best in a narrow side yard?
- Foundations, anchoring and assembly in tight spaces
- Preventing moisture, pests and premature wear
- Do you need council approval for a side yard shed?
- How to lay out a narrow shed so it actually works
- Why Ketergroup resin storage suits narrow side yards
- What the right storage unit actually changes
- Ready to find the right Ketergroup storage for your side yard?
- Sources
- FAQ
What narrow side yard storage options actually suit tight spaces?
Slimline sheds commonly sit between 0.75–1.5 m wide, and the best option for your yard depends on how much passage width you have and what you need to store.
Ultra-slimline lockers (0.75–1.0 m wide) Best for passages under 1.0 m. These are typically tall, narrow cabinets suited to tools, cleaning equipment and small bins. Resin models are the practical choice here because they are lightweight enough to manoeuvre through tight gates.
Slimline side-entry sheds (1.0–1.5 m wide) Best for bikes, bins and garden gear. A practical minimum footprint is around 0.9 m x 2.5 m; a comfortable access footprint is 1.2 m x 3.6 m. Sliding doors are strongly recommended at this width because they eliminate swing clearance entirely.
Off-the-wall or lean-to units Best for side accessways 0.9–1.5 m wide where you want to preserve walkway space. These mount against the house wall or fence and use a skillion roof with a small drainage fall (3–5 degrees) away from the dwelling. Check fire separation clearances from masonry before installing.
Freestanding resin storage boxes Best for very tight spots or as supplementary storage beside a shed. The Store It Out Prime Shed 880L and Keter City Box 113L both sit comfortably in passages under 1.2 m and need no base preparation.
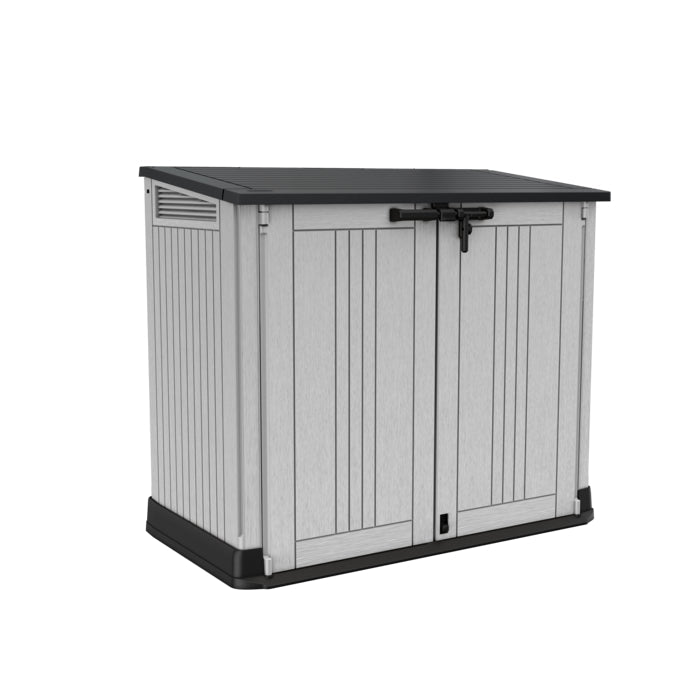
Tall vertical resin cabinets Best for tools, sports gear and chemicals that need to stay off the ground. These maximise height rather than footprint, which is exactly what a narrow yard rewards.
For small yard landscaping ideas that pair storage with planting and paving, a lean-to or slimline unit along the fence line keeps the passage functional and tidy.
How to measure your side yard before buying any storage
Getting the measurement right is the difference between a shed that fits and one that blocks the path or won’t clear the gate on delivery day.
Measurements to take:
- Minimum passage width at three or more points along the full length (walls bow, pipes protrude, and the narrowest point is the one that matters)
- Usable length from the gate or entry point to the end wall or fence
- Overhead clearance under eaves, gutters or any overhang along the full run
- Ground level variation — a slope of even 50 mm across a 2.5 m run needs a levelled base
- Obstructions — downpipes, tap outlets, window sills, steps and meter boxes all reduce usable width
Door clearance by type:
- Hinged doors — allow 450–600 mm additional clearance in front of the door for full swing
- Bi-fold doors — allow 250–350 mm; better than hinged but still require some swing space
- Sliding doors — allow zero additional clearance; the door travels parallel to the shed wall, making them the best choice for tight passages
Delivery and assembly checks:
- Measure your side gate opening width (many standard gates are 900 mm; a 1.2 m shed panel won’t pass through)
- Check whether the path surface can support a pallet or trolley
- Confirm whether panels can be carried through the house if the gate is too narrow
Pro Tip: Add 150–300 mm to your minimum width measurement as a maintenance buffer. You need to be able to reach the back wall to clean gutters, check fixings and repaint if needed. If you plan to store a mower or bike, measure those items with handlebars extended and wheels on.
For a full breakdown of garden shed sizes in Australia, Ketergroup’s sizing guide covers footprint options across their full range.
Which materials and features work best in a narrow side yard?
Resin is the most practical material for most narrow side yard installs. It is lightweight (decisive when delivery access is tight), UV resistant, and needs no painting or sealing. Steel offers higher structural strength and suits a concrete slab base well, but it can corrode in coastal or humid conditions without a quality coating. Timber looks good but demands regular sealing, staining and pest treatment — a real commitment in a shaded, poorly ventilated alley.
| Material | Weight | Maintenance | Corrosion resistance | Best for |
|---|---|---|---|---|
| Resin | Light | Very low | Excellent | Tight delivery, coastal, low-upkeep yards |
| Steel/Colorbond | Heavy | Low–medium | Good (with coating) | Slab bases, workshop use, higher load |
| Timber | Medium | High | Poor without treatment | Aesthetic priority, well-ventilated sites |
Feature checklist for narrow installs:
- Door type — sliding preferred; confirm track direction clears the path
- Locks — multi-point locking or a padlock-ready hasp; visibility from the street is low in a side yard, so a good lock matters
- Ventilation — louvred vents or a gap at the ridge prevent condensation build-up in enclosed alleys
- Drainage — a raised base or moulded floor channels water away from stored items
- Coastal fixings — stainless steel or hot-dipped galvanised anchors if you are within 1 km of the coast
- Roof type — flat or skillion roofs clear low eaves better than gable peaks; confirm the ridge height clears your overhead clearance measurement
For guidance on choosing the right shed for your backyard, Ketergroup’s buying guide covers these feature trade-offs in detail.
Foundations, anchoring and assembly in tight spaces
The base you choose affects both the shed’s longevity and how easy it is to install in a narrow access.
Base options for narrow sites:
- Concrete slab — the most stable option for steel sheds and heavier resin units; requires formwork and curing time, and a concrete truck or pump may not reach a tight side yard
- Paving stone pads — practical for resin sheds; individual pavers can be carried through a standard gate and levelled by hand; allow a 50 mm overhang on each side
- Treated timber bearers — quick to install, good for uneven ground; use H4 or H5 treated pine and keep bearers off direct soil contact
- Raised moulded base (factory-supplied) — many Keter resin units include an integrated floor that lifts contents off the ground; no additional base needed for lighter storage boxes
Anchoring tips:
Resin units in exposed or elevated positions need anchor straps or ground anchors rated to your local wind classification. Check the product’s wind rating against your site’s classification (available from your local council or a building certifier). Steel sheds on a slab use chemical anchors or bolt-down brackets. Never rely on the shed’s own weight alone in a narrow alley where wind can funnel and accelerate.
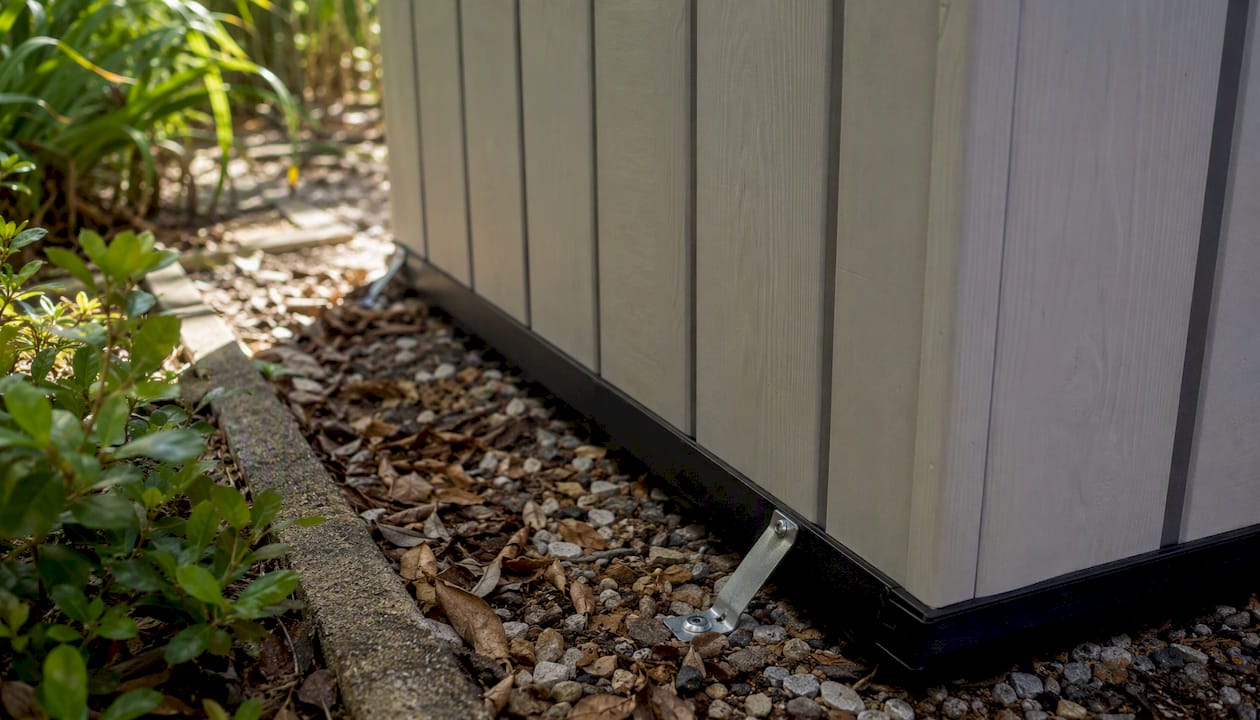
Assembly logistics:
Plan the delivery before you order. Confirm the gate width, path surface and whether panels can be staged in the yard before assembly begins. A step-by-step Keter shed assembly guide covers the sequence for resin kit builds, which typically need two people and a clear 2 m staging area.
Pro Tip: If you are pouring a concrete slab, have it cut or formed 50 mm smaller than the shed footprint on each side. This prevents water pooling at the base edge and makes it easier to anchor the shed frame directly to the slab perimeter.
Preventing moisture, pests and premature wear
Narrow side yards trap humidity. A shed pressed between a house wall and a fence gets less sun, less airflow and more condensation than one sitting in an open backyard. That combination shortens the life of stored items and the shed itself if you don’t manage it.
Ventilation and condensation basics:
- Position the shed so at least one vent faces the prevailing breeze
- Choose a unit with louvred ridge vents or high-wall louvres; avoid fully sealed designs in shaded alleys
- A raised base (even 50–75 mm) allows air to circulate under the floor and prevents moisture wicking from concrete or soil
- Leave a 50–100 mm gap between the shed wall and the house or fence wall where possible
Seasonal maintenance checklist:
- Every three months — clear debris from the roof and gutters; check that drainage channels are unblocked
- Every six months — inspect fixings and anchor points for corrosion; check door seals and tracks for wear
- Annually — clean the interior with a mild detergent; check the base for any movement or settlement; inspect vents for blockages or pest entry
Pest and moisture control:
- Fit screened vents to block spiders, wasps and rodents
- Use silicone sealant around any penetrations (downpipes, conduit) where pests can enter
- Keep stored items on shelves or pallets, not directly on the floor
- For backyard privacy and screening ideas that also reduce wind funnelling into a side yard, a planted screen or lattice panel on the open end can cut condensation-causing draughts noticeably.
Do you need council approval for a side yard shed?
Most small sheds in a side yard fall below the thresholds that trigger building or planning approval, but the rules vary by council and state. Getting this wrong can mean a removal order, so check before you install.
Common approval thresholds (check your own council):
Brisbane City Council generally does not require building approval for a shed no more than 10 m² in plan area, no more than 2.4 m in height (mean height ≤2.1 m) and no longer than 5 m on any side, subject to conditions.
City of Melville typically does not require planning approval for a freestanding, non-habitable outbuilding where the aggregate area of all outbuildings is ≤60 m² or ≤10% of the site area, with wall height ≤2.4 m and ridge height ≤4.2 m.
City of Joondalup) generally exempts small outbuildings ≤10 m² from development approval if setback and height requirements are met; boundary walls closer than 600 mm may be permitted in some cases.
| Threshold | Brisbane (QLD) | City of Melville (WA) | City of Joondalup (WA) |
|---|---|---|---|
| Max plan area (exempt) | 10 m² | 60 m² aggregate or 10% of site | 10 m² |
| Max wall height | 2.4 m (mean ≤2.1 m) | 2.4 m | Varies by site |
| Max ridge height | Not specified separately | 4.2 m | Varies by site |
| Setback from boundary | Conditions apply | ~1 m side/rear | 600 mm minimum in some cases |
Compliance checklist:
- Is the unit freestanding and non-habitable? ✓ proceed
- Is the plan area under 10 m²? ✓ likely exempt in most councils
- Is the wall height under 2.4 m? ✓ likely exempt
- Does it meet setback requirements from the boundary? ✓ confirm with your council
- Does it push the aggregate outbuilding area over the council limit? If yes, seek approval
Pro Tip: Contact your local council before you order, not after delivery. A quick phone call or online enquiry takes 10 minutes and can save you a removal order. If your shed sits close to any threshold, engage a private building certifier for a formal assessment.
How to lay out a narrow shed so it actually works
A narrow shed with no internal organisation plan quickly becomes a wall of clutter you have to unpack to reach anything. The layout matters as much as the size.
Suggested layouts by footprint:
- 0.9 m x 2.5 m (practical minimum) — one wall of shelving at 300 mm depth, hooks on the opposite wall for bikes or tools, bins at the door end. No room for a bench.
- 1.2 m x 3.6 m (comfortable access) — 400 mm shelving on one wall, a fold-down bench at the far end, bikes hung vertically on the door wall. A 600 mm aisle gives workable access.
- 1.8 m x 4.0 m (generous slimline) — 450 mm shelving on both walls at the rear half, a fixed bench on one side, overhead rack above the bench for seasonal items, bins and mower at the door end.
Vertical storage ideas:
- Pegboards at 1.5–1.8 m height for hand tools and small items
- Bike hooks at 1.8–2.0 m (front wheel up saves 400–500 mm of floor depth)
- Overhead racks above head height for seasonal or rarely used items
- Labelled stackable bins on lower shelves for garden chemicals, sports gear and cords
- Fold-down bench that stores flat against the wall when not in use
Ergonomics checklist:
- Store heavy items (bags of fertiliser, tool boxes) at waist height (800–900 mm) to avoid back strain
- Keep bins and frequently accessed items within 600 mm of the door
- Leave a minimum 500 mm aisle width for comfortable access
The Ketergroup blog on what fits in a Keter shed gives practical examples of how to zone a compact shed interior for bikes, BBQ gear and garden tools.
Why Ketergroup resin storage suits narrow side yards
Ketergroup builds its sheds and storage boxes from recycled and recyclable resin, which gives them a specific set of advantages that matter most in tight, hard-to-access spaces.
- Light enough to deliver through a standard gate — resin panels are a fraction of the weight of steel or timber equivalents, which is often the deciding factor when a pallet truck can’t reach the install site
- No painting, sealing or rust treatment required — the colour and UV resistance are built into the material, which matters in a shaded alley where touch-up painting is awkward
- Integrated floor and raised base options — many Keter units lift contents off the ground and channel water away without needing a separate base build
- Integrated locks and security-ready designs — multi-point locks or padlock-ready hasps are standard on shed models, addressing the visibility gap that comes with a side yard location
- DIY assembly with no specialist tools — Keter’s panel-and-clip system means two people can assemble most units in a few hours, even in a confined space
The Keter Manor 4x6 Garden Shed (1.3 x 1.9 m) is a strong starting point for side yards with 1.5 m or more of clearance. For wider yards that can support a larger footprint, the Keter Cortina 9x7 (2.8 x 2.2 m) and Keter Cortina 11x7 (3.4 x 2.2 m) offer significantly more internal volume while keeping the same resin build quality.
What the right storage unit actually changes
Most homeowners who tackle a side yard storage project are surprised by how much the garage changes once the side yard is doing its job. Bins move out. The mower finds a home. The bikes stop leaning against the car.
The shift usually starts with one good measurement session and a sliding-door unit that fits the passage without blocking it. A homeowner who measures carefully, picks a slimline resin shed with a sliding door, and adds a couple of vertical bike hooks typically reclaims two to three square metres of garage floor space. The side yard goes from a dumping ground to a functional storage zone, and the path stays clear.
The practical wins are straightforward: easier bin access on collection day, no more squeezing past a bike to reach the lawnmower, and a tidy side yard that doesn’t embarrass you when the neighbours walk past. None of that requires a renovation. It requires the right unit in the right spot, measured correctly before you order.
Ready to find the right Ketergroup storage for your side yard?
Ketergroup’s resin sheds and storage boxes are built for exactly this situation: a tight space, a practical need and no appetite for a high-maintenance solution. The range covers everything from compact outdoor storage boxes for passages under 1.0 m wide to full garden sheds for yards with room to move.
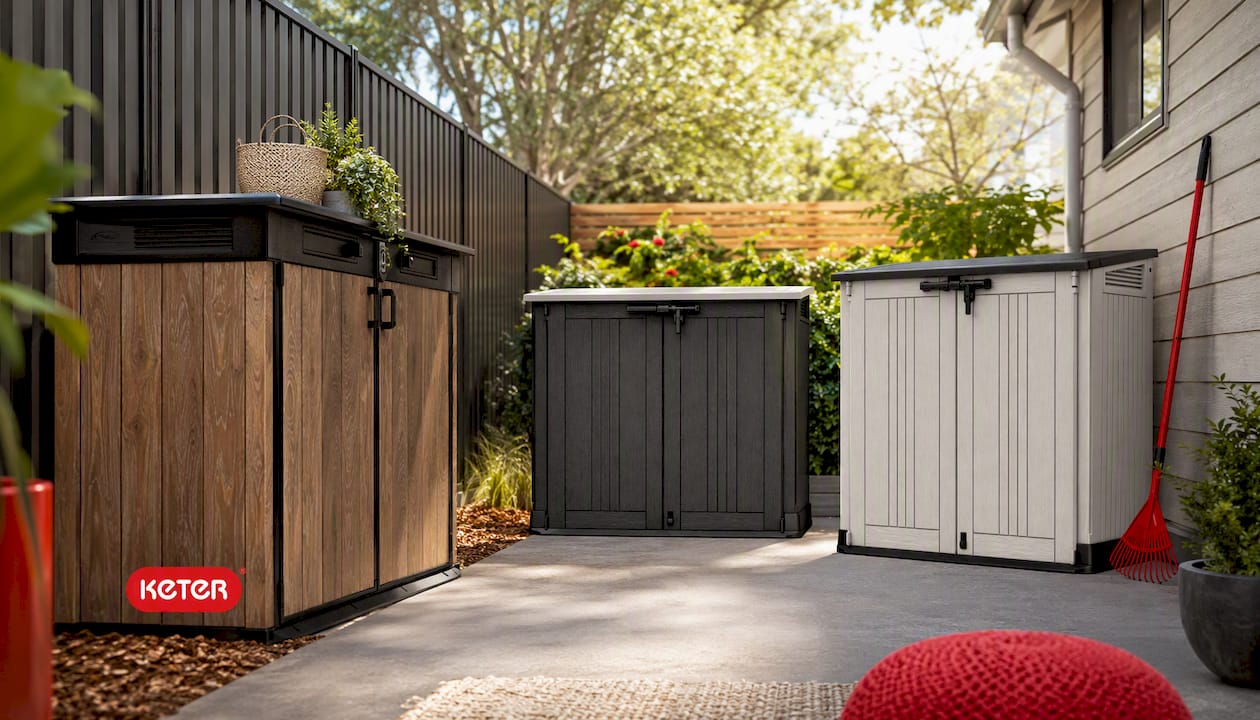
The Store It Out Prime Shed 880L is a practical first choice for tight spots, while the Keter Manor 4x6 Garden Shed suits yards with a bit more room. If you need serious capacity, the Keter Cortina 11x7 delivers a full-size shed footprint in a resin build that arrives flat-packed and assembles without a tradie.
Measure your passage width, check your council’s approval thresholds, confirm your base option, then browse the Ketergroup range and order the unit that fits. That’s the whole process.
Sources
- Sheds — Brisbane City Council
- Building a shed or outbuilding | City of Melville
- Side of house shed guide — SmallTrades
FAQ
What is the minimum width for a side yard shed?
Slimline sheds can be as narrow as 0.75 m wide, though a practical working minimum is around 0.9 m. Below 1.0 m, a resin storage box or tall locker is usually more practical than a full shed.
Do I need council approval for a small side yard shed?
Most sheds under 10 m² in plan area and under 2.4 m in height are exempt from building approval in many Australian councils, but thresholds vary by state and local government. Always confirm with your own council before installing.
Are sliding doors better than hinged doors for narrow passages?
Yes. Sliding doors travel parallel to the shed wall and need no swing clearance, which is critical in passages under 1.5 m wide. Hinged doors require 450–600 mm of clear space in front of them.
Can I install a Ketergroup shed without a concrete slab?
Yes. Many Keter resin units include an integrated floor and can sit on paving stone pads or treated timber bearers without a poured slab. Heavier steel sheds generally perform better on a concrete base.
How do I stop condensation building up in a side yard shed?
Choose a unit with louvred vents, raise the floor at least 50–75 mm off the ground, and leave a small gap between the shed wall and any adjacent fence or house wall. Clear debris from vents and gutters every three months to keep airflow consistent.
Recommended
- Summer Sorted: Outdoor Storage Box Ideas to Tame Backyard Clutter – Keter Australia
- How to Organise Your Backyard: Outdoor Furniture, Sheds & Storage Solu – Keter Australia
- Outdoor toy storage ideas for busy families – Keter Australia
- Transform Your Garden with Adirondack Chairs & Storage Tables – Keter Australia’s Outdoor Solutions


