
Tool-free furniture assembly: what it is and how it works

Tool-free furniture assembly means putting a piece together using only interlocking joints, snap-fit connectors or pre-installed fittings, with no screwdriver, hex key or hammer required. It suits renters, frequent movers and anyone who has ever lost the one Allen key that came with a flat-pack wardrobe. If you want furniture you can build in minutes, take apart cleanly, and move without a toolbox, this is the category to understand before you buy.
The rest of this guide covers how these joints actually work, where they outperform screwed hardware, where they fall short, and a practical checklist for spotting a well-engineered piece before you click “buy.”
- Best for: renters, apartment dwellers, frequent movers, anyone assembling solo
- Main trade-off: joint strength varies significantly by design and material
- What to check: panel thickness, joint type, spare-part availability
Key Takeaways
Tool-free furniture works best when engineered joints, not the absence of screws, are what the buyer actually evaluates before purchase.
| Point | Details |
|---|---|
| Joint type drives strength | Eccentric cam joints have tested up to 147–213% stronger than some plastic lamella joints. |
| Assembly is genuinely faster | Tool-less designs typically cut assembly from 60–90 minutes to under 15 minutes. |
| Not suited to every load | Heavy-duty cabinetry and long-span shelving still favour screwed or bolted joints. |
| Buyer checks matter most | Panel thickness, joint disclosure and spare-part support separate quality from hype. |
| Keter applies this at scale | Keter’s outdoor range integrates factory-fitted connectors and weather resistant resin for easy DIY assembly. |
Table of Contents
- How does tool-free furniture assembly actually work?
- What do you actually gain from tool-free furniture?
- Is tool-free furniture as strong as furniture with hardware?
- How do you choose tool-free furniture that will actually last?
- How does Keter build easy assembly into outdoor furniture?
- What does the typical assembly process look like?
- How do you maintain tool-free furniture for longevity?
- Why tool-free design deserves more credit than it gets
- Furnish your outdoor space without ever picking up a screwdriver
- Sources
- FAQ
How does tool-free furniture assembly actually work?
Every tool-free piece relies on one of four joint families, and the differences between them explain why some tool-free furniture lasts years while other pieces wobble within weeks.
- Interlocking tab-and-slot joints. Panels are cut with a tab on one edge and a matching slot on another, usually with CNC precision, so the two pieces lock together under light hand pressure.
- Snap-fit and click-in connectors. A moulded plastic or metal clip deforms slightly on insertion and springs back to hold panels in place, the same basic principle used in clip-together toy bricks.
- Pre-installed connector systems. Cams, dowels or brackets are fitted to the panel at the factory, so the buyer only needs to align and press, not fit hardware themselves.
- Friction-fit and gravity-assisted designs. Some pieces rely on weight and pressure alone, where the item’s own mass, or the load placed on it, presses joints tighter rather than pulling them apart.
Manufacturers describe these systems as reducing part counts and giving a cleaner finish with no visible screw heads, which is part of why tool-free pieces often look more polished than their screwed equivalents, according to industry technical explainers.
Manufacturing precision is the hidden variable. A tab-and-slot joint is only as good as the tolerance it was cut to. Groove milling and CNC cutting accuracy determine whether panels click together snugly or rattle loose after a few months, and comparative joint testing shows that even small tolerance errors in production noticeably weaken the finished joint. That is why two products that look identical on a listing page can behave very differently in your living room.
What do you actually gain from tool-free furniture?
The appeal isn’t just convenience. It changes how you live with your furniture, not just how you build it.
- Speed. Trade reporting on tool-less designs shows typical assembly times dropping from 60–90 minutes down to under 15 minutes compared with screwed flat-pack equivalents.
- Fewer mistakes. With no screws to strip or brackets to mismatch, there’s less chance of a wonky shelf or a stripped hole you can’t fix.
- Renter-friendly. You can disassemble a piece for a move, then reassemble it in the new place without needing to re-drill or replace worn screw threads.
- Cleaner look. No visible hardware means a tidier finish, and fewer loose screws rattling around in a junk drawer.
- Less packaging waste. Fewer components generally means simpler packaging, and manufacturers point to this as a genuine sustainability upside of the category.
Pro Tip: If you move house often, look specifically for pieces described as “reassemblable” rather than just “tool-free” — some snap-fit joints are designed for one-time assembly and weaken noticeably on the second or third build.
Is tool-free furniture as strong as furniture with hardware?
Not always, and this is the trade-off worth understanding before you commit to a piece meant to carry real weight.
A 2025 peer-reviewed comparison of ready-to-assemble joints found some eccentric cam joints achieved bending moment capacity significantly higher than certain plastic lamella-style joints tested against them. Joint design, not just the absence of screws, is what determines whether a piece holds up.
That range, drawn from mechanical testing of RTA and eccentric joints, matters because it shows “tool-free” is not one uniform standard of strength. A snap-fit bookshelf bracket and a metal eccentric cam joint are both tool-free, but they behave very differently under load.
Tool-free joints tend to perform best on light-to-moderate loads: side tables, storage boxes, garden furniture, small shelving. They’re a poorer fit for fixed kitchen cabinetry, long-span shelving carrying heavy books, or anything exposed to constant flexing. Repeated heavy use, direct sun and moisture cycling can also loosen plastic snap-fits over time, which is why outdoor pieces need weather resistant materials specifically engineered for that exposure, not just a tool-free joint borrowed from indoor furniture. For genuinely heavy-duty or permanent installations, screwed, bolted or glued assemblies still win on raw strength.
How do you choose tool-free furniture that will actually last?
Run through this checklist before buying, whether you’re standing in a store or scrolling a product page.
- Check panel material and thickness. Thicker, denser panels distribute load better and resist joint fatigue over time.
- Ask what joint type is used. A retailer or listing should name the system (snap-fit, cam-lock, interlocking tab), and whether damaged joints can be replaced rather than binning the whole piece.
- Confirm the assembly-time claim with real instructions. Clear, illustrated steps are a good sign; vague “assembles in minutes!” copy with no visuals is a warning sign.
- Check load guidance. Does the listing state a weight limit? If not, assume it’s designed for light use only.
- Check spare-part and returns support. Buyer guidance on tool-free furniture consistently flags spare-part availability as the clearest sign of a manufacturer standing behind its joint design.
- Match the piece to its actual use. A tool-free outdoor storage box for light garden gear has very different demands to a tool-free bed frame.
| Point | Details |
|---|---|
| Material thickness | Thicker panels resist joint fatigue better than thin, budget stock. |
| Joint type disclosure | A retailer naming the exact connector system is a good transparency signal. |
| Spare-part access | Genuine easy-assembly brands stock replacement parts for worn joints. |
How does Keter build easy assembly into outdoor furniture?
Keter designs its outdoor storage boxes, sheds and furniture around recyclable resin panels with fittings integrated at the factory, so most of what you’re doing on assembly day is aligning pieces and locking them into place, not hunting for the right screw.
- Panels and connectors are moulded from durable, weather resistant resin built to handle sun and rain without the joint fatigue that plagues cheaper plastics.
- Keter provides step-by-step assembly guides and support so you’re not guessing your way through a build.
- Customers consistently name ease of assembly as a standout benefit of buying Keter over more hardware-heavy alternatives.
Pro Tip: Keep the original packaging and any spare fittings from a Keter storage box or shed for the first few months. It’s the easiest way to have a backup on hand if a joint ever needs a top-up.
For anyone furnishing a small courtyard, a compact patio setup with tool-free lounge furniture and a storage box nearby is a genuinely low-fuss way to get outdoor living sorted in an afternoon.
What does the typical assembly process look like?
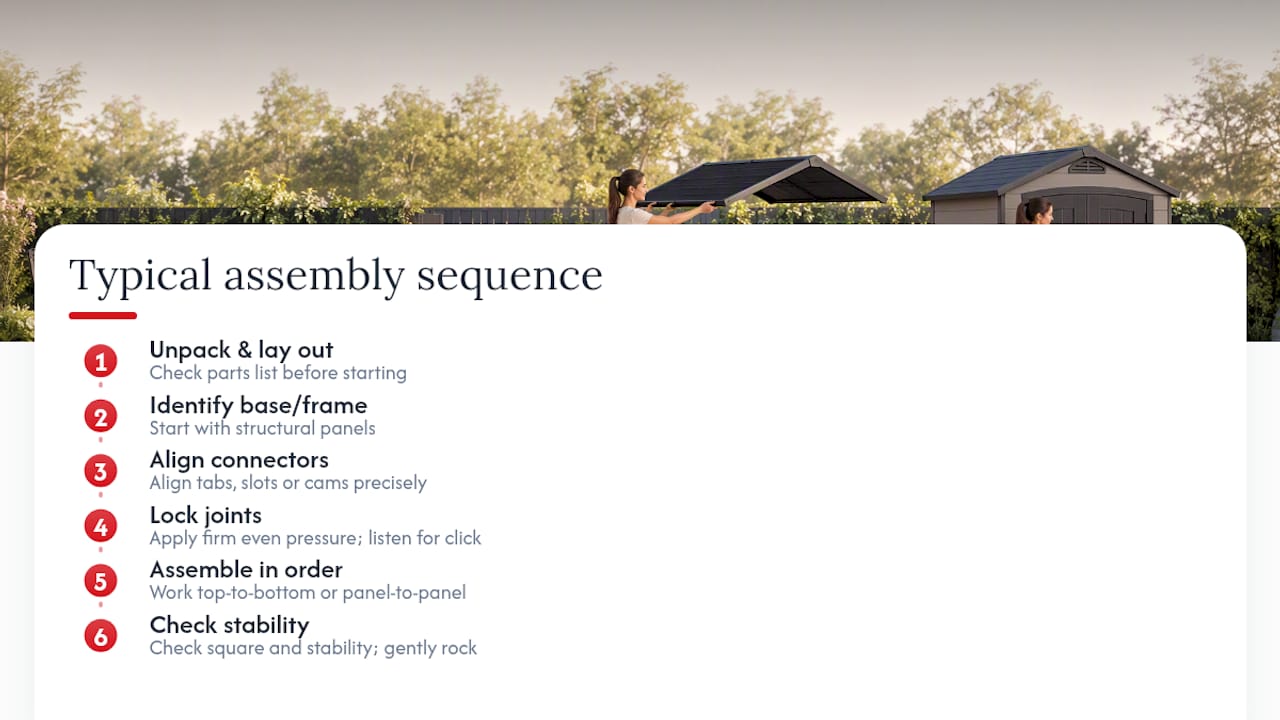
Most tool-free pieces follow a similar sequence, whether it’s a storage box, a garden shed or an outdoor lounge set.
First, unpack and lay everything out. Check panels against the parts list before you start, since spotting a missing piece now is far easier than halfway through.
Second, identify the base or frame panels. These usually form the structural starting point, and most instructions build outward from here.
**Third, align tabs, slots or cam connectors
the diagram.** This is the step where precision matters most. Rushing an interlocking joint before it’s fully seated is the most common cause of a wobbly finish.
Fourth, apply firm, even hand pressure to lock each joint. Snap-fit and cam systems usually give an audible or tactile click when they’re properly seated. If a joint doesn’t click, it isn’t done.
Fifth, work top to bottom or panel to panel in the order shown, rather than jumping around, since many tool-free designs rely on earlier joints holding the frame steady for later ones.
Finally, check for square and stability before loading the piece. Gently rock a shelf or box before you fill it with weight. A properly seated joint won’t flex or creak under light pressure.
Done properly, this whole sequence rarely takes more than fifteen to twenty minutes for a small to mid-sized piece, matching the faster end of industry assembly-time reporting.
How do you maintain tool-free furniture for longevity?
Tool-free joints need a different kind of care than screwed furniture, mostly because there’s no bolt to simply retighten.
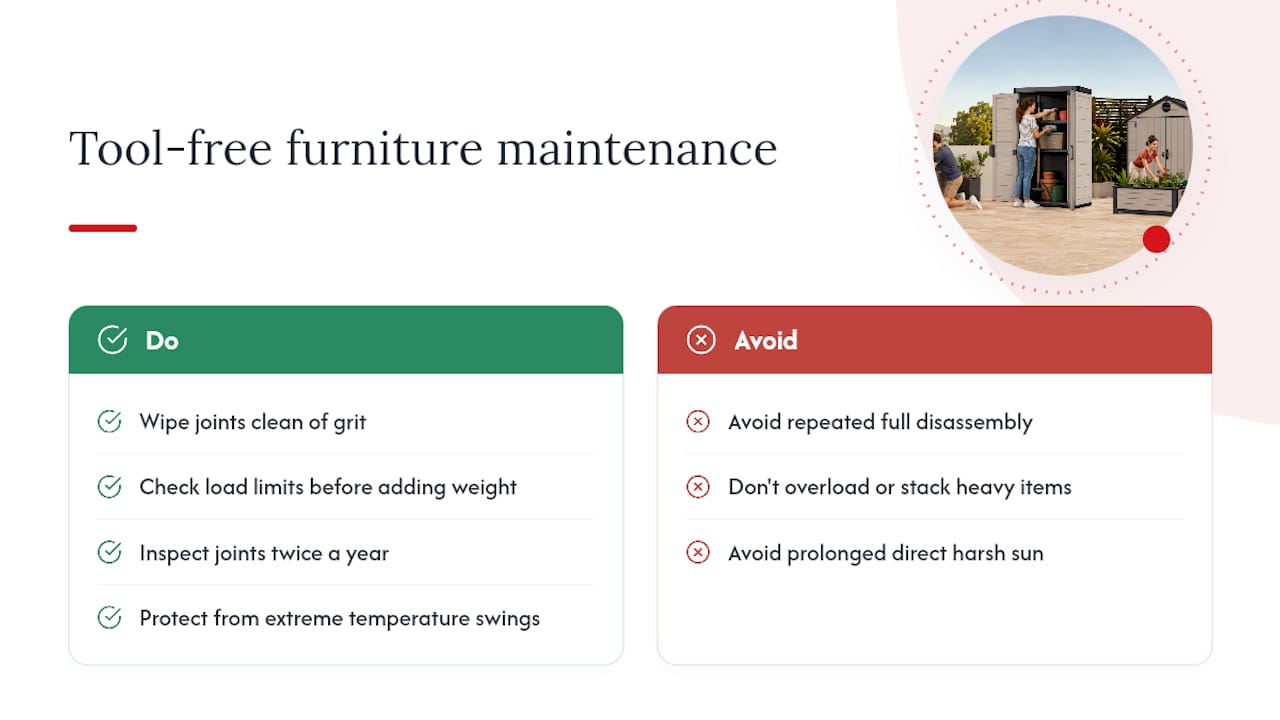
Avoid repeated full disassembly where possible. Every rebuild puts slight stress on tabs and clips, so if a piece is staying put for the season, leave it assembled rather than breaking it down and rebuilding it for no reason.
Keep joints clean and free of grit. Sand and dirt working into a snap-fit or cam joint can wear the seating surface over time, particularly on outdoor storage boxes and sheds. A quick wipe-down before storing garden gear helps joints seat properly each time.
Check load limits before adding weight. Overloading a friction-fit or gravity-assisted joint is the fastest way to shorten its lifespan, so distribute heavier items across shelves or boxes rather than stacking everything in one spot.
Protect from extreme temperature swings where you can. Resin and plastic connectors handle weather resistant duty well, but joints that spend years in direct, harsh sun exposure will still show wear sooner than shaded pieces.
Inspect joints twice a year. A quick check for any looseness lets you catch a worn clip early, before it fails under load. If a spare part is available, swapping one component is far cheaper than replacing the whole piece.
Why tool-free design deserves more credit than it gets
The conventional wisdom treats “tool-free” as a synonym for flimsy, and that’s lazy thinking. The research tells a more interesting story: joint engineering, not the presence or absence of a screwdriver, is what actually determines durability. A well-designed cam joint can outperform a poorly designed screwed bracket, and the reverse is just as true.
What gets underrated is manufacturing precision. Most buyers focus on the marketing phrase “no tools needed” and skip past the far more important question of how tightly the panels were cut and how the connector was engineered. That’s the detail separating a piece that still feels solid in three years from one that’s wobbling in three months.
My advice: prioritise the manufacturer’s transparency about joint type and materials over how fast the box promises assembly will be. Speed is nice. Repeatable strength is what you’re actually paying for. If a brand is willing to explain its connector system and stock spare parts, that’s worth more than any “5 minute assembly” sticker on the box.
— Liza
Furnish your outdoor space without ever picking up a screwdriver
If the checklist above has you looking for furniture that actually delivers on its tool-free promise, Ketergroup’s outdoor range is built around exactly that standard. Every piece uses recyclable resin panels with connectors fitted at the factory, so you’re aligning and locking, not hunting for hardware in a plastic bag.

The Keter Mia Outdoor Lounge Set is a straightforward example of this in action: a full lounge setting that goes from box to backyard in one sitting, with weather resistant materials built for years of outdoor use rather than one summer. If you’re setting up a bigger space, the Keter Oakland Garden Shed applies the same easy-assembly principles at a larger scale, with clear instructions and support if you ever need a spare part. For furniture inspiration beyond Keter’s own range, sets like the outdoor sofa collections at Couch & Dumbells show how varied the broader outdoor furniture category can look.
Browse the current range on Ketergroup and pick a piece that matches how you actually plan to use your outdoor space.
Sources
- Comparative study of ready-to-assemble and eccentric joints — Materials (MDPI)
- How tool-free assembly is changing furniture manufacturing — OVVO
- Tool-less & fast-assembly furniture trend — HSA Heritage
FAQ
What is the best tool for furniture assembly?
For genuinely tool-free furniture, the “tool” is simply your hands. Well-designed snap-fit and cam-lock joints are built to seat with firm hand pressure alone, no screwdriver or hex key required.
What is the best app for putting together furniture?
There’s no single dominant app for this. Most reputable tool-free furniture brands, including Keter, provide printed or downloadable step-by-step assembly guides that are clearer and more reliable than relying on a generic third-party app.
Does IKEA give tools to assemble?
IKEA typically includes a basic hex key with most flat-pack items, since its furniture generally relies on screwed hardware rather than tool-free connector systems. That makes it a different category to genuinely tool-free furniture.
What tools do I need to assemble furniture without tools?
None, by definition. Genuine tool-free furniture uses interlocking tabs, snap-fit clips or pre-installed cam connectors that lock together with hand pressure, though having a rubber mallet nearby can help gently seat a stubborn joint.


