
How to hide wheelie bins without losing easy access

The easiest ways to hide wheelie bins fall into four camps: a ready-made bin hideaway, a DIY slatted timber store, a screen or trellis softened with planting, or a quick cover and wheeled planter combo for renters. Whichever you choose, two rules override everything else: the collection crew needs a clear pull-out route, and the enclosure needs airflow so bins don’t cook in summer. A Keter Hideaway unit satisfies both briefs straight out of the box.
- Ready-made resin hideaway (fastest, no tools)
- DIY slatted timber store (best custom fit)
- Screen, trellis or hedge with planting (softest look)
- Wheeled planters or fabric covers (renter-friendly, temporary)
Key Takeaways
Hiding wheelie bins successfully comes down to getting access and ventilation right before you worry about looks.
| Point | Details |
|---|---|
| Access is non-negotiable | Keep the pull-out route to the kerb clear so collection crews can do their job without obstruction. |
| Ventilation prevents odour | Leave 15 to 20mm slat gaps and a 40mm base gap to stop heat and smell building up inside the store. |
| Measure lids open, not just closed | Build clearance around the bin’s full open-lid height, not its closed footprint. |
| Base matters for longevity | Sit any structure on pavers or compacted gravel rather than bare soil to avoid sinking and rot. |
| Buy ready-made for a fast fix | Keter Hideaway units offer a weather resistant, low-maintenance option that meets clearance and airflow needs out of the box. |
Table of Contents
- Which wheelie bin storage ideas actually work?
- How do you build a DIY slatted timber bin store?
- What are the quickest low-effort screening ideas?
- What clearances and airflow gaps do bins actually need?
- Why weather resistant resin storage suits most Australian yards
- What are the rules on wheelie bin placement and enclosures?
- How does weather affect bin enclosures through the year?
- Why the “one perfect enclosure” advice misses the point
- Ready to skip the build? Keter Hideaway units do the job
- Sources
- FAQ
Which wheelie bin storage ideas actually work?
Not every option suits every yard, so match the approach to your space, your lease terms and how handy you are with a drill.
- Ready-made flat-pack bin stores. These suit renters, busy households or anyone who wants a tidy result this weekend rather than next month. Assembly is straightforward, and most units arrive with the ventilation and clearance already engineered in.
- DIY slatted timber store. If you want the enclosure to match your fence palings or deck boards exactly, building your own gives you that control. It takes a Saturday and some basic tools, but the payoff is a structure that looks built-in rather than bolted on.
- Freestanding screen or trellis with planting. For narrow front gardens where a full box would eat too much space, a simple screen angled across the sightline does the job. It’s the lowest-commitment option because you can move or remove it without much fuss.
- Storage bench or dual-purpose box. Some enclosures double as outdoor seating or extra storage for hoses and tools, which is handy if your side passage or courtyard is tight on square metreage.
- Living screen. A hedge, climbing star jasmine or a row of clumping bamboo in pots will hide bins completely once established, but you’re waiting months for coverage and committing to regular trimming.
- Temporary covers and wheeled planters. Cheap fabric covers or tall planters on castors let you screen bins between collections and roll them out of the way on bin day, which makes them popular with renters and anyone staging a property for sale.
Designers generally recommend matching the enclosure’s materials and lines to your existing fence or decking so it reads as part of the garden rather than an afterthought bolted against the wall.
How do you build a DIY slatted timber bin store?
A slatted timber store is the classic weekend project for good reason: it’s cheap, it breathes properly, and you can size it to your exact bins rather than a generic template. Measure your bins first, both with lids closed and with lids fully open, because it’s the open-lid height that trips people up.
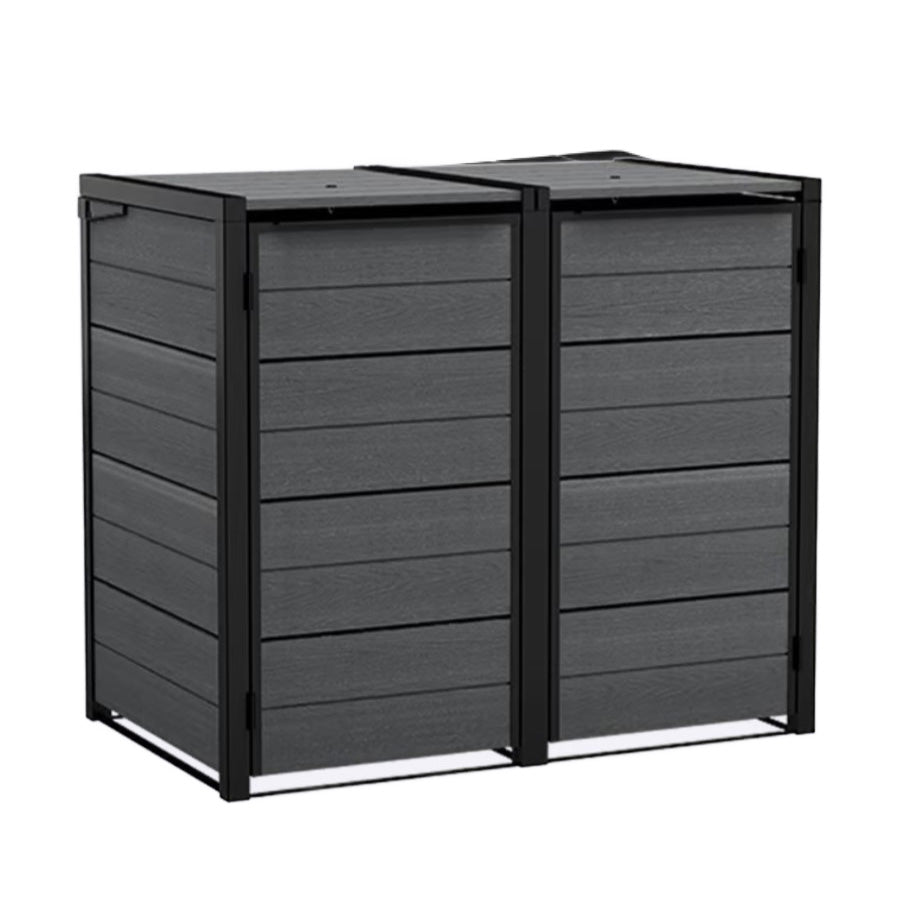
For a two-bin arrangement, aim for a finished footprint of roughly 1,400 to 1,500mm wide by 800mm deep. For three bins, Bunnings’ own DIY design lands at 2,210mm wide by 915mm deep by 1,260mm high, which is a solid template to scale from.
Tools and materials:
- H3 treated pine or another rot-resistant timber species
- Galvanised screws, brackets and hinges (avoid untreated steel, it’ll rust within a season)
- Gas struts or a simple lift-stay for the lid
- Exterior paint, decking oil or stain
- Pavers or compacted gravel for the base
Build sequence:
- Prepare a level base with pavers or compacted gravel.
- Build the box frame to your measured dimensions, squaring every corner.
- Fix the slats vertically or horizontally, leaving 15 to 20mm gaps between each one.
- Fit hinged doors or a lift-lid roof using gas struts so you’re not wrestling a heavy panel every bin day.
- Sand, paint or oil, and let it cure before use.
Check you’ve left 20mm clearance down each side and a 40mm gap at the base before you call it finished. Leave enough headroom for the lids to open fully, and never build a frame that boxes in the pull-out path.
Pro Tip: Treat all cut ends with sealant, not just the visible faces. That’s where rot starts first, and it’s the one step most first-time builders skip.
What are the quickest low-effort screening ideas?
If a full build isn’t on the cards, a few smaller moves get you most of the way there without a single power tool.
- Stand a trellis or slatted panel 300 to 400mm in front of your bins, not hard against them. That gap keeps the lids free to open fully.
- Line up tall wheeled planters along the front of the bins. Roll them aside on collection day, roll them back afterwards.
- Consider a lightweight green roof retrofit on an existing box: a waterproof membrane, a shallow substrate, and low sedum or succulents on top. Check your structure’s weight limit before loading it up, since a planted roof adds real load once it’s wet.
- Use a tarpaulin or fabric bin cover as a stopgap. It’s cheap and instant, but it traps heat and moisture against the plastic, so treat it as a short-term fix rather than a permanent answer.
Wheeled planters and folding trellis panels are particularly popular with renters, since nothing is fixed to the property and everything can travel with you at lease’s end.
What clearances and airflow gaps do bins actually need?
Get the numbers wrong and you’ll end up with a store that either won’t shut or cooks your bins by February. Measure your bin twice: once closed, once with the lid propped fully open, and build clearance around the larger figure.
- Leave 20mm clearance on each side of the bin body.
- Leave a 40mm gap at the base for drainage and airflow.
- Space slats 15 to 20mm apart rather than butting them tight.
- Sit the whole structure on pavers or compacted gravel, never bare soil.
- Keep the pull-out route to the kerb completely clear of gates, planters or trailing hoses.
A sealed box can run several degrees hotter than a slatted equivalent on a warm day, which is exactly the odour and pest problem good ventilation is designed to prevent. Bins left on bare soil typically sink 20 to 40mm during their first wet season, which is enough to jam a door or crack a timber base. Council collection crews also need unobstructed access to open lids and tip bins into the truck’s hopper, so an enclosure with a narrow or gated entry can genuinely slow your street’s collection round.
Why weather resistant resin storage suits most Australian yards
Timber looks lovely for about three years, then the annual sanding and resealing catches up with most households. Weather resistant resin skips that maintenance cycle entirely, which is exactly the gap Keter’s Hideaway range is built to fill.
- Weather resistant construction that shrugs off UV, rain and coastal air without repainting.
- Made from recyclable materials, so it fits a lower-maintenance approach to outdoor storage.
- Straightforward assembly, which suits renters and anyone without a shed full of power tools.
Resin hideaways make the most sense when you want a tidy result fast, when DIY isn’t your thing, or when you’re renting and want something you can take with you. Before ordering, measure your bins with lids open as you would for a timber build, then check that figure against the product’s listed internal dimensions.
| Point | Details |
|---|---|
| Two-bin footprint | Suits standard households running general waste and recycling side by side. |
| Three-bin footprint | Fits households also running a dedicated green waste or glass bin. |
| Assembly | Flat-pack resin units are designed for straightforward home assembly without specialist tools. |
What are the rules on wheelie bin placement and enclosures?
Every council sets its own rules on where bins can sit on your property and how enclosed a storage structure can be, so check your local council’s waste services page before you build anything permanent. Most councils care about three things: bins must be visible and accessible from the street or laneway on collection day, the enclosure can’t obstruct footpaths or driveways, and the structure usually needs to sit within your own boundary rather than on a nature strip or verge outside collection hours.
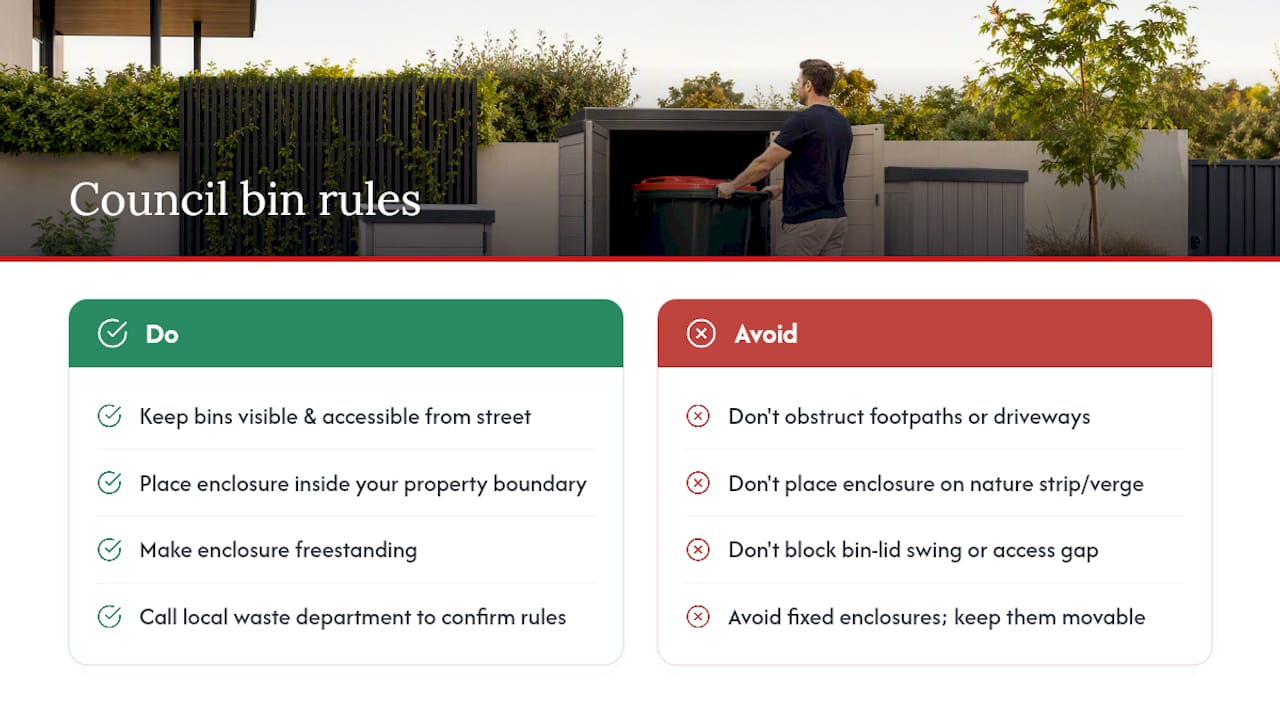
Some councils also set limits on structure height or require a setback from the street frontage, particularly in heritage overlay areas or on corner blocks where sightlines for traffic matter. If you’re in a strata or body corporate arrangement, check the by-laws too. Many apartment complexes and townhouse developments have their own rules about where bins can be stored and whether communal enclosures are compulsory.
The safest approach is to keep any enclosure freestanding rather than fixed, so it’s easy to reposition if a rule changes or an inspector asks you to shift it. Collection crews also need enough clearance to swing lids fully open and manoeuvre bins without lifting them over obstacles, so even a compliant structure can cause friction if the access gap is too tight. When in doubt, a quick call to your local council’s waste department will settle the exact requirements for your street, and it’s a five-minute call that saves you rebuilding a structure that doesn’t pass muster.
How does weather affect bin enclosures through the year?
Australian weather puts different enclosures through very different stress tests depending on the season, and the material you choose should reflect the climate you’re actually building for.
Summer is the toughest test for ventilation. Heat trapped in a sealed or poorly slatted box accelerates bacterial growth in food waste, which means more odour and more flies. This is exactly why the 15 to 20mm slat gap matters more in January than it does in June. Resin and treated timber both handle UV exposure reasonably well, but untreated softwood will grey and crack within a couple of summers without a fresh coat of oil.
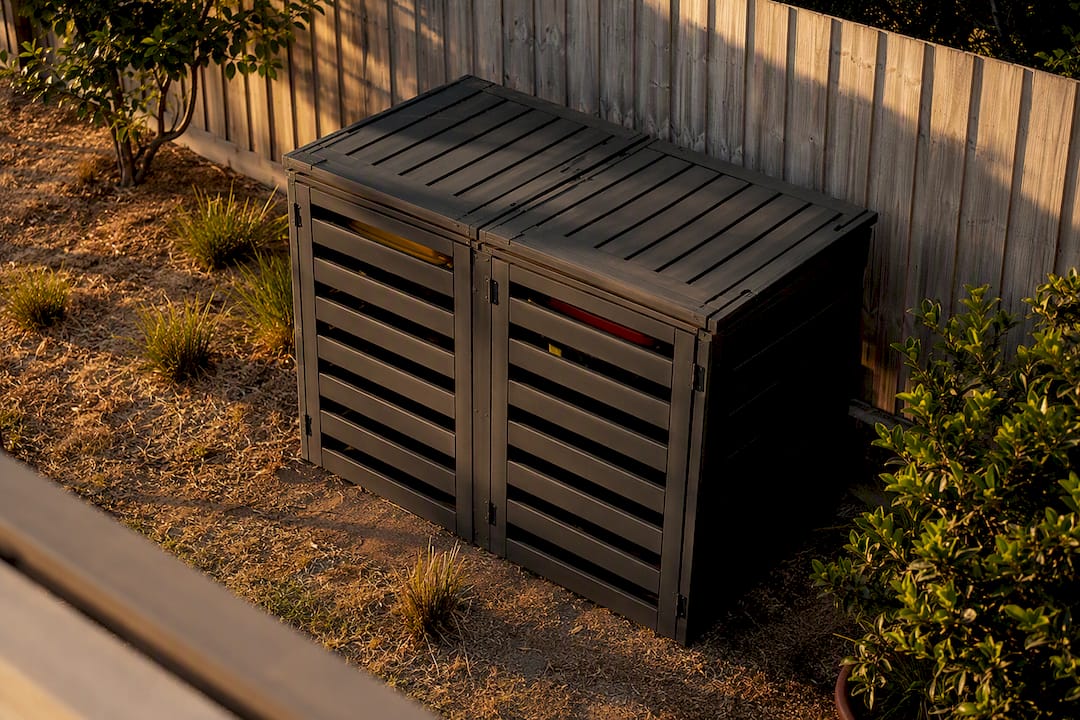
Wet season and coastal humidity are where timber struggles most. Moisture wicking up from a bare-soil base is the main cause of rot, which is why the paver or compacted gravel base isn’t just a nice-to-do, it’s the difference between a store lasting five years or fifteen. Resin and other weather resistant materials sidestep this problem almost entirely, since there’s no grain for water to penetrate.
Storm season adds wind loading to the equation, particularly for taller screens or freestanding trellis panels. Anchor any lightweight structure properly, and if you’ve added a planted green roof, remember the added weight of wet substrate during heavy rain when checking your structure can handle the load.
Why the “one perfect enclosure” advice misses the point
Most guides push you toward a single “best” solution, usually the most elaborate build in the article. That’s the wrong frame. The right enclosure depends entirely on whether you own or rent, how long you’re staying, and how much of your weekend you’re willing to trade for a tidier front yard.
What’s consistently underrated is ventilation. Readers obsess over how well a structure hides bins visually and treat airflow as an afterthought, when it’s actually the difference between a fresh-smelling store and a summer problem. I’d also push back on the idea that DIY always beats buying. A well-engineered resin hideaway with the clearances already sorted can outperform a rushed weekend build that skipped the base gap or under-measured the lid height.
Prioritise access and airflow first, aesthetics second. Get those two right and almost any style, timber, resin or a planted screen, will do its job for years.
— Liza
Ready to skip the build? Keter Hideaway units do the job
If the DIY plan above sounds like more weekend than you’ve got spare, Ketergroup’s Hideaway range gets you the same result without the timber, the tools or the trip to the hardware store.
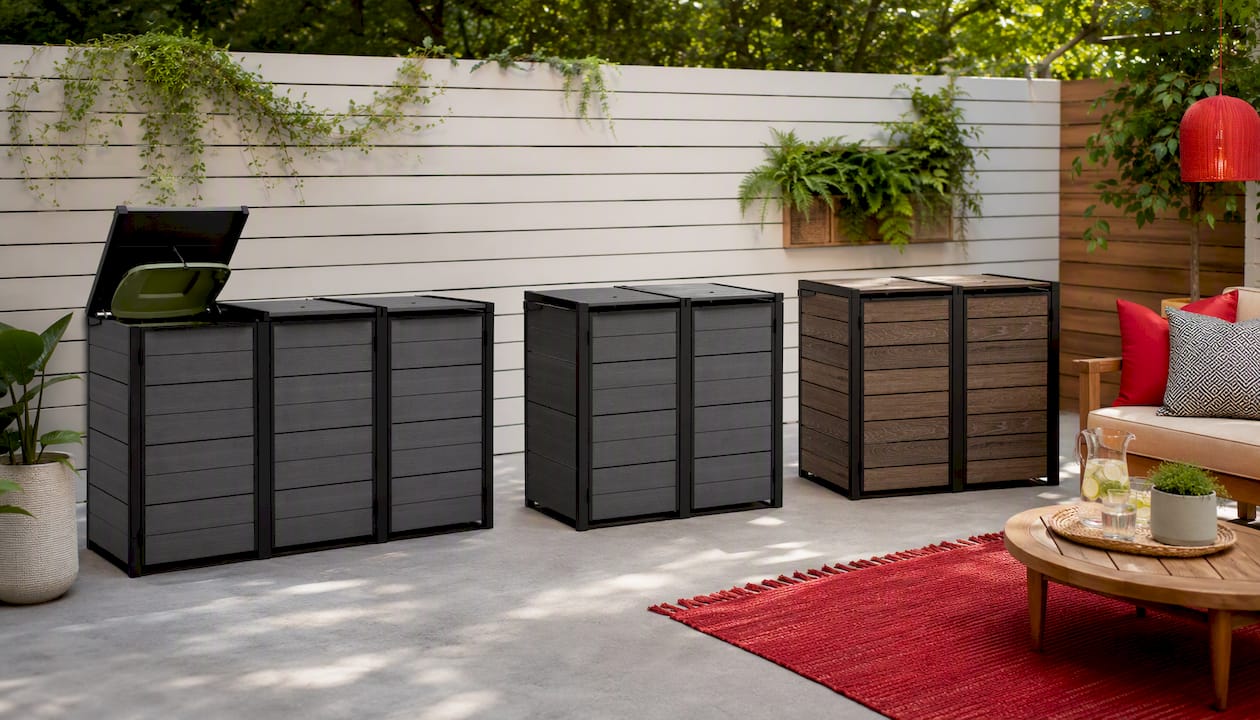
The Keter Hideaway 2 Bin in Walnut Look suits households wanting a warmer, timber-style finish without any of the upkeep timber demands. Prefer a more neutral palette that blends into paved courtyards or rendered facades? The Keter Hideaway 2 Bin in Grey does that job. Running three waste streams, general, recycling and green waste? The Keter Hideaway 3 Bin in Grey has the footprint to match.
Measure your bins with lids open before you order, and check that figure against each product’s listed clearances. For more on keeping any outdoor storage in good shape through the seasons, Ketergroup’s guide to protecting outdoor bin storage from Australian weather is worth a read. Head to the product pages above to check current availability and place a pre-order where noted.
Sources
- Clever ways to hide wheelie bins | Garden UK
- Wheelie bin storage: how to disguise your garbage bins – BHG Australia
FAQ
What is the most effective way to hide wheelie bins?
A ventilated slatted timber store or a purpose-built resin hideaway both work well, provided you keep 15 to 20mm airflow gaps and a clear path for collection crews. The “best” option depends on whether you’d rather build it yourself or buy it ready-made.
How can I hide wheelie bins in my front garden?
In a narrow front garden, a freestanding trellis or slatted screen set 300 to 400mm in front of the bins usually works better than a full enclosure, since it needs less space and still lets lids open freely.
How do I hide outdoor rubbish bins without blocking collection?
Whatever enclosure you choose, keep the pull-out path to the kerb completely clear and confirm the lid can open fully within the structure. A resin hideaway like the Keter range is designed with these clearances built in, which removes the guesswork.
Do wheelie bin enclosures need council approval?
Rules vary by council, so check your local waste services page before building anything permanent, particularly around setbacks from the street and any height limits in your area.
How much space should I leave around a wheelie bin store?
Aim for roughly 20mm clearance on each side and a 40mm gap at the base, measured against your bin with the lid fully open rather than closed.


