
Shed Shelving Layout for Australian Sheds: Measure, Test in 3 Minutes

The best shed shelving layout works with zones, not guesswork: daily-use gear sits between waist and shoulder height, heavy items stay low, and seasonal stuff goes up high where you only need to reach it twice a year. Keep aisles wide enough for comfortable movement, typically around 600 to 800 millimetres, widening where needed for larger equipment like mowers or trolleys, and vary shelf depth to suit what you store, ranging from shallow depths for small parts to deeper shelves for bins and power tools. The sections below walk through measuring, materials, dimensioned templates, and where a modular kit like Keter’s shelving range fits into the plan.
TL;DR:
- Shelving should be zoned by use, with daily items at mid-height, heavy gear low, and seasonal items high to maximize accessibility and safety.
- Measure internal shed dimensions carefully, accounting for structural elements and door swing, before selecting shelving types and wall fixings.
- Shelves deeper than 450 millimeters are usually unnecessary and can reduce aisle space, so match shelf depth to the size of stored items.
- Use load ratings specified by manufacturers and conduct gradual load tests, checking for sagging, movement, or loose fasteners, especially in coastal zones.
- Modular, adjustable shelving and pre-fit kits like Keter’s range offer flexible options, ideal for evolving shed layouts and avoiding costly reconfigurations.
Table of Contents
- Measure, map and zone your shed before you buy anything
- Which shelf types and fixings suit a shed?
- How deep should shelves be in a shed?
- Three layout templates you can adapt to your shed
- Build sequence, testing and maintenance checks
- Storing chemicals and dangerous goods safely
- Keeping your layout modular and adjustable
- Zone-first layouts, and a three-minute test that proves it
- Where Keter shelving fits your finished layout
- Sources
- FAQ
Measure, map and zone your shed before you buy anything
Grab a tape measure before you grab a shelf. The usable width inside your shed is almost always smaller than the external footprint once you account for wall liners, the door frame, and any hinge clearance, so measure the internal space directly rather than trusting the shed’s advertised dimensions.
Mark where the door swings and note the size of your largest item (mower, wheelbarrow, ride-on) before you fix anything to a wall. Locate the girts, studs, or portal frame members too, because wall-mounted shelving needs something solid to bite into. If you can’t find one, freestanding racking is the safer default.
- Measure internal width and depth, not the shed’s external size
- Mark door swing and the largest item’s footprint on the floor
- Locate structural members before choosing wall-mount fixings
- Zone by use: bench/work area, daily-use mid-height, heavy items low, seasonal items high
- Keep aisles comfortably wide for foot traffic, and allow extra clearance where larger items like mowers or trolleys will pass through
These clearances are common Australian guidance rather than fixed rules, so adjust them to your own gear.
Pro Tip: Chalk the door swing arc on the floor before you install a single shelf. It’s the fastest way to spot a layout mistake before it’s bolted to the wall.
Which shelf types and fixings suit a shed?
Three shelving styles cover most sheds: freestanding racking, wall-mounted shelving, and bespoke timber corner units. Freestanding racking is the most forgiving option because it doesn’t rely on wall structure, and it’s easy to reposition if your storage needs change. Wall-mounted shelving frees up floor space but only works when you can anchor into something solid. Bespoke timber units suit awkward corners but take longer to build and adjust.
- Freestanding steel or resin racking: flexible, no wall dependency, good for renters or changing layouts
- Wall-mounted shelving: saves floor space, needs anchoring into girts or portal frame, not just cladding
- Bespoke timber corner units: custom fit, slower to build, harder to reconfigure later
Material choice matters more in a shed than indoors. Galvanised or powder-coated steel resists corrosion, which counts for a lot in a tin shed that heats and sweats. Treated pine or marine plywood holds up better than untreated timber if you’re building your own frames. Whatever you choose, use correct-length self-drilling fasteners rated for the right corrosion class, especially near the coast. For heavy loads, tall racks, or anything in a cyclone-prone zone, get a tradesperson or engineer to check the anchoring before you load it up.
How deep should shelves be in a shed?
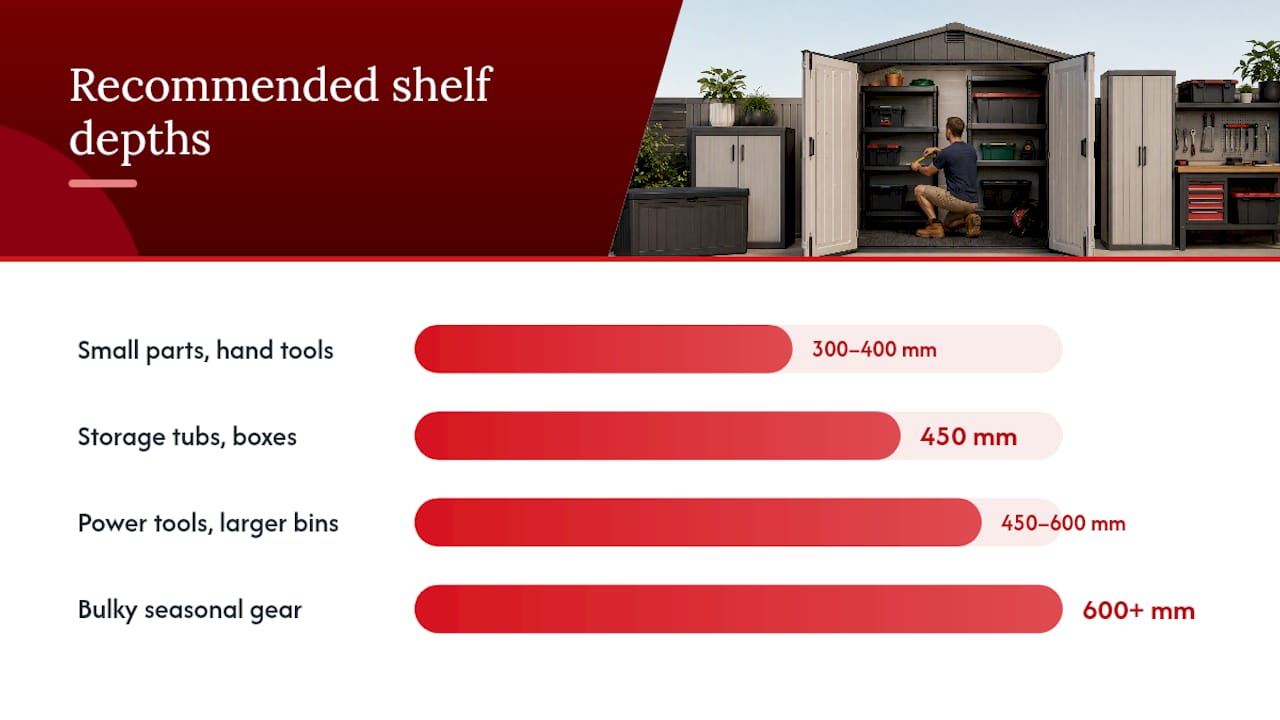
Shelf depth should match what’s sitting on it, not the other way around. A 600-millimetre-deep shelf for a box of screws just wastes floor space and pushes the aisle narrower than it needs to be.
| Item type | Recommended depth | Typical height zone |
|---|---|---|
| Small parts, hand tools | 300 to 400 mm | Waist to shoulder |
| Storage tubs, boxes | 450 mm | Eye level or below |
| Power tools, larger bins | 450 to 600 mm | Waist height |
| Bulky seasonal gear | 600 mm or more | High shelf, occasional access |
Bench height typically sits at a comfortable ergonomic level common for standing workbenches. Keep walkways wide enough for safe foot traffic, widening where larger equipment needs to pass through.
Load ratings fall into three rough bands: load ratings fall into light, medium, and heavy duty categories with increasing load capacities per shelf; always confirm exact manufacturer ratings. Always confirm the manufacturer’s uniform distributed load figure rather than assuming, and avoid stacking all the weight into one corner. Point loads bend shelves that were rated for evenly spread weight, and that’s how sagging starts long before a shelf actually fails.
Three layout templates you can adapt to your shed
Every shed footprint is a little different, but three templates cover most cases.
- Small shed (single wall focus): Run one long wall of shelving at 300 to 400 millimetres depth for hand tools and small parts, add a pegboard above the bench for frequently grabbed items, and keep the centre floor completely clear. This suits sheds where you’re mostly storing garden tools and a mower, with maybe two or three shelf tiers.
- Medium shed (L-shaped bench): Build an L-shaped bench along two walls with overhead shelving at 450 to 600 millimetres depth above it, and dedicate one full wall to hanging tools. Keep the main aisle at 700 to 900 millimetres so you can move a wheelbarrow through without knocking gear off the bench.
- Workshop shed (perimeter layout): Run shelving around a U or L shape along the walls, leaving 900 to 1,200 millimetres of clear work space in the middle for machinery or a mower to turn. Put overhead racks above the bench for seasonal or rarely used gear that doesn’t need daily access.
A few adaptations shift these numbers. Sliding doors free up wall space a hinged door would otherwise need for its swing arc. Fold-down benches reclaim floor area when you’re not working. Mobile tool carts let you wheel frequently used gear closer to whatever job you’re doing, which matters more in a workshop than a simple storage shed.
- Sliding doors: recover wall space normally lost to door swing
- Fold-down benches: reclaim floor area between work sessions
- Mobile tool carts: bring tools to the job instead of walking back and forth
Real-world examples from common shed sizes, such as the 10x6 footprint, show how bench height, aisle clearance, and shelf depth combine in practice.
Build sequence, testing and maintenance checks
A shelving build goes smoother when you follow the same order every time, rather than mounting brackets as you think of them.
- Take inventory of everything you’re storing and measure your usable internal space
- Draw the door swing and mark your main aisle on the floor
- Mark shelf heights based on your zoning plan (daily items mid-height, heavy low, seasonal high)
- Locate structural members before drilling any wall fixings
- Assemble and anchor the shelving, checking each bracket as you go
- Load test progressively, starting light and adding weight in stages
- Label each zone so the system stays organised after the first busy weekend
This sequence follows general safety guidance for assembling and inspecting shelving systems. During your load test, watch for movement in the brackets, early signs of corrosion on fasteners, any visible sagging in the shelf itself, or fasteners that have worked loose. None of these should appear under normal use, and if they do, stop loading and recheck the anchor points.
- Check for movement, corrosion, sagging or loose fasteners during testing
- Re-anchor loose brackets before adding more weight
- Inspect shelving every six months, more often near the coast
Pro Tip: Load test with water containers instead of guessing weight by eye. A 10 litre jerry can weighs exactly 10 kilograms, which makes it a handy, repeatable test weight.
Storing chemicals and dangerous goods safely
Not everything belongs on an open shelf. Fuels, pesticides, solvents, and compressed gas cylinders need storage that meets specific safety requirements, and a standard timber or steel shelf usually isn’t it.
Keep these items in their original labelled containers, and separate incompatible substances rather than lining them up side by side. Australian workplace safety guidance calls for ventilation, spill containment, and lockable storage for certain products, and that applies just as much to a home shed as a small business site. Chemical-safety guidance from Victoria’s agriculture department also stresses that a shed shelf is not automatically a suitable chemical store, no matter how tidy it looks.
- Keep chemicals in original, labelled containers
- Separate incompatible substances, never store them touching each other
- Use spill trays or bunds where the product calls for containment
- Check the Safety Data Sheet before deciding where something goes
The practical rule is simple: follow the SDS and your state’s guidance, and don’t improvise a cabinet for anything highly toxic or stored in large quantity. Purpose-built lockable cabinets exist for exactly this reason.
Keeping your layout modular and adjustable
Sheds rarely stay static. You add a new mower, swap hobbies, or the kids’ bikes suddenly need somewhere to live, and a fixed layout means pulling everything apart to make room. Modular, adjustable shelving solves that by letting you shift shelf heights or add bays without rebuilding the whole system.
- Overhead racks free up wall space for seasonal items you rarely touch
- Mobile bays let you reposition storage as your shed’s use changes
- Fold-down benches reclaim floor space between projects
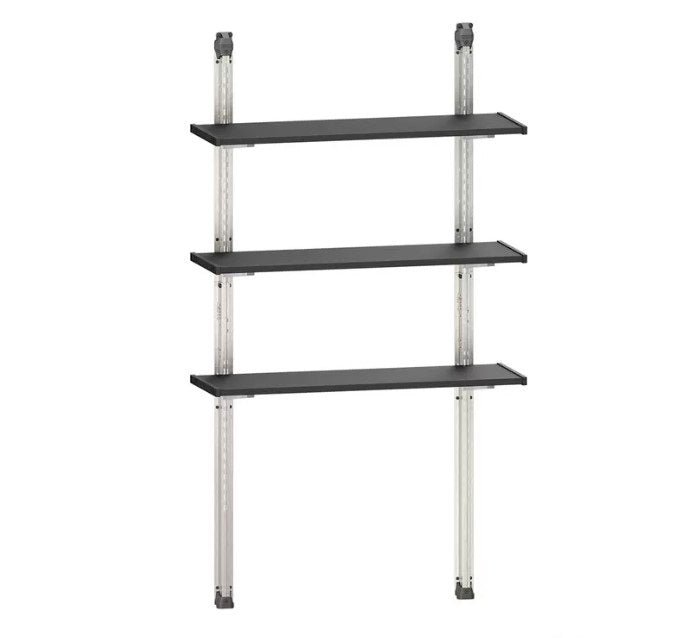
For readers planning around a plastic shed, adjustable tiered storage kits can provide storage solutions without needing to drill into cladding. Smaller tiered shelves suit small-item organisation such as hand tools, fasteners, and garden accessories where a shallow, compact footprint matters, while larger tiered shelves handle bulkier bins and medium-duty loads, making them a better fit where floor space is tighter but vertical storage is available.
Choosing between freestanding modular bays and anchored wall shelving comes down to two things: whether you’ve got solid structure to anchor into, and how heavy your load is. No usable girt or portal frame member nearby? Freestanding wins every time.
Zone-first layouts, and a three-minute test that proves it
Most shed layouts fail not because the shelving is wrong, but because nobody rehearsed using it. I’d rather see a slightly imperfect zone-first layout that’s actually been tested than a beautifully measured one that’s never had a mower wheeled through it.
Try this before you call the job done: open the door and remove the mower, carry a full tub the length of the main aisle, and reach a regularly used item on a high shelf without moving anything else first. If any of those three feel awkward, adjust before you bolt the last bracket down.
— Liza
Where Keter shelving fits your finished layout
Once you’ve mapped your zones and settled on depths, the next step is fitting the right hardware into that plan rather than working backwards from whatever’s on the shelf at the hardware store. Keter’s range gives you a ready-to-fit option built specifically around modular Australian sheds, so you’re not stuck fabricating brackets to suit awkward wall cavities.
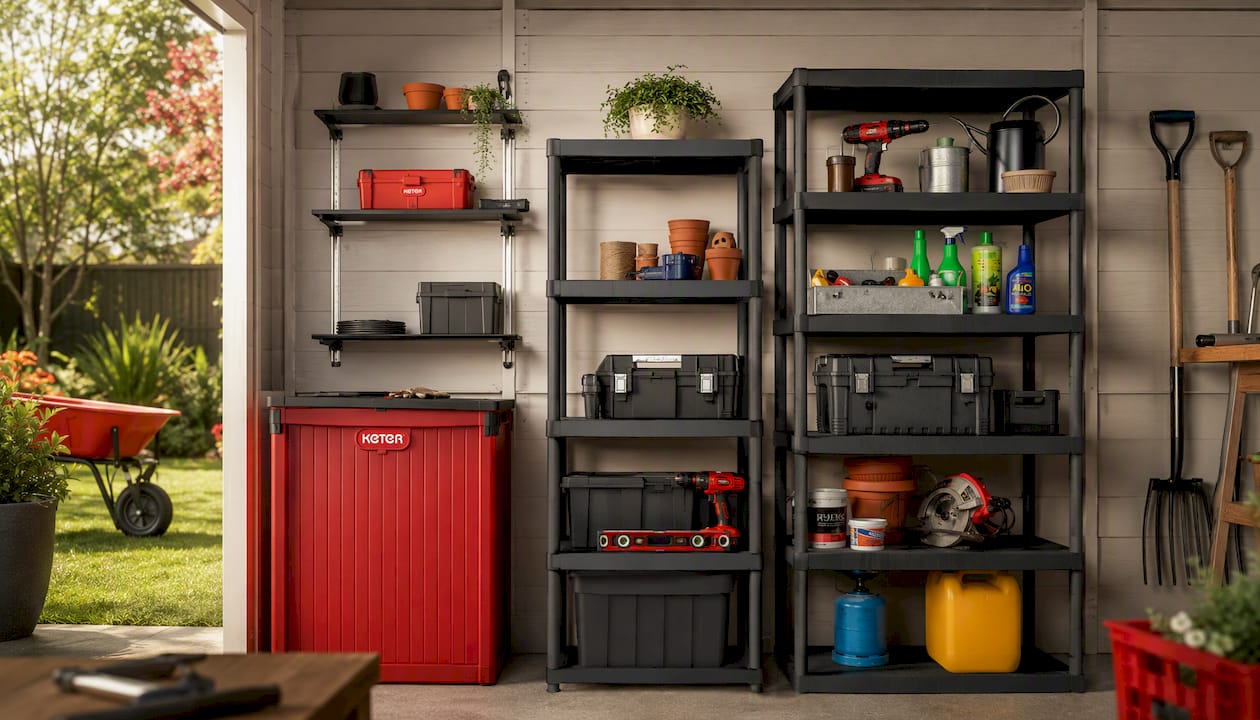
The Keter Storage Shed Shelf Kit is a straightforward pick if you’re setting up a plastic shed from scratch and want adjustable tiered storage without extra drilling. If your layout leans towards smaller items, the Keter Sigma 4 Tier Shelves 12’’ suit that compact, small-parts zone well, while the Keter Sigma 5 Tier Shelves 18’’ handle bulkier bins where you’ve got the vertical space to spare. Whichever you choose, measure your actual usable space and check the load rating against what you’re planning to store before you order. Browse the full outdoor storage range or check out weather-resistant options for the garden if your shelving plans extend beyond the shed itself.
Sources
- Storage Sheds DIY: Australian guide (SmallTrades)
- Managing chemical safety in your small business (WorkSafe Tasmania)
- Safety guidance (University of Melbourne)
FAQ
How do I build shelves for my shed?
Start by measuring your shed’s usable internal space, marking door swing and your largest item, then zone the layout by height: daily items mid-level, heavy items low, seasonal items high. Locate structural members before anchoring anything to a wall, and load test progressively before you trust the shelving with your full inventory.
What items should never be stored in a shed on ordinary shelving?
Fuels, pesticides, solvents, and compressed gas cylinders need proper containment rather than an open shelf, following the storage requirements in their Safety Data Sheets and state guidance. Keep them in original labelled containers, separated from incompatible substances, with spill containment where required.
How deep should shelves be in a shed?
Shelf depth should match what you’re storing: around 300 to 400 millimetres for small parts and hand tools, up to 450 millimetres for storage tubs, and 600 millimetres for larger power tools or bulky bins, based on common Australian shelving guidance. Going deeper than necessary just eats into your aisle space.
What are the best shelves for a storage shed?
The right choice depends on your wall structure and load needs. Freestanding racking works anywhere and suits changing layouts, while adjustable kits like the Keter Storage Shed Shelf Kit fit neatly into plastic sheds without needing to drill into cladding.


