
Shed security ideas for homeowners: practical fixes

The fastest way to reduce shed theft is to make forced entry physically difficult and detection immediate. Reinforce the door and frame first, fit a quality covered-shackle padlock on a through-bolted hasp, then add a motion-sensor light aimed at the approach path. Those three steps alone remove most of the opportunity that opportunistic thieves rely on.
Your highest-impact actions, ranked:
- Right now: Lock the shed every time you leave it, even for five minutes. Unlocked sheds are the most common target.
- Today: Move ladders, bins, and garden tools inside or into a locked space. Victoria Police explicitly lists these as items intruders use to access the main house.
- This weekend: Fit a motion-sensor light aimed at the gate or path leading to the shed, not just the shed face.
- This weekend: Replace any short screws on door hinges and hasp plates with 75mm+ security bolts.
- This week: Photograph serial numbers on all tools and engrave a unique code on high-value items.
- This month: Assess whether the door frame, panels, and lock together form a genuinely layered barrier. A layered security approach adds friction at every stage of a theft attempt, not just at the padlock.
Table of Contents
- 1. How to harden your shed door and frame against forced entry
- 2. Window options that stop thieves seeing inside your shed
- 3. Structural upgrades that make your shed harder to break into
- 4. Which locks and hasps work best for Australian sheds?
- 5. How to set up alarms and sensors for early detection
- 6. Motion-sensor lighting that deters intruders without annoying neighbours
- 7. Improve visibility and remove climbing aids around your shed
- 8. How to lock away valuables and anchor heavy items inside your shed
- 9. Budget guide: what to do first on any budget
- 10. How to choose the right security products and installers in Australia
- 11. Australian police and expert checklist you can follow right now
- 12. Padlocks vs electronic locks: choosing and fitting the right lock for your shed
- Key takeaways
- The practical case for staged security upgrades
- Thinking about replacing an insecure shed?
- Useful sources
- FAQ
1. How to harden your shed door and frame against forced entry
The door and frame are the most common failure points in a shed break-in, so reinforce them before spending money on cameras or alarms.
Step-by-step door hardening:
- Fit a framed door if your shed has an unframed panel door. A framed door resists racking and kick-in forces far better.
- Replace the hasp with a through-bolt hasp: drill through the door and frame, fit a backing plate on the inside, and secure with bolts and captive nuts rather than screws.
- Swap all short hinge screws for 75mm+ security-grade fasteners that bite into solid timber or metal framing, not just the surface sheet.
- Use non-removable hinge pins or one-way security screws on exposed hinges so the hinge cannot be knocked off from outside.
- For roller doors, fit anti-lift devices or an internal locking bar to prevent the door being lifted or laterally displaced. A simple padlock through the track bracket is a quick interim fix.
A framed door with a quality lock fitted correctly is more secure than multiple visible padlocks on an unframed door — the frame is what gives the lock something solid to resist against.
Pro Tip: Test your hinges and hasp by gripping the door edge and pulling firmly. If you feel movement or hear creaking at the frame, the fasteners are too short or the backing is too thin. Timber frames accept longer coach screws; sheet-metal frames need rivnuts or through-bolts with a steel backing plate inside.
2. Window options that stop thieves seeing inside your shed
If possible, remove windows from a shed used to store high-value tools. If that’s not practical, obscure the sightlines and make the glazing harder to breach. Victoria Police guidance notes that the easier a thief can spot valuable items through a window, the more likely the shed will be targeted.
Material and glazing options:
- Thick acrylic (Perspex): Harder to shatter than standard glass, lighter, and easier to cut to size for DIY replacement. A good first upgrade.
- Security window film: Applied to existing glass, it holds shards together on impact and slows forced entry. Available at most hardware stores.
- Security mesh: Bolt or screw a steel mesh panel to the interior frame. Stops hands reaching in even if glass breaks.
- Internal blinds or frosted film: The simplest fix for obscuring sightlines without replacing glazing.
Quick-fix checklist:
- Apply frosted or opaque window film to all shed windows.
- Fit a blind or shade cloth on the inside.
- Bolt security mesh to the interior frame with security fasteners.
- Rearrange storage so high-value items are not visible from any window angle.
- Where chemicals are stored, keep at least one ventilation point clear — don’t seal every gap if airflow is needed for safety.
3. Structural upgrades that make your shed harder to break into
Attacks on sheds often exploit weak fixings and thin panels rather than the lock itself. Strengthening the frame and fasteners is frequently more effective than upgrading the padlock alone.
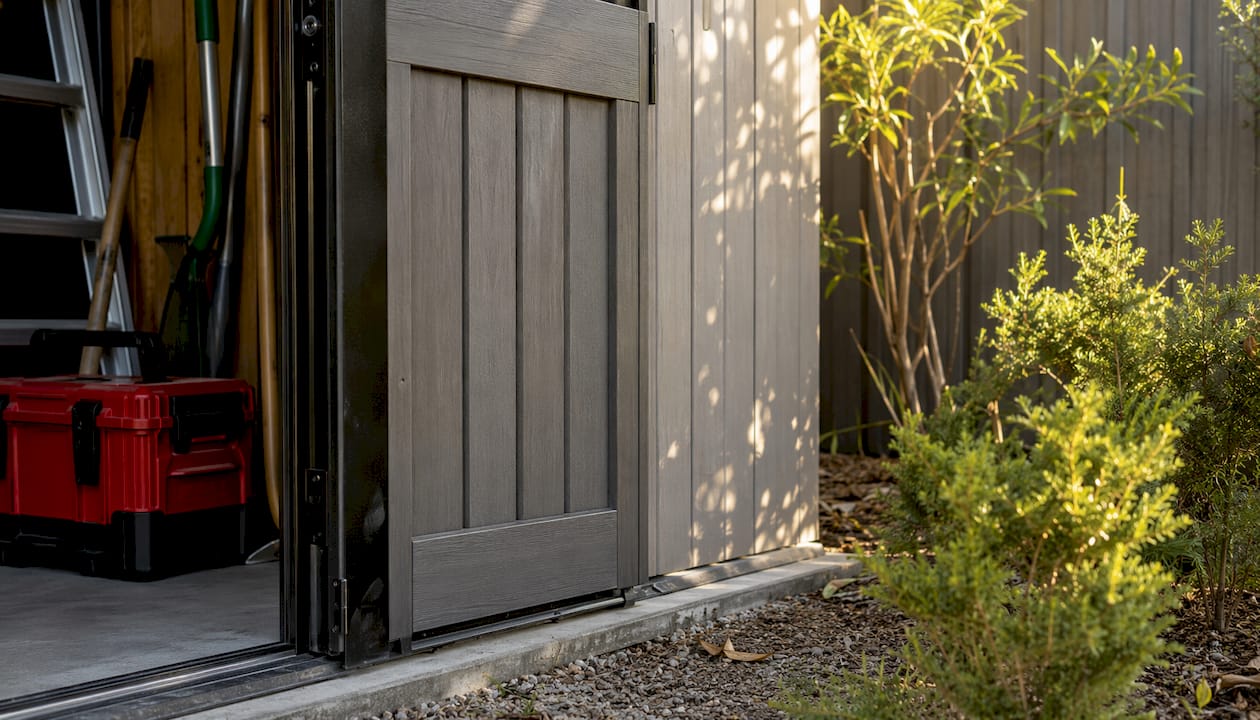
| Shed type | Security strengths | Key vulnerabilities | Recommended fix |
|---|---|---|---|
| Timber framed | Easy to add longer screws and backing plates | Timber can rot or split; hinges may pull out | Replace screws with 75mm+ coach screws; treat timber annually |
| Metal framed | Strong frame, resists racking | Short self-tapping screws strip easily | Use rivnuts or through-bolts with backing plates |
| Resin/HDPE panel | Weather resistant, no rot | Panels can flex; fixings into plastic need care | Use security bolts through panels into frame; add internal steel plate at lock zone |
Practical structural fixes:
- Replace all short panel screws with longer security bolts that pass through the sheet and into the frame.
- Fit captive nuts or rivnuts on the inside face so bolts cannot be removed from outside.
- Reinforce the roof-to-wall join with additional brackets — this join is often the weakest point on metal sheds.
- Add an internal steel plate around the padlock hasp area to prevent the panel being prised away from the lock.
- Use security-head fasteners (one-way screws or pin-hex bolts) on any external fixing that could be removed with a standard screwdriver.
4. Which locks and hasps work best for Australian sheds?
Choose a lock with a hidden or covered shackle design and pair it with a quality hasp fitted to a solid backing plate. A visible shackle is the first thing bolt cutters target.
What to look for in a shed padlock:
- Shackle material: Hardened boron steel resists cutting and sawing.
- Shackle cover or shroud: A close-shackle or shrouded design leaves almost no gap for bolt cutters to grip.
- Anti-saw pins: Rotating pins inside the shackle body prevent a hacksaw from biting.
- Weather resistance: Look for a rubber-sealed body or stainless internals for outdoor use in Australian conditions.
- Electronic locks: Keypad or Bluetooth locks suit sheds where multiple people need access, but check battery life and whether the unit is rated for outdoor exposure before buying.
Installation steps:
- Mark and drill hasp holes through the door and frame, not just the surface sheet.
- Fit a 3mm+ steel backing plate on the interior face behind the hasp.
- Thread security bolts through the door, hasp, and backing plate; tighten with captive nuts on the inside.
- For ground anchors (bikes, mowers, generators), drill into the concrete slab, insert a resin anchor, and bolt the anchor plate down once the resin cures.
- To secure a steel lockbox or safe, bolt it through the floor using the same resin-anchor method for concrete, or through-bolt to a timber floor joist.
Pro Tip: Fastener length matters more than most people realise. A 25mm screw into a 20mm panel leaves almost nothing in the frame. Use at least 75mm for timber frames and through-bolts for metal or resin. When the floor is concrete, a resin anchor outperforms a raw plug by a significant margin under lateral load.
5. How to set up alarms and sensors for early detection
Prioritise sensors on the approach path — the side gate, driveway, or walkway leading to the shed — so alerts trigger before a thief reaches the door. Practitioners recommend aiming motion sensors at routes rather than the shed door itself, because early detection gives you time to act and gives the intruder a reason to leave.
Comparison of detection options:
- Local audible deterrents (sirens, barking simulators): Cheap, no subscription, effective against opportunists. Fail if the intruder is determined or the neighbourhood is noisy enough to mask the sound.
- Camera-only systems: Record evidence but don’t deter in real time unless paired with a siren or light. Wi-Fi cameras often lose signal in detached sheds.
- Monitored alarm hubs: Alert a monitoring centre or your phone. Most reliable, but require a subscription and depend on connectivity. Detached sheds often have weak Wi-Fi, so choose a system with cellular backup or a local Ethernet connection.
Sensor placement that works: Mount a PIR sensor at gate height (roughly 1.2m) aimed across the path, not down at the ground. Add a second sensor at the roller-door edge or side access point. Mount the receiver or siren where it’s visible but out of easy reach — a soffit or high wall bracket works well. Protect the unit from tampering with a security cage or tamper-evident mount. For battery-powered units, check and replace batteries every six months; for mains units, add a battery backup so a power cut doesn’t disable the system.
For rural properties or sheds far from the house, a cellular-backup alarm paired with a local siren is the most reliable combination. Avoid relying on Wi-Fi alone.
6. Motion-sensor lighting that deters intruders without annoying neighbours
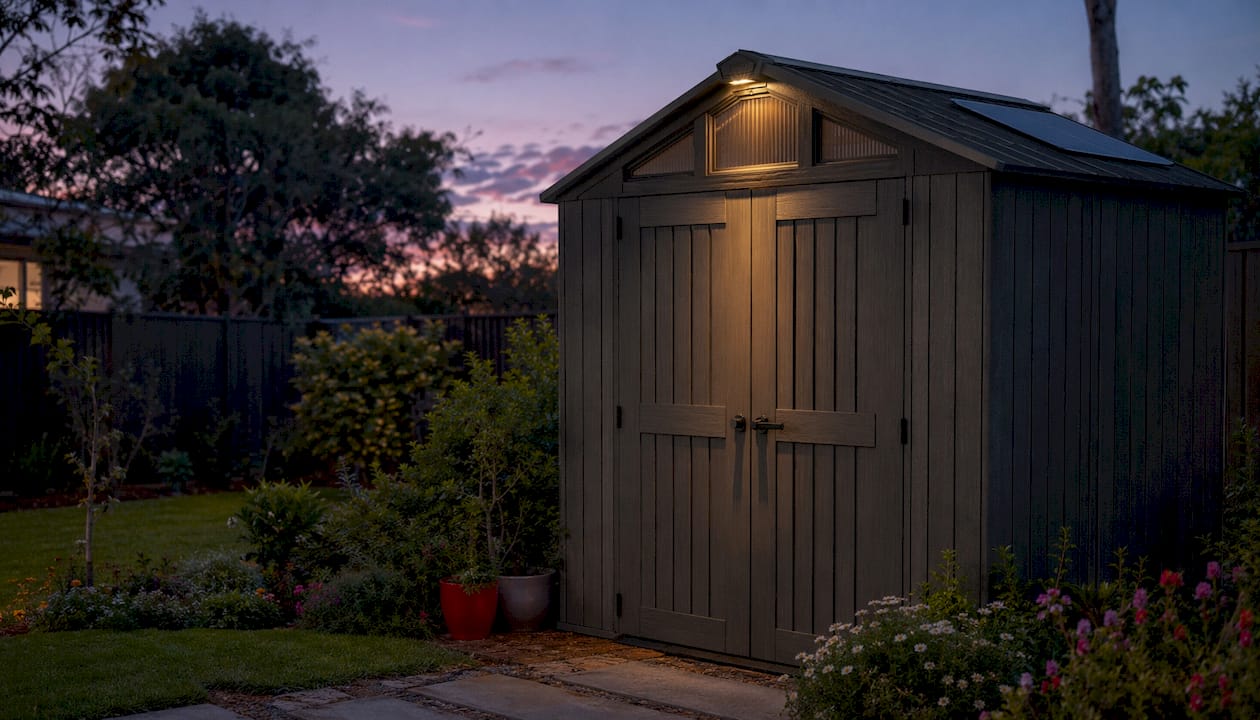
Aim a motion-sensor light to cover the approach path and gate, not just the shed face. A well-placed light makes the approach uncomfortable for anyone who shouldn’t be there, and it gives cameras a usable image if something does happen.
Lighting options by situation:
- Mains-powered LED floodlights: Brightest and most reliable. Best when a power point is within reach of the shed. Aim for at least 1,500 lumens for a typical backyard approach.
- Solar motion lights: No wiring needed, ideal for detached sheds. Performance drops in shaded spots or during extended cloudy periods, so pair with a battery-storage unit for reliability.
- Smart lights with app alerts: Combine motion detection with a phone notification. Useful but dependent on Wi-Fi coverage at the shed location.
Placement steps:
- Mount the light at 2.5–3m height on the wall or eave facing the approach path.
- Angle the sensor to cover the gate and path, not the street (reduces nuisance trips from passing cars).
- Set the sensitivity to medium and the duration to 30–60 seconds — long enough to be useful, short enough not to irritate neighbours.
- Add a second light covering any blind spot on the side or rear of the shed.
- For solar units on detached sheds, position the panel on the north-facing side for maximum sun exposure year-round in Australia.
Pairing motion lighting with an audible deterrent on the same trigger is more effective than either alone — the combination changes an intruder’s decision before they reach the door.
7. Improve visibility and remove climbing aids around your shed
Improve sight lines, remove easy climbing aids, and keep hedges trimmed to eliminate hiding places. Queensland Police guidance and Victoria Police both emphasise that good visibility increases the chance a neighbour or passer-by will notice suspicious activity.
Immediate actions (do this weekend):
- Trim hedges and shrubs along the fence line and around the shed so there are no obvious hiding spots.
- Move ladders inside the shed or lock them to a fixed anchor point. Victoria Police specifically lists ladders as items intruders use to access the main house.
- Relocate wheelie bins away from fences and walls — a stacked bin is a step up for anyone climbing over.
- Lock side gates, even during the day.
Medium-term actions (this month):
- Secure fencing so it can’t be easily lifted or removed at the base.
- Number your house clearly so emergency services can find you quickly.
- Register with your local Neighbourhood Watch programme and let a trusted neighbour know when you’re away for extended periods.
Behaviour habit: Make locking the shed and closing the gate part of the same routine as locking the back door. Store ladders inside every night, and photograph serial numbers on tools so you have a record if something goes missing.
South Australian Police advice: Keep your garage, shed, and gates shut and locked. Put away garden tools, ladders, and wheelie bins — they can help thieves enter your house. (SA Police home security habits)
8. How to lock away valuables and anchor heavy items inside your shed
Store high-value items in a secured container and bolt that container to the shed floor or wall. Even if the shed is breached, a bolted-down steel lockbox or anchored mower adds significant time and effort for a thief.
Internal securing options:
- Steel lockboxes for small valuables, cash, and documents.
- Cable locks for bicycles looped through a wall-mounted anchor.
- Ground anchors bolted into the concrete slab for mowers, generators, and compressors.
- Lockable wall cabinets for power tools — mount them high and bolt the cabinet back to the wall studs.
How to anchor heavy items:
- Identify the anchor point: a concrete slab is ideal; a timber floor needs a through-bolt into a joist.
- For concrete, drill to the manufacturer’s specified depth, clean the hole, inject resin anchor compound, and insert the bolt. Allow full cure time before loading.
- For timber floors, use a 10mm+ through-bolt with a large washer and nut on the underside.
- Thread a heavy-duty chain or shackle through the item’s frame and the anchor point.
- Close with a covered-shackle padlock rated for outdoor use.
Pro Tip: Property marking is often the deciding factor in recovering stolen tools. Engrave a unique code (your postcode plus a personal number works well) on every high-value item, and keep a digital inventory with photos, serial numbers, and purchase receipts. Victoria Police recommends this as a primary recovery and insurance tool.
9. Budget guide: what to do first on any budget
Immediate habits and low-cost fixes give the best short-term return; higher-cost items add convenience and long-term reliability. Sheds often hold thousands of dollars in tools yet lack even basic security layers, so almost any investment here pays off quickly.
| Action category | Effort | Cost band | Likely risk reduction |
|---|---|---|---|
| Always lock up; store ladders inside | Very low | Free | High (removes easy opportunity) |
| Trim hedges; improve sight lines | Low | Free–low | Moderate–high |
| Motion-sensor light on approach path | Low | Low | High |
| Quality padlock + through-bolt hasp | Low–medium | Low–medium | High |
| Reinforce door frame + security fasteners | Medium | Low–medium | High |
| Shed alarm with audible siren | Medium | Medium | High |
| Monitored alarm with cellular backup | Medium | Medium–high | Very high |
| Ground anchors + lockboxes for valuables | Medium | Medium | Moderate–high |
Tiered recommendations:
- Low budget (free to a few dollars): Lock every time, store ladders inside, trim hedges, photograph serial numbers. These habits alone remove most opportunistic risk.
- Medium budget: Add a quality covered-shackle padlock, a through-bolt hasp with backing plate, and a solar motion light aimed at the approach path.
- Higher budget: Reinforce the door frame, install a shed alarm with a local siren and cellular backup, fit ground anchors for heavy items, and consider a monitored system if the shed holds business tools or expensive equipment.
For a rural property with long access, prioritise cellular-backup alarms and solar lighting over Wi-Fi-dependent systems. For a tradesperson storing tools, ground anchors and a steel lockbox are non-negotiable additions to the lock-and-light baseline.
10. How to choose the right security products and installers in Australia
Choose products and installers that match the shed’s use, the installation complexity, and the property’s power and communications situation. A system that works perfectly in a suburban home with strong Wi-Fi may be useless in a detached rural shed.
Questions to ask before buying:
- Is the alarm or camera rated for outdoor use in Australian conditions (heat, humidity, UV)?
- Does it need Wi-Fi, or does it offer cellular or Ethernet backup?
- What is the battery life, and how easy is it to replace or recharge?
- Does the installer offer a warranty on both the product and the installation?
- Is there a local support contact, or is all support offshore?
Red flags to watch for:
- Claims that a single product (one camera, one padlock) is all you need.
- No weather-resistance rating on outdoor hardware.
- Subscription fees with no clear benefit over a self-monitored option.
- Installers who can’t explain how the system handles a power or Wi-Fi outage.
Decision checklist:
- Define the use case: occasional backyard storage, daily tradesperson access, or long-term rural storage?
- Check return and installation policies before purchasing online.
- Confirm the product is available and supported in Australia.
- Test the system yourself after installation — trigger every sensor and confirm alerts reach your phone or monitoring centre.
- Get a simple written handover from any installer covering how to reset, replace batteries, and update firmware.
11. Australian police and expert checklist you can follow right now
Follow this checklist combining Victoria Police, Queensland Police, and South Australian Police prevention guidance with practitioner best practice. It covers the actions that consistently appear across Australian state police crime-prevention advice.
The checklist:
- Always lock the shed and side gates, even when you’re home.
- Record serial numbers and engrave a unique identifier on all high-value tools and equipment.
- Trim hedges and vegetation to improve sight lines from the street and neighbouring properties.
- Fit a quality covered-shackle padlock on a through-bolted hasp with a backing plate.
- Reinforce the door frame and replace short screws with security-grade fasteners.
- Fit motion-sensor lights aimed at the approach path, not just the shed face.
- Place early-detection sensors (PIR or microwave) at the gate and path leading to the shed.
- Store ladders, bins, and garden tools inside or locked away.
- Display a warning sign indicating an alarm system or Neighbourhood Watch participation. A metal security sign on the gate or shed door adds a visible deterrent at minimal cost.
- Register extended absences with a trusted neighbour or local police.
Practitioner insight: The biggest mistake homeowners make is treating shed alarms as post-entry recorders rather than early-detection tools. Aim sensors at approach paths so a deterrent triggers before the door is reached — that’s when it actually changes an intruder’s decision. (Shed security planning)
ACT Policing also recommends placing stickers and signs around your property to warn of an alarm system, and checking outside lights, window locks, and door locks regularly to confirm they’re working correctly.
12. Padlocks vs electronic locks: choosing and fitting the right lock for your shed
The right lock depends on who needs access, how often, and what the shed contains. Both padlocks and electronic locks can be secure — the fitting method and the hasp quality matter as much as the lock itself.
Padlocks remain the most practical choice for most Australian sheds. A hardened-steel, close-shackle padlock with anti-saw pins and a weather-sealed body is difficult to defeat quickly. The key advantage is simplicity: no batteries, no connectivity, no firmware updates. The key disadvantage is key management — if multiple people need access, keys get copied or lost.
Electronic locks (keypad, Bluetooth, or smart-key) suit sheds where several people need entry, or where you want an audit trail of who opened the shed and when. Look for an IP65 or higher weather rating for outdoor Australian conditions, and confirm the lock has a mechanical key override in case the battery dies. Avoid any electronic lock that relies solely on Wi-Fi for operation — a connectivity drop should not lock you out of your own shed.
Fitting either type correctly:
- Never fit a padlock to a hasp screwed directly into thin sheet metal with short screws. The hasp will pull out under load before the lock fails.
- Always use a through-bolt hasp with a steel backing plate, regardless of lock type.
- For electronic locks, follow the manufacturer’s drill template precisely — a misaligned bolt throw is a common installation failure that leaves the door easy to force.
- Test the lock under load after fitting: push and pull the door firmly and confirm the bolt or shackle holds without movement at the hasp.
For sheds storing motorcycles or larger machinery, consider a secondary ground anchor and chain in addition to the door lock. A motorcycle storage guide recommends combining a ground anchor with a disc lock as a layered approach — the same principle applies to any high-value item stored in a shed.
Key takeaways
A layered approach combining a reinforced door, a quality covered-shackle padlock, motion-sensor lighting on the approach path, and a digital inventory of serial numbers gives Australian homeowners the strongest practical defence against shed theft.
| Point | Details |
|---|---|
| Reinforce the door first | The door and frame are the most common failure points; fix these before buying cameras or alarms. |
| Aim sensors at the approach | Mount PIR sensors at the gate or path so deterrents trigger before the shed is reached, not after. |
| Use a covered-shackle padlock | A close-shackle or shrouded padlock on a through-bolted hasp resists bolt cutters far better than a standard padlock. |
| Record serial numbers | Photographing and engraving tools improves recovery chances and supports insurance claims. |
| Ketergroup sheds as a foundation | A well-built, weather-resistant shed from Ketergroup provides a stronger structural base for all the security upgrades above. |
The practical case for staged security upgrades
Most homeowners I speak with want to do everything at once, and then do nothing because it feels too big. The research and police guidance here point to a simpler truth: a handful of low-cost, high-impact steps done consistently outperform an expensive system that’s poorly installed or rarely checked. Start with the lock, the light, and the habit of actually using them. Add structural reinforcement and sensors when the budget allows. A Keter shed gives you a solid, weather-resistant starting point with a frame designed for real outdoor conditions, which makes every subsequent security upgrade easier to fit and more effective to rely on.
Thinking about replacing an insecure shed?
If your current shed has a flimsy frame, rusted panels, or a door that won’t close squarely, no amount of hardware will make it genuinely secure. Sometimes the most practical long-term fix is a replacement shed built to last.
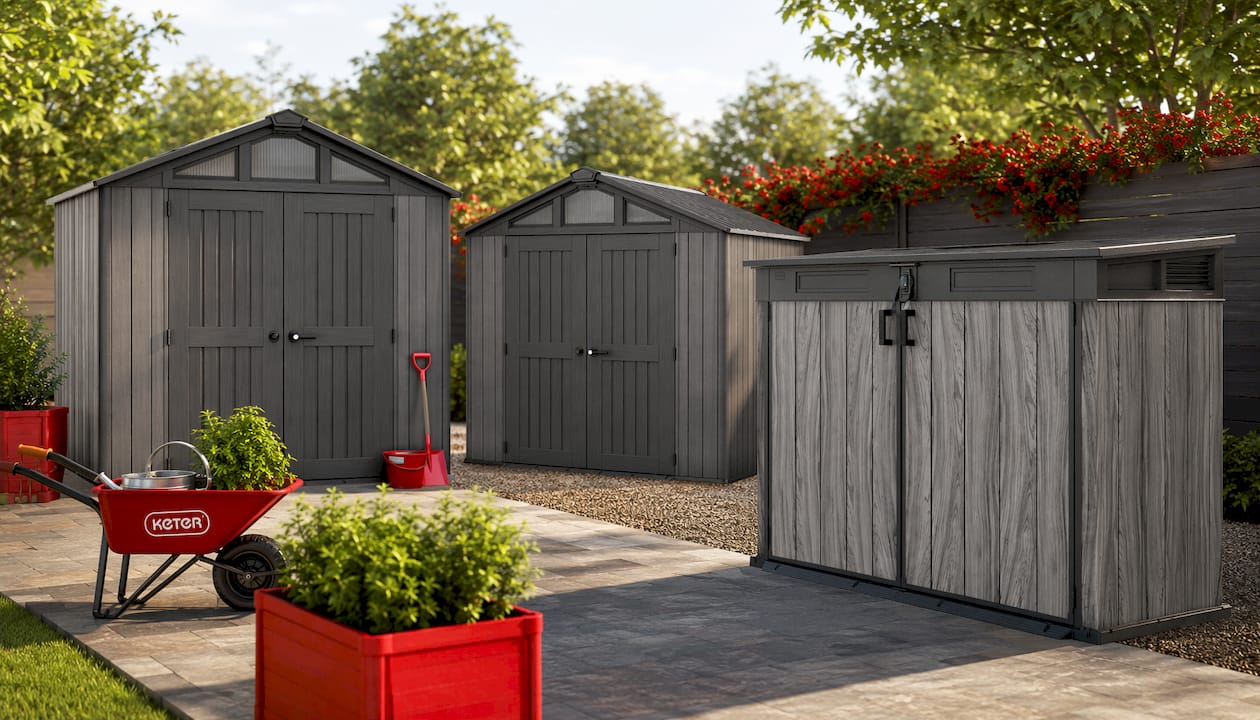
Ketergroup’s Stronghold and Signature shed lines are designed for Australian conditions, built from durable, weather-resistant resin that won’t rot, rust, or warp. The Keter Stronghold 8x6 shed suits most standard backyards, while the Keter Stronghold 8x8 gives you room for larger equipment. For compact spaces, the Keter Signature Horizontal Shed in Stormgrey Look fits neatly against a fence and keeps tools accessible without taking up the whole yard. All three are designed for straightforward DIY assembly, and their resin panels accept security fasteners and hasp fittings without the corrosion issues that come with older metal sheds. Browse the full range at ketergroup.com.au and find the shed that gives your security upgrades a solid foundation to work from.
Useful sources
Short list of trusted Australian resources for further reading:
- Victoria Police: shed, outhouse and garage security — primary police guidance on locking habits, ladder storage, and property marking.
- Queensland Police: home and multi-residential security — sight-line and vegetation advice from Queensland Police.
- SA Police: home security habits — practical checklist covering sheds, gates, and outdoor tools.
- ACT Policing: home security — sensor lights, alarm signs, and door/window lock advice.
- K9-Alert: shed tool theft prevention Australia — practitioner guidance on layered security and sensor placement.
- Shedblog.com.au: shed security planning — detailed practitioner advice on approach-path detection and connectivity considerations.
- Ketergroup shed assembly guide — step-by-step assembly and installation guidance for Keter sheds.
- Ketergroup: best sheds guide — product selection guidance across the Keter range.
For region-specific advice, contact your local police station directly — crime patterns and recommended responses vary by area across Australia.
| Resource | Type | Best for |
|---|---|---|
| Victoria Police shed security page | Government | Locking habits, property marking |
| Queensland Police home security | Government | Sight lines, vegetation, lighting |
| SA Police home security habits | Government | Outdoor tools, gates, shed locks |
| K9-Alert shed theft prevention | Practitioner | Sensor placement, layered security |
| Shedblog.com.au shed security | Practitioner | Approach-path detection, connectivity |
| Ketergroup blog | Brand | Assembly, replacement shed options |
FAQ
How do you burglar-proof a shed?
Fit a covered-shackle padlock on a through-bolted hasp with a steel backing plate, reinforce the door frame with security-grade fasteners, add a motion-sensor light aimed at the approach path, and store ladders and tools inside. No shed is completely burglar-proof, but layering physical barriers with early detection removes most of the opportunity opportunistic thieves rely on.
How do I deter thieves from targeting my shed?
Improve sight lines by trimming hedges, fit a motion-sensor light on the approach path, display a warning sign indicating an alarm or Neighbourhood Watch, and store ladders and bins out of sight. Queensland Police and Victoria Police both confirm that good visibility and the removal of climbing aids significantly reduce shed targeting.
What is the best way to secure a shed?
The most effective approach combines a reinforced door and frame, a quality covered-shackle padlock on a through-bolted hasp, motion-sensor lighting on the approach path, and an audible alarm with sensors aimed at the gate or path. Record serial numbers on all tools and engrave a unique identifier on high-value items as a recovery measure.
Is it legal to live in a shed in Australia?
No. Under Australian building codes, sheds are classified as non-habitable structures (Class 10a) and cannot legally be used as a dwelling without formal reclassification approval, significant construction upgrades, and council consent. Some councils allow temporary occupancy permits during house construction under strict conditions, but permanent shed living is unlawful across Australian jurisdictions. Confirm the current rules with your local council or a licensed building certifier.


