
Keep Faded Plastic Furniture Looking Good for Months

Most faded plastic outdoor furniture can be brought back to life with a thorough clean and a purpose-made plastic restorer, and that combination is the single most effective place to start. If grime and oxidised film are the problem, cleaning alone often does the heavy lifting. If the piece is cracked, brittle, or falling apart at the joints, restoration is the wrong move. Replace it instead.
TL;DR:
- Restoring faded plastic outdoor furniture relies on thorough cleaning, using a gentle brush, and applying a dedicated plastic restorer combined with a UV protectant.
- Use softer methods like bicarbonate paste, white vinegar, and non-abrasive cleaners to avoid micro-scratches and uneven colour loss during restoration.
- Structural issues such as cracks, broken joints, or brittle plastic should be repaired or replaced before cosmetic restoration to ensure safety and durability.
- Restorer effects last several months, with indoor or shaded storage and regular reapplication of UV protectants extending the furniture’s lifespan effectively.
- When plastic is deeply faded, cracked, or beyond cosmetic repair, replacing with weather-resistant, high-quality furniture is often more cost-effective and long-lasting.
Table of Contents
- Gather the right kit before you restore faded plastic furniture
- Step-by-step: cleaning, restoring, and protecting the plastic
- DIY hacks that work short-term, and which ones risk real damage
- Keeping restored plastic furniture looking good longer
- When to stop restoring and start replacing
- Liza’s manufacturer-aware tips for better outcomes
- How to identify your furniture’s plastic before you restore it
- Fix cracks and breaks before you touch cosmetics
- Sanding and repainting for a complete refresh
- Eco-friendly ways to restore faded plastic furniture
- Publisher perspective: restore first, replace when necessary
- When it’s time for a new lounger instead
- Sources
- FAQ
Gather the right kit before you restore faded plastic furniture
Half the battle with restoring faded plastic furniture is having the right gear on hand before you start, rather than improvising halfway through with whatever’s under the sink. Skip the harsh stuff. Concentrated solvents and industrial-strength cleaners can strip colour and leave the surface looking worse than the fade you started with.
Here’s what actually earns a place in your kit:
- Mild dish soap, a soft-bristle brush, and a stack of microfibre cloths for the wash stage
- A garden hose or low-pressure washer for rinsing, rather than a high-pressure gun that can pit softer plastics
- Bicarbonate of soda paste and white vinegar for spot treatments on yellowing and mildew
- An oxygen-based cleaner for tougher, ground-in stains
- A dedicated plastic restorer or automotive trim restorer, plus a UV protectant spray to lock in the results
- Gloves, eye protection, and a shaded, well-ventilated spot to work in
Always spot-test any product on a hidden panel first. Some restorers react differently on different resins, and you don’t want your first test run to be the armrest everyone sees.
Step-by-step: cleaning, restoring, and protecting the plastic
This is the order that gets results, and skipping steps is where most DIY restorations go wrong.
- Rinse first. Hose down the piece to knock off loose dirt, cobwebs, leaf litter, and dust before you touch a brush to it. Doing this first stops you from grinding grit into the surface later.
- Deep clean. Wash with warm water and a mild dish soap, using a soft-bristle brush in gentle, circular motions. A thorough clean with warm water and mild detergent removes most of the grime that reads as “fading” but is actually just oxidised film and airborne pollutants sitting on top of the plastic. Rinse twice, checking that water sheets off cleanly rather than beading with residue.
- Treat stains and mildew. For yellowing or mould, a bicarbonate of soda paste or diluted white vinegar handles most jobs gently. For heavier mould or set-in staining, a diluted bleach solution can work, but always spot-test first and rinse thoroughly afterwards. Never mix bleach with other cleaning chemicals.
- Apply the restorer. Once the piece is fully dry, apply a plastic or trim restorer in a shaded area, out of direct sun. Working in shade stops the product from flashing off too fast and drying unevenly. Buff it in with a clean cloth and follow the curing time on the label. This can range from a couple of hours to overnight, and rushing it is the easiest way to end up with a patchy finish.
- Check and protect. Once cured, inspect the surface under natural light and touch up any uneven patches. Finish with a UV protectant designed for plastics to slow the next round of fading before it starts.
Pro Tip: Do the restorer application in the cool part of the morning or late afternoon. Applying it on a hot plastic surface in direct sun almost always causes streaking, because the product cures faster than you can buff it evenly.
DIY hacks that work short-term, and which ones risk real damage
Not every trick you’ll find online is worth the risk. Some genuinely help. Others trade a quick win for long-term damage.
- WD-40 and petroleum-based products can bring back shine almost instantly, but they tend to leave a sticky residue that attracts dust and dirt, meaning the surface looks worse again within weeks. If you’ve already used it, wipe the residue off with dish soap before applying anything else.
- Heat guns and hairdryers can sometimes revive dulled pigment by softening the top layer of plastic, but this carries a genuine risk of warping or melting if held too close or used on high heat. If you try it, keep the tool moving, use the lowest setting, and test on an inconspicuous spot first.
- Scouring pads and abrasive scrubbers feel satisfying because they cut through grime fast, but aggressive scrubbing roughens the surface, creating micro-scratches that trap dirt and speed up the next round of dulling. A soft brush and a baking soda paste do the same job more slowly and far more safely.
- Concentrated bleach and strong solvents on coloured plastics can strip pigment unevenly, leaving blotchy patches that no restorer will fix.
The pattern across most of these hacks is the same: speed comes at the cost of longevity. A softer approach usually wins over a full season outdoors.
Keeping restored plastic furniture looking good longer
A restored finish isn’t a permanent one, and setting realistic expectations now saves disappointment later. Results from a quality restorer typically hold for several months, with the exact timeframe shaped by sun exposure, coastal salt spray, and humidity.
- Apply a UV protectant made for plastics straight after restoring, and reapply per the product’s guidance, usually every few months in harsh sun.
- Build in a quick rinse every fortnight and a proper wash monthly, so grime never gets the chance to bake into the surface.
- Store or cover furniture in shade over the off-season, especially in coastal or tropical climates where salt and humidity accelerate wear faster than inland areas.
Pro Tip: If you’re in a humid or coastal spot, shift your cleaning schedule to weekly. Salt air and moisture encourage algae and mildew far quicker than a dry inland climate, and catching it early is much easier than scrubbing it out later.
When to stop restoring and start replacing
Restoration has limits, and pushing past them wastes time and product. Cracked plastic, brittle joints, or a piece that flexes and creaks under normal use signals a structural problem that no cleaner or restorer will fix. If colour has faded all the way through the material rather than sitting on the surface, you’re looking at a piece beyond cosmetic help. And if the hours and product cost start rivalling the price of new furniture, restoration stops making financial sense. At that point, a local recycling program or a professional repairer for high-value pieces is the better route.
Liza’s manufacturer-aware tips for better outcomes
Always follow the cure times printed on the product label rather than guessing. Rushing a restorer before it’s fully set is the most common reason results look patchy within a fortnight. Recycled resin furniture, like much of what you’ll find in outdoor ranges today, behaves a little differently to thin moulded plastics. It tends to hold restorer more evenly but can also show scratches more visibly, so a gentler touch and a proper spot test matter even more.
How to identify your furniture’s plastic before you restore it
Not all plastic outdoor furniture is made the same way, and treating them identically is a common reason restoration attempts fall short. Thicker, injection-moulded resin pieces, the kind used in most modern outdoor chairs and loungers, tend to be dense and rigid, with colour running further into the material. These generally respond well to standard cleaning and restorer treatments because the surface holds product evenly.
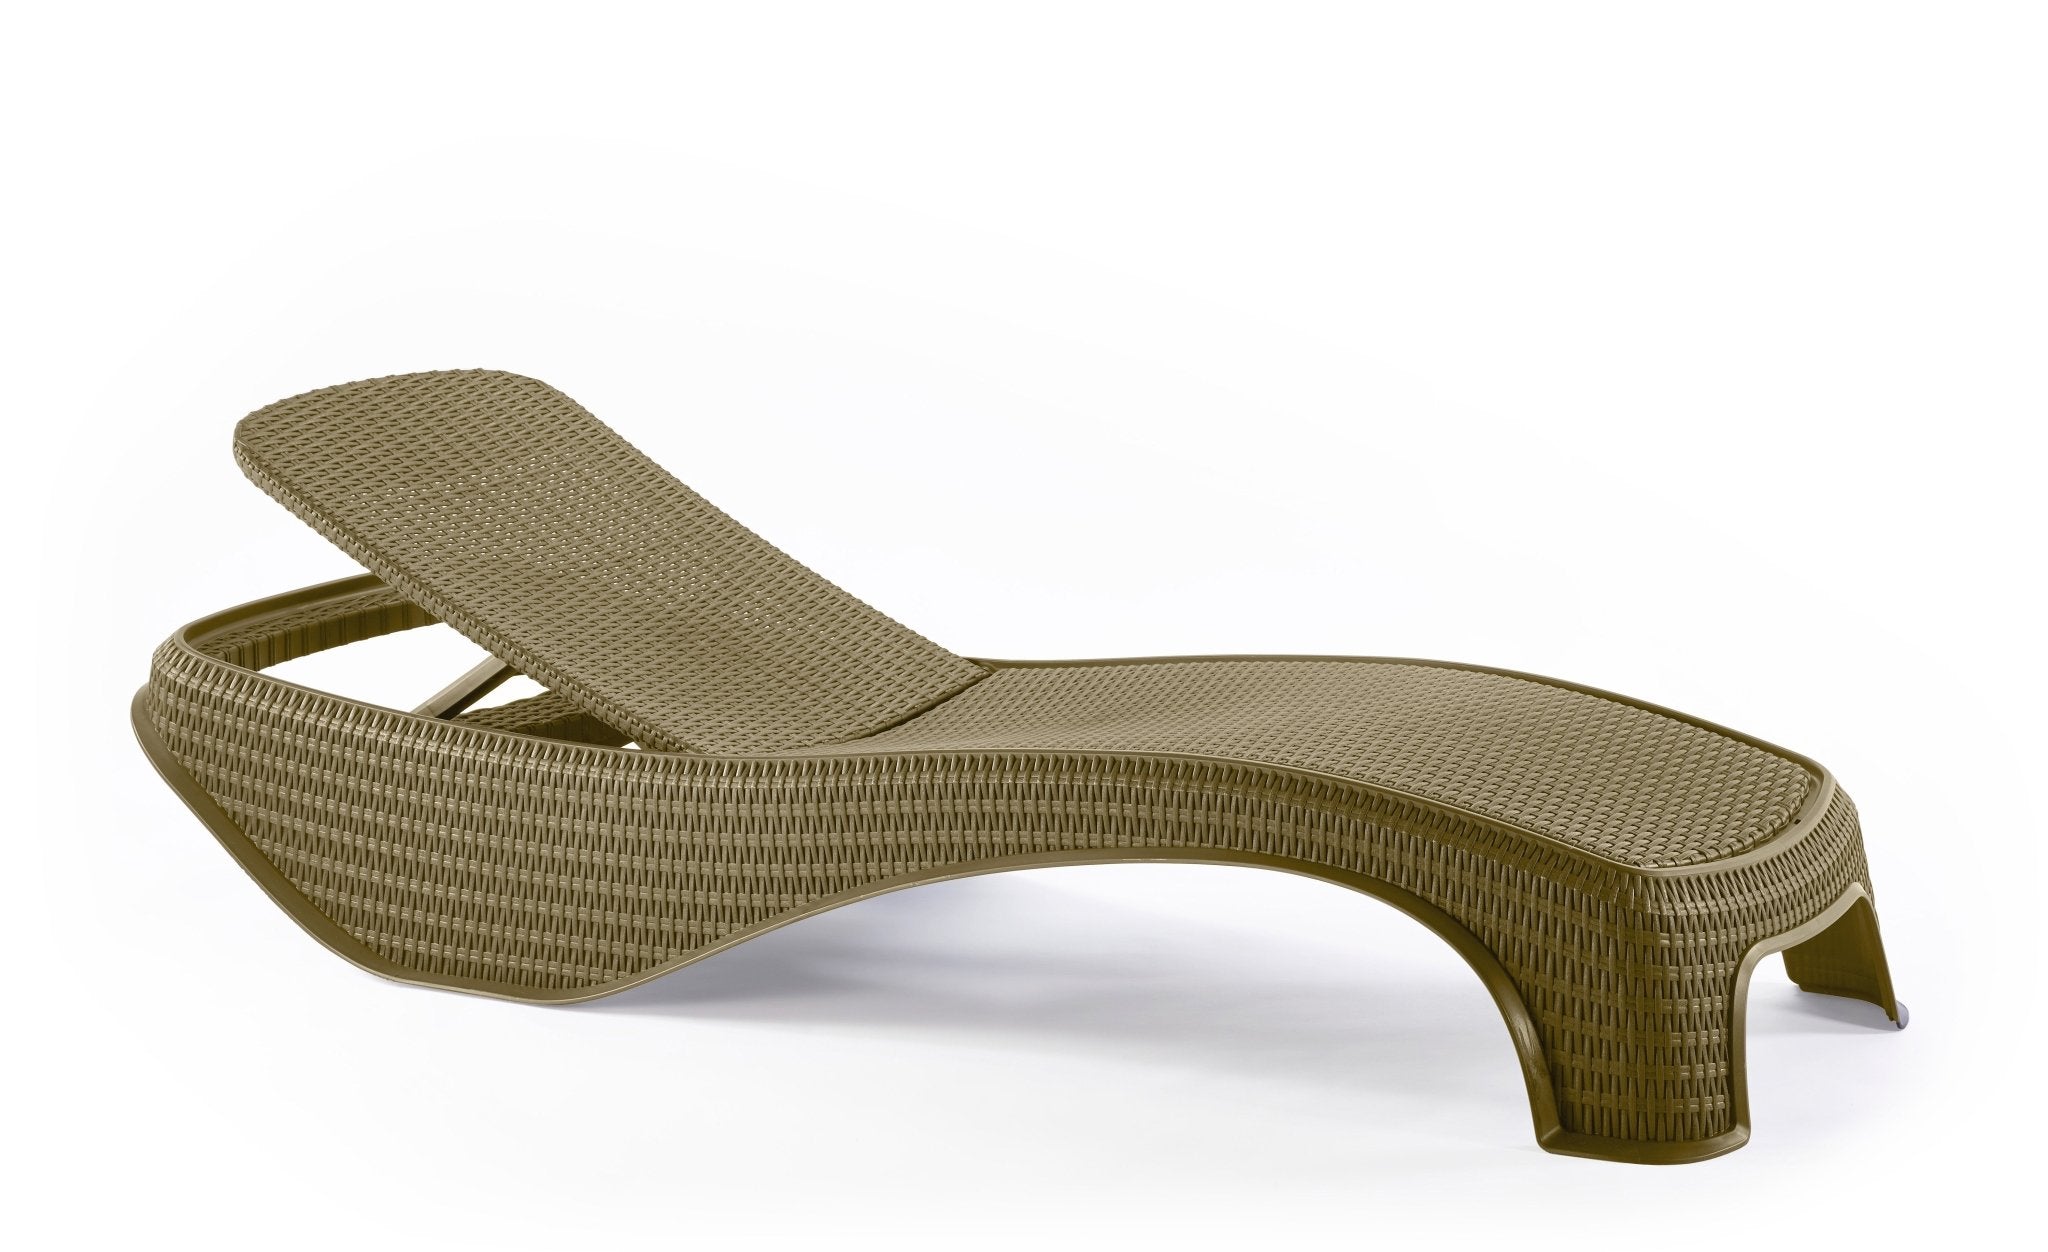
Thinner, moulded plastics, like the sort found in older budget furniture or lightweight stacking chairs, fade differently. Colour sits closer to the surface, so it can wash out patchier and respond less predictably to restorers. These pieces are also more prone to becoming brittle with age, so flex-test a corner gently before scrubbing hard.
Textured or woven-look plastics, common on some outdoor dining sets, trap dirt in the grooves and need a softer brush worked into the pattern rather than a flat wipe. A toothbrush or detailing brush handles these crevices far better than a standard scrub brush.
If you’re not sure what you’re working with, check the underside of the piece for a resin identification code, usually a small triangle with a number. Polypropylene and high-density polyethylene, the two most common outdoor furniture plastics, both take restorers well, but polypropylene tends to be more flexible and slightly more forgiving if you apply too much pressure while cleaning. When in doubt, always spot-test in an inconspicuous spot before committing to the whole piece.
Fix cracks and breaks before you touch cosmetics
Cosmetic restoration on a structurally compromised piece is wasted effort, and worse, it can be unsafe. Before reaching for cleaner or restorer, check every joint, leg, and load-bearing point for cracks, stress lines, or brittleness. Press down gently on seats and armrests to feel for flex that shouldn’t be there.
Small cracks in non-structural areas, like a hairline split in a decorative panel, can sometimes be repaired with a plastic-specific epoxy or welding kit designed for outdoor resin. Clean the area first, apply the repair product per its instructions, and let it cure fully before any cosmetic work begins. Rushing this step means the restorer or paint won’t adhere properly to the repaired section.
Cracks at load-bearing points, snapped legs, broken backrest supports, or joints that have separated are a different story. These affect safety, not just looks, and a cosmetic fix does nothing to address the underlying weakness. If the furniture bears weight, whether it’s a dining chair or a lounger, a compromised structural point means it’s time to stop restoring and start thinking about replacement.
Once you’ve confirmed the frame is sound, cosmetic restoration can proceed with confidence that the piece will actually hold up to use afterwards.
Sanding and repainting for a complete refresh
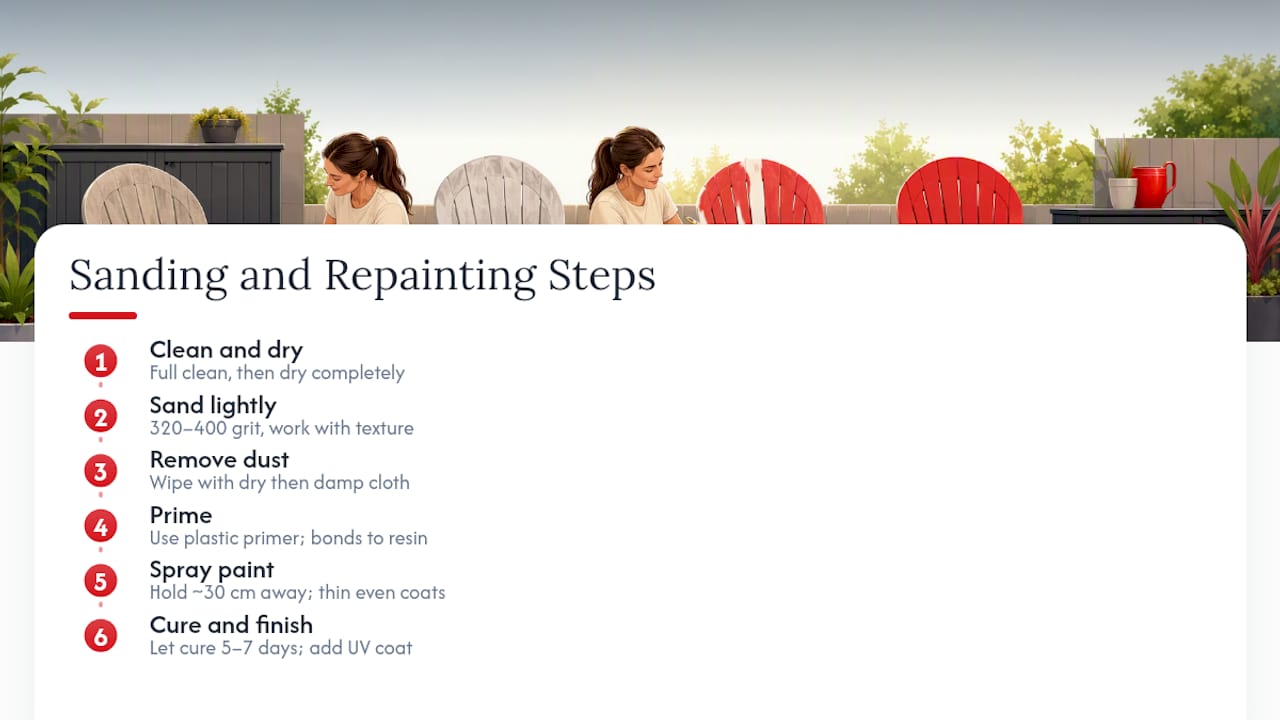
When cleaning and restorer products aren’t enough, usually because the fade is deep, the colour is patchy, or you want a different look entirely, sanding and repainting gives you a genuine reset.
Start by giving the piece a full clean and letting it dry completely. Sand the surface lightly with fine-grit sandpaper, around 320 to 400 grit, working in the direction of any moulded texture. You’re not trying to strip the plastic back, just scuff the surface enough for paint to grip. Wipe away all dust with a dry cloth, then a damp one, and let it dry again before moving on.
Apply a plastic-specific primer designed to bond with resin or polypropylene surfaces. Skipping this step is the most common reason repainted plastic furniture chips or peels within a season. Once the primer has cured per its label instructions, usually a few hours, apply a plastic-specific spray paint in thin, even coats, holding the can around 30 centimetres away and keeping it moving to avoid drips.
Two to three light coats generally beat one heavy one. Let each coat dry fully before the next, and allow the full curing period on the label, often five to seven days before the piece goes back into regular outdoor use. Finish with a UV-protective clear coat if the paint doesn’t already include one, since this is what determines how long your new colour survives its first summer.
Eco-friendly ways to restore faded plastic furniture
Restoring rather than replacing is already the more sustainable choice, and you can push that further with the products you choose along the way. Bicarbonate of soda and white vinegar handle most cleaning and spot-treatment jobs without the environmental load of harsh chemical cleaners, and both break down safely once rinsed away.
When shopping for a restorer or UV protectant, look for water-based formulas over solvent-heavy ones. They’re gentler on the plastic, produce fewer fumes while you work, and are kinder to garden beds if any overspray drifts nearby. Buying a smaller quantity and reapplying as needed also beats stockpiling a large bottle that degrades before you use it all.
Choosing to restore instead of replace keeps a perfectly functional piece of furniture out of landfill for another season or two, and that’s a meaningful difference multiplied across a whole household’s worth of outdoor gear. It’s also worth checking whether your furniture is made from recycled resin in the first place. Many outdoor ranges now are, and those materials are generally designed to be recycled again at end of life, closing the loop rather than breaking it.
Publisher perspective: restore first, replace when necessary
Getting more years out of furniture you already own is the easiest sustainability win most households have sitting in the backyard. Durable, recyclable materials are commonly emphasised in the outdoor furniture industry, along with a philosophy that extends to caring for what you already have before reaching for a replacement. For more on keeping outdoor gear performing well, our fading prevention guide is worth a look.
— Liza
When it’s time for a new lounger instead
Sometimes the smartest move isn’t more restoration, it’s a fresh start. If a lounger has cracked frame joints, brittle plastic that flexes where it shouldn’t, or colour loss that’s gone right through the material, no amount of cleaning or restorer will bring it back safely.
The Keter Pacific Sun Lounger is built from weather resistant materials designed to handle everyday sun and outdoor use without the upkeep a well-worn piece demands. If you prefer a lighter palette, the Keter Atlantic Sun Lounger in Beige brings the same weather resistant construction in a warmer tone that suits most outdoor settings. For a cleaner, brighter look, the Keter Atlantic Sun Lounger in White offers the same durability with a crisp finish that pairs easily with most patio styles.

Replacing a structurally compromised piece with something built to resist fading and weathering from the outset means fewer restoration weekends down the track. It’s a straightforward trade, less time spent maintaining, more time actually using your outdoor space. Browse the full outdoor furniture range to find a lounger that suits your space, or check the garden collection if you’re refreshing more than just the seating.
Sources
- How To Restore Faded Plastic Garden Furniture | WD-40
- How to clean recycled plastic outdoor furniture: easy steps - CleaningBro
- How to restore plastic patio furniture? - Joe Joslin Outdoors
- Revive your outdoor oasis: a complete guide to restoring faded plastic garden furniture - GreatGardenPlans
FAQ
Does WD-40 restore faded plastic?
WD-40 can bring back shine on faded plastic in the short term, but it tends to leave a sticky residue that attracts dust and dirt, making the surface look worse within weeks. A dedicated plastic or trim restorer gives a longer-lasting result with less mess to manage afterwards.
Can I use WD-40 on faded plastic chairs?
You can, and it will produce a quick shine, but it’s better suited as a last resort than a regular fix. If you’ve already applied it, wipe the residue off with warm soapy water before applying any other restorer product.
How do I make old faded plastic look new again?
Start with a thorough clean using warm water and mild dish soap, then apply a purpose-made plastic or trim restorer once the piece is completely dry. This combination handles most fading because much of what looks like colour loss is actually oxidised surface film and pollutants sitting on top of the plastic rather than damage to the material itself.
Can vinegar be used to restore faded plastic?
White vinegar is effective as a spot treatment for yellowing and light mildew, especially when combined with a bicarbonate of soda paste for tougher marks. It won’t reverse deep fading on its own, but it’s a gentle, low-risk step before reaching for a dedicated restorer product.
How long does restored plastic furniture stay looking good?
Results from a quality restorer typically last several months, depending on sun exposure, coastal salt spray, and how often the piece is cleaned. Furniture in humid or coastal climates generally needs more frequent reapplication than pieces kept in drier, shaded spots.


