
Insulating Australian Plastic Sheds: 20–40mm Roof Gap, Resin Fixings

For most plastic garden sheds, foil-faced rigid panels on the roof and walls, backed by proper ventilation and a warm-side vapour retarder, give you the best mix of cost, condensation control and ease of DIY installation. Spray foam works if you want a full air seal and have the budget, but ventilation and vapour control stay non-negotiable regardless of which insulation you choose. A well-built Cortina shed gives you a solid, weather resistant shell to build these layers onto.
TL;DR:
- The roof should be insulated with foil-faced rigid panels and an air gap to effectively reduce radiant heat, especially during Australian summers.
- Moisture control through proper ventilation and a warm-side vapour retarder is critical to prevent condensation and moisture damage inside the shed.
- Prioritize sealing and insulation around vents and penetrations with professional-grade spray foam or tape to ensure an airtight environment.
- For most garden sheds, a roof R-value between R2.5 and R3.5 and wall insulation around R1.5 to R2.5 provide sufficient thermal comfort.
- Spending on roof insulation and ventilation yields the highest benefits, while wall insulation can often be a budget-friendly consideration for occasional storage purposes.
Table of Contents
- Which insulation methods work best in a plastic shed?
- What R-value should you actually aim for?
- How do you install insulation step by step?
- How do you stop condensation forming inside the walls?
- What fixings and adhesives work on resin shed walls?
- Where should you spend and where can you save?
- Why Keter sheds suit DIY insulation projects
- What the research actually tells you to prioritise
- Get a shed built for the job before you insulate it
- Sources
- FAQ
Which insulation methods work best in a plastic shed?
Rigid foam boards are the workhorse option for most Australian sheds. Expanded polystyrene (EPS) is cheap and easy to cut with a hand saw, which makes it forgiving for a first-time installer, though it offers the lowest performance per centimetre of thickness. Extruded polystyrene (XPS) costs more but resists moisture better and holds its shape under load, useful if you are lining a floor. PIR (polyisocyanurate) and PUR (polyurethane) boards deliver noticeably better thermal resistance for the same thickness, which matters in a shed where wall cavities are shallow.
Reflective foil comes into its own when radiant heat, not conducted heat, is your main problem, which describes most Australian summers. Reflective insulation can block up to 95% of radiant heat, but only when it’s installed facing an air gap rather than pressed flat against the roof sheet. Skip the air gap and you lose most of that benefit.
Spray foam gives you the tightest seal of any option, filling gaps and penetrations that rigid boards can’t reach. It’s harder to apply evenly yourself, though, and professional application usually costs more than a DIY panel job. Many experienced installers combine methods rather than picking one: foil-faced composite panels on the roof for radiant control, paired with rigid foam or spray foam around the door frame and vents where air leakage tends to concentrate.
A few practical starting points:
- EPS panels: budget-friendly, easy to cut, best for wall linings in mild climates.
- XPS panels: better moisture resistance, suited to floors and damp-prone areas.
- PIR/PUR boards: highest thermal performance per centimetre, good where space is tight.
- Reflective foil: essential for roof radiant control, needs a 20–40mm air gap to work properly.
- Spray foam: best air seal, best left to a professional for full-shed coverage.
What R-value should you actually aim for?
R-value measures how well a material resists heat flow. It’s not the whole story in a shed, though, because radiant heat behaves differently to conducted heat, and a plastic shed roof under full sun is mostly a radiant heat problem.
For typical Australian shed use, workshops and hobby spaces do well with a roof R-value around R2.5 to R3.5, and wall insulation around R1.5 to R2.5 for balanced comfort in temperate climates. You don’t need commercial-grade figures for a garden shed. You need enough bulk insulation to slow heat transfer, plus reflective foil to knock down the radiant load before it ever reaches the bulk layer.
Here’s a rough guide to where each material sits:
| Material | Typical use | Moisture tolerance |
|---|---|---|
| EPS | Wall panels | Moderate |
| XPS | Floors, damp zones | High |
| PIR/PUR | Roof and wall boards | High |
| Reflective foil | Roof underlay | High (with air gap) |
| Closed-cell spray foam | Gaps, penetrations | Very high |
Quick fact: Reflective foil-faced products can reflect up to 95% of radiant heat when installed with the correct air gap, making the roof your highest-value insulation target in a plastic shed.
How do you install insulation step by step?
Getting the sequence right matters more than getting every material choice perfect. Rush the prep stage and even good materials will underperform.
- Prepare the shed. Clean all interior surfaces, check the roof and wall joints for gaps or leaks, and measure each panel area before you buy a single sheet.
- Fit wall panels. Cut rigid foam or foil-faced boards to size, then fix them using a construction adhesive rated for resin surfaces or VHB tape. Where the shed frame allows it, add screws with large plastic washers to spread the load and stop the fastener pulling through thin panelling.
- Seal wall seams. Tape every joint with a 75mm foil tape rated for the job. Gaps at seams are where condensation problems usually start.
- Install roof insulation. For reflective foil, leave enough slack that it sags slightly once fixed. Kingspan recommends a 20 to 40mm air gap between the foil and the roof sheet to get the declared radiant performance. If you’re using PIR boards between rafters instead, cut them tight enough to friction-fit without crushing the material.
- Address the floor. A floating floor of rigid XPS foam under plywood or a floor kit gives you insulation without a full concrete pour. If you already have a plastic shed floor fitted, insulation sits above it as a separate layer.
- Final seal and inspect. Fill any remaining gaps with a low-expansion spray foam rated for use near plastic surfaces, trim excess, then check every seam once more before closing up.
Pro Tip: Install your vapour retarder before you fit the final wall lining, not after. It’s far easier to run one continuous sheet across the frame than to patch around panels that are already screwed in place.
How do you stop condensation forming inside the walls?
Condensation forms when warm, moist air meets a cold surface and the water vapour has nowhere to go. In a plastic shed, that cold surface is usually the inside face of the resin wall or roof panel, especially overnight when outside temperatures drop fast.
Australian guidance recommends fitting a 0.2mm polyethylene vapour retarder on the warm side of any foam-core insulation. That means the retarder sits between the insulation and the room, not against the outer shell. Get this the wrong way around and you trap moisture inside the panel cavity instead of keeping it out.
Ventilation matters just as much as the vapour layer. Fit one low vent and one high vent on opposite walls so air can move through the space rather than sitting stagnant in corners. If the shed gets heavy use as a workshop with a kettle or petrol tools running, a small passive or powered extraction fan is worth adding.
- Skipping the vapour retarder is the single most common DIY mistake, and it can cause condensation to form inside the panel core itself.
- Sealing every seam but forgetting vents creates a sealed box that traps humidity rather than releasing it.
- Check the shed after the first full winter and summer cycle for any damp patches, musty smell, or condensation beading on the inside of panels.
What fixings and adhesives work on resin shed walls?
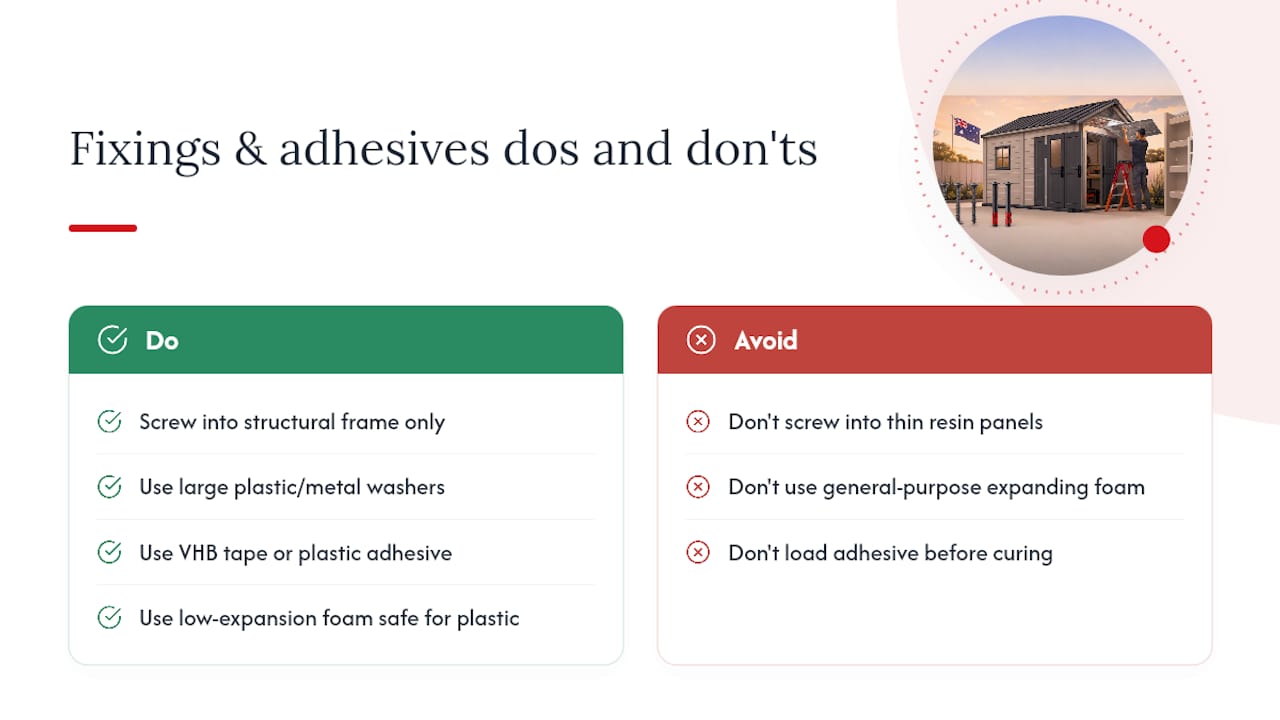
Plastic and resin panels don’t hold a screw the way timber framing does, so fixing choices matter more here than in a wooden shed.
Screw only into the structural frame members where they exist, never straight into thin resin panelling on its own. Use large plastic or metal washers under every screw head to spread the load across a wider area and stop the fastener working loose or punching through. For sections without frame access, VHB tape or a construction adhesive rated for plastic and resin surfaces gives a strong bond, though check the adhesive’s curing time before you load it up.
Low-expansion spray foam is fine for gap filling around vents and frames, but only use products labelled safe for plastic contact, since some general-purpose foams can distort resin over time. Pair it with 75mm foil tape for seam sealing across panel joints.
A basic tool kit for the job: a hand saw or fine-tooth blade for cutting foam boards, a caulking gun, a screwdriver or drill driver, a tape measure, and a straight edge for scoring foil-faced panels cleanly.
Pro Tip: Keep a spare box of large washers on hand. It’s the cheapest insurance against a screw pulling through a resin panel months after installation.
Where should you spend and where can you save?
Roof insulation and ventilation give you the biggest comfort improvement for the smallest outlay, so put your budget there first if funds are tight.
The cheapest setup that still performs reasonably well is reflective foil under the roof with a proper air gap, decent door and window seals, and basic EPS panels on the walls. That combination handles the bulk of radiant heat and stops draughts without needing premium materials.
Upgrading to PIR boards or spray foam is worth it if you’re converting the shed into a workshop you’ll use year-round, or if the shed sits in full sun with no shade cover. For occasional storage use, the budget setup usually does the job.
- Spend first on roof foil and the air gap; it’s the highest-return single change.
- Save on wall insulation with EPS if the shed isn’t used daily.
- Upgrade to PIR or spray foam only for full-time workshop use.
- Inspect seals and tape annually. UV exposure and temperature swings can loosen adhesive over years of use.
Why Keter sheds suit DIY insulation projects
Some shed panels are built from weather resistant resin designed to resist rot, rust and warping, providing a stable, dry surface to build an insulation system onto without worrying about the shell degrading underneath. Certain panel constructions offer enough depth for foam boards and foil layers without crowding usable floor space, and straightforward DIY assembly can help ease the insulation process.
If you’re planning shelving or a workbench alongside insulation, it helps to sort your shed’s moisture barrier and flooring first, since both interact with how well insulation performs long term. Getting the base right before you insulate saves you pulling panels back off later.
What the research actually tells you to prioritise
Most shed insulation advice online treats every surface as equally important, and that’s where a lot of DIYers waste money. The research is fairly consistent: the roof carries the biggest thermal load in a plastic shed, so it deserves the first dollar and the first hour of your weekend, not an even split across walls, roof and floor.
The bigger gap in most guides is condensation, treated as an afterthought rather than the actual reason insulation fails. A shed with excellent foam boards and no warm-side vapour retarder will often perform worse over a year than one with cheaper foil and correct ventilation, because trapped moisture degrades stored goods and can affect the panels themselves over time.
If you take one thing from this, prioritise the vapour retarder and ventilation plan before you buy a single sheet of foam. Material choice is a budget decision. Moisture management is the difference between a shed that lasts and one that needs stripping back within a year or two.
— Liza
Get a shed built for the job before you insulate it
Some manufacturer sheds provide a weather resistant, DIY-friendly shed shell to start from, so you’re not insulating a structure that’s already fighting rot or warping. Three Cortina models suit different insulation projects depending on how much floor space you need: the Keter Cortina 7x7 works well for a compact insulated storage space, the Keter Cortina 9x7 balances storage and workspace, and the Keter Cortina 11x7 gives you room for a full workshop conversion.
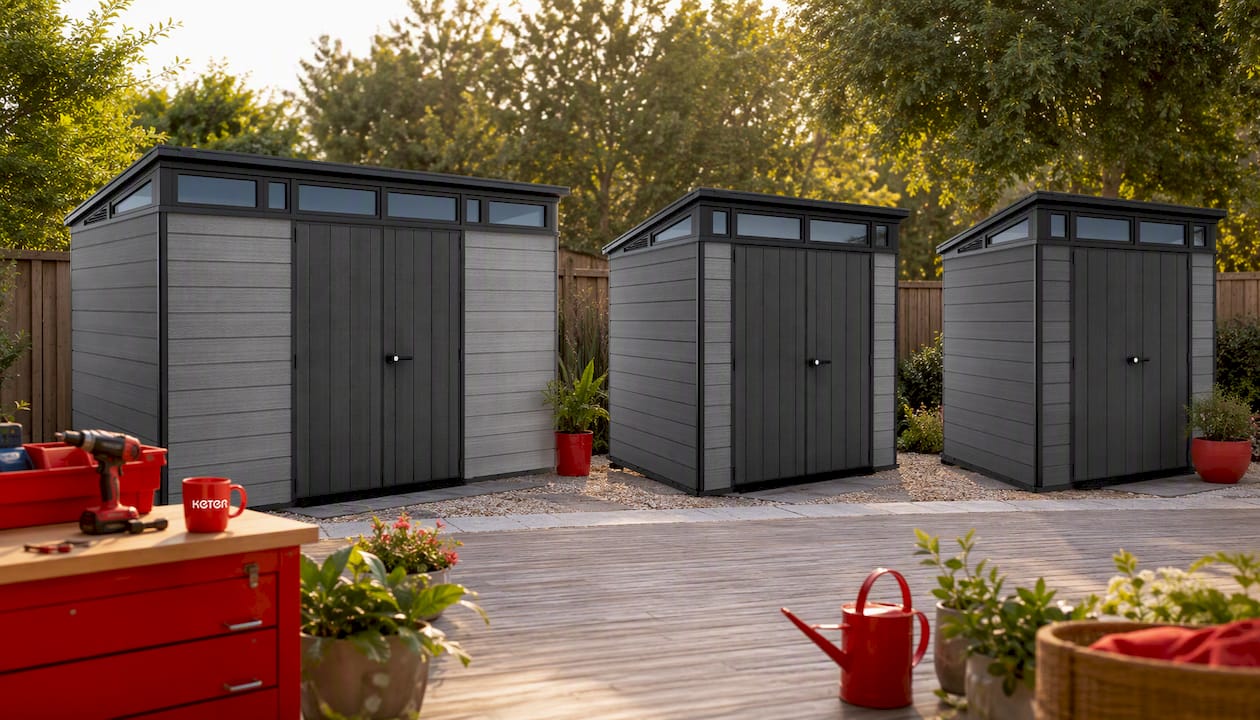
Each product page lists exact dimensions and assembly details so you can plan panel sizes before you buy insulation materials. If you’re still deciding on flooring, our guide to shed flooring options covers what to lay down before insulation goes in, and our moisture barrier guide walks through vapour control in more depth. Browse the current Cortina range to check sizing against your own backyard before you start.
Sources
For the technical detail behind this guide, Kingspan Australia’s shed insulation guidance covers radiant heat performance and air gap requirements. Insulation.com.au’s residential shed guide covers reflective foil products in more depth, Neumann Steel explains vapour barrier selection, and Small Trades’ installation guide covers panel fitting and sealing practice.
- Why insulate a shed | Kingspan Australia
- Should you use polyethylene film as a vapour barrier? | Neumann Steel
- Shed insulation guide with panels and wall insulation tips | Small Trades
- Insulation
FAQ
What is the best way to insulate a plastic shed?
Foil-faced rigid panels or PIR boards on the roof and walls, combined with a warm-side vapour retarder and cross ventilation, give the most reliable balance of cost and performance for most plastic sheds.
What should you put under a plastic storage shed?
A level base such as compacted gravel, pavers or a purpose-built floor kit works best, and adding a rigid foam layer such as XPS underneath a floating floor improves insulation if the shed sees regular use.
What’s the cheapest way to insulate a shed?
Reflective foil under the roof with a 20 to 40mm air gap, basic EPS wall panels, and good door and window seals gives noticeable comfort improvement for the lowest cost.
How can you insulate a Keter shed?
Fix rigid foam or foil-faced panels to the internal frame using screws with large washers or a resin-rated adhesive, seal all seams with foil tape, and always include a vapour retarder and ventilation to prevent condensation. Keter’s Cortina range provides a stable resin shell suited to this kind of DIY fit-out.


