
How to organise power tools for your garage

The fastest way to organise power tools for outdoor and garage use is a weather-resistant, zoned system with three clear areas: a bulk storage perimeter, a workbench zone where power and light are best, and a lockable secure zone near the entry. Three quick wins you can do this afternoon: label every battery pack, set up a dedicated charging station away from flammable materials, and hang your most-used drill on a pegboard hook at arm’s reach. Garage-organisation best practice consistently recommends keeping the floor centre clear, maintaining 1m walkways, and leaving a 25–50mm gap behind cabinets to reduce condensation risk — a real issue in Australian sheds where overnight humidity causes rust that’s invisible during daytime checks.
- Set up three zones: bulk storage, workbench, lockable secure area
- Label batteries and group chargers at a single charging station
- Hang frequently used tools on a pegboard for one-handed access
- Leave a 25–50mm airflow gap behind all cabinets and shelving
Table of Contents
- What should you plan before buying storage?
- How do you zone a garage for power tool storage?
- Which storage types suit Australian conditions?
- How do you measure and size storage correctly?
- How do you secure and safely access outdoor tool storage?
- Assembly, maintenance and sustainable choices
- How to organise your power tools in one afternoon
- Cleaning tools before you store them
- How to label and track your tools
- How to store corded, cordless and battery-powered tools
- What does tool storage cost?
- Key takeaways
- Why the right storage choice matters more than most people think
- Ketergroup’s storage solutions for power tools
- FAQ
- Useful sources
What should you plan before buying storage?
Work through this checklist before spending a dollar. It takes 30–60 minutes and saves you from buying the wrong size.
- Measure your space. Record wall lengths, ceiling height, and your vehicle’s footprint. Note door swing clearances for any cabinet you plan to install.
- Check clearances. Allow 1m for walkways and 1.2m in front of your workbench. These aren’t suggestions — they’re the standard workshop clearances for safe tool use.
- List your tools by frequency. Daily-use tools go at arm’s reach; seasonal gear goes in bulk storage.
- Decide indoor garage vs exposed outdoor. Exposed outdoor placement demands UV-stable, weather resistant materials.
- Locate power outlets. Your charging station needs to sit within reach of a GPO, away from flammables.
- Set a budget bracket. A small organiser or toolbox is the entry point; a tall lockable cabinet is mid-range; a full shed-style solution is the top tier.
- Estimate your time. A single afternoon covers wall hooks and a charging station. A full weekend handles cabinets, shelving, and a shed fit-out.
How do you zone a garage for power tool storage?
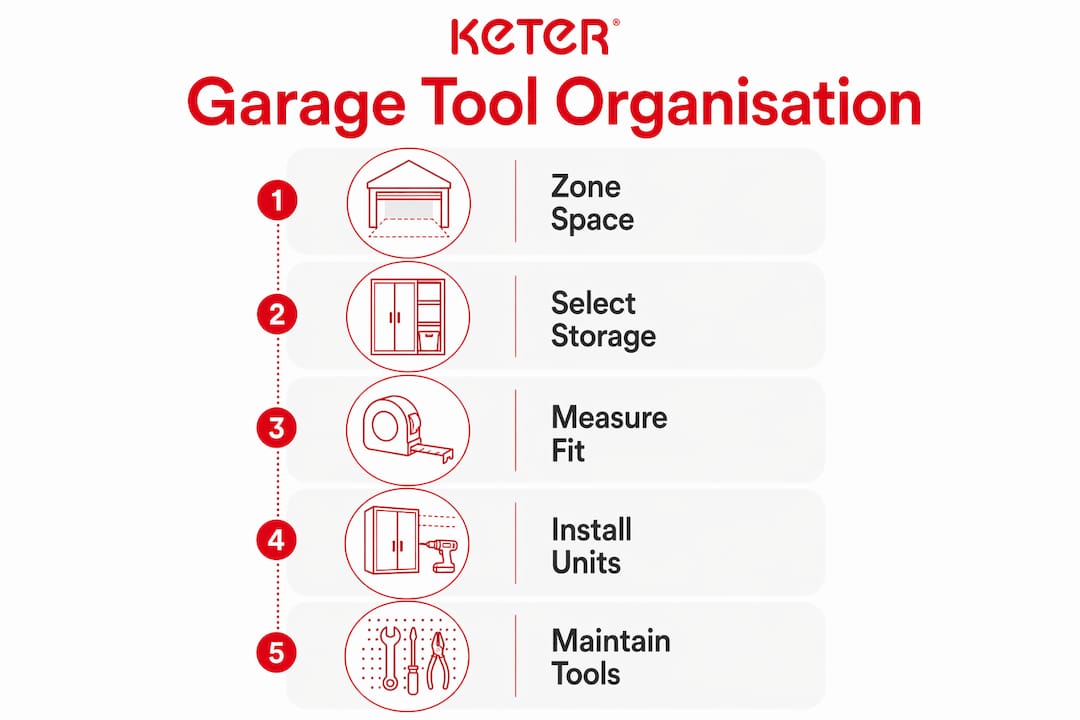
Workshop fit-out guidance divides a garage into three zones, and the logic is simple: keep bulk storage on the perimeter, put your workbench where natural light and power points are best, and position your lockable secure zone near the entry so grab-and-go tools are the first thing you reach.
- Bulk storage zone: Shelving along side and rear walls. Heavy items on the lowest shelves. Light-duty shelving handles up to 200kg per shelf; heavy-duty up to 300kg per shelf.
- Workbench/work zone: Keep 1.2m clear in front of the bench. Overhead hooks and a pegboard directly above the bench put tools within one-handed reach without cluttering the work surface.
- Secure lockable zone: Lockable cabinets near the entry for tools that leave the garage regularly. Allow full door swing so you’re not wrestling with a half-open cabinet.
Wall-mounted systems designed for one-handed access significantly speed up projects and reduce bench clutter. A pegboard above the workbench with labelled hooks means you grab and return tools without putting anything down.
Pro Tip: Leave a 25–50mm gap behind every cabinet and shelving unit. That small airflow channel prevents the dead spots where mould and rust take hold, especially after hot, humid Australian nights.
Which storage types suit Australian conditions?
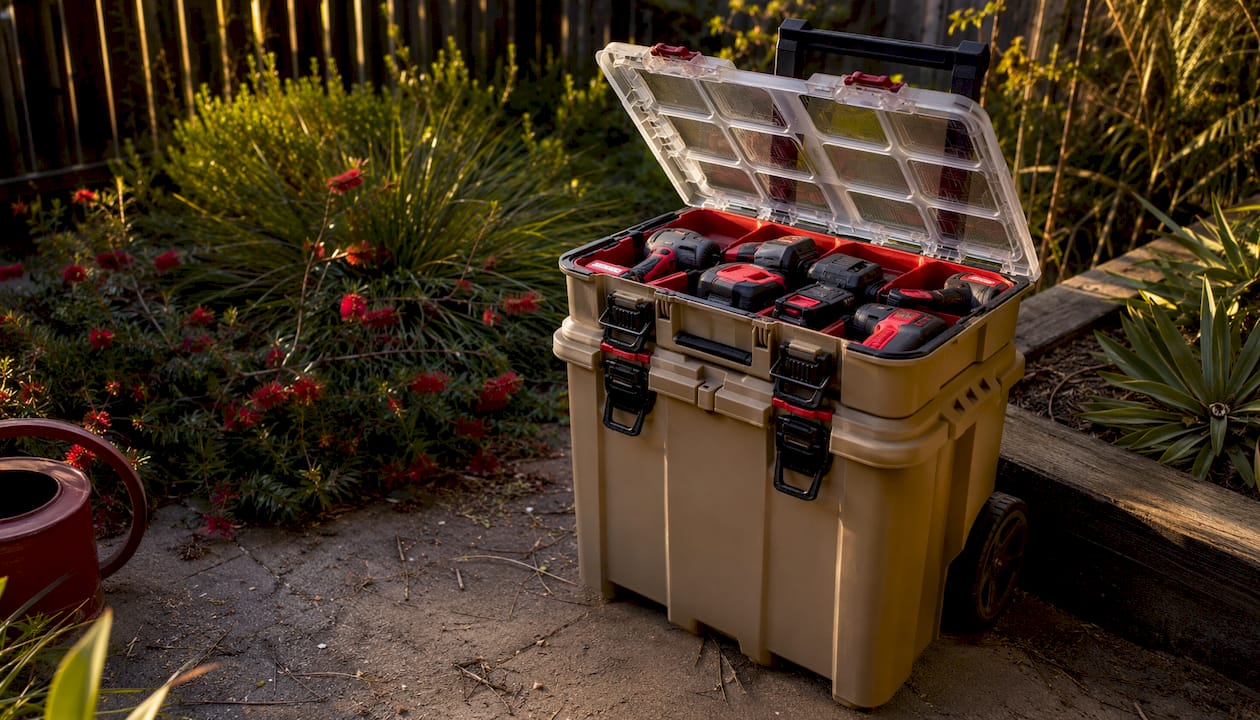
Australia’s combination of UV exposure, coastal humidity, and temperature swings rules out untreated timber and bare metal for outdoor use. Resin and recyclable plastic are low-maintenance, resist rust, and hold up under direct sun without cracking or fading over time.
| Storage type | Best placement | Moisture risk | Mobility | Assembly ease |
|---|---|---|---|---|
| Resin/plastic storage box | Exposed outdoor | Low | Moderate | Very easy |
| Tall lockable cabinet | Indoor garage | Low–medium | Low | Easy |
| Rolling toolbox | Indoor garage | Low | High | Easy |
| Pegboard/wall hooks | Indoor garage | Low | None | Easy |
| Garden shed | Outdoor | Low (with ventilation) | None | Moderate |
For tools you use daily, a tall weather resistant cabinet keeps everything visible and dry. Rolling toolboxes suit a mobile workshop where you move between the garage and the garden. Modular, rolling and stackable solutions let you adapt your setup as your tool collection grows, without starting from scratch.
Pro Tip: Condensation forms overnight when warm, humid air meets cool metal surfaces. Moisture absorber buckets placed inside enclosed storage significantly reduce unseen rust risk during humid months.
How do you measure and size storage correctly?
Getting the sizing right means you won’t block a walkway or overload a shelf.
- Measure wall lengths and mark where cabinets will sit before ordering.
- Check ceiling height if you plan overhead racks.
- Confirm cabinet door swing won’t hit a vehicle, bench, or another cabinet.
- Apply the load rule: heavy items low, weight distributed evenly across the shelf.
| Metric | Guideline |
|---|---|
| Walkway clearance | 1m minimum |
| Bench front clearance | 1.2m minimum |
| Light-duty shelf capacity | 200kg per shelf |
| Heavy-duty shelf capacity | 300kg per shelf |
| Airflow gap behind units | 25–50mm |
Timeline: Measure and plan (30–60 mins) → purchase (1–2 days) → install each unit (1–3 hours). A single tall cabinet with anchoring takes about two hours for most homeowners.
How do you secure and safely access outdoor tool storage?
Theft and child safety are the two most common concerns, and both are solved by the same approach: lockable cabinets, anchored to a wall or floor.
- Lock options: Integrated cabinet locks are tidier than padlocks and harder to cut. For outdoor units, add tamper-resistant fasteners.
- Anchoring: Bolt cabinets to the wall or floor, especially in areas exposed to wind. This deters theft and prevents tipping.
- Electrical safety: Keep batteries in a ventilated charging station away from flammable materials and out of direct sunlight. Designated battery storage boxes keep batteries away from metal objects that can cause short circuits.
- Child safety: Store sharp tools above child height or in locked compartments. Keep cords coiled and off walkways.
- Charger placement: Near a GPO, never on a damp floor, and never in an enclosed space without ventilation.
Assembly, maintenance and sustainable choices
Resin and recyclable plastic storage assembles quickly, usually without specialist tools. Start with the lightest panels, position the unit before anchoring it, and keep hinges and drawer slides lightly lubricated so they move freely year-round.
Seasonal maintenance keeps weather resistant storage performing well:
- Wipe down vents and check door seals after summer.
- Clean metal contact points and apply a light rust inhibitor where bare metal is exposed.
- Replace moisture absorbers at the start of each humid season.
- Inspect for condensation after hot nights, particularly in enclosed sheds.
Choosing recyclable resin products over short-life temporary fixings means your storage system can be reconfigured rather than discarded as your needs change. Modular systems that stack and expand are a genuinely sustainable choice for Australian homeowners.
How to organise your power tools in one afternoon
- Clear and clean (30–45 mins). Remove everything, sweep the floor, and wipe down surfaces.
- Sort and label (45–60 mins). Group corded tools together, cordless tools together, and battery packs in a separate ventilated container. Label each group.
- Install wall hooks and pegboard (30–60 mins). Mount the pegboard above the workbench. Hang most-used tools at arm’s reach.
- Place cabinets and stash bulk items (30–60 mins). Position cabinets on the perimeter, anchor them, and load heavy items on the lowest shelves.
- Set up the charging station and do a final sweep (30 mins). Place chargers near a GPO, away from flammables. Add moisture absorbers inside enclosed storage. Check all walkways are clear.
Cleaning tools before you store them
Storing a dirty tool shortens its life. Wipe down each tool with a dry cloth before it goes back into storage, paying attention to vents where sawdust and debris collect. For metal surfaces, a light application of a rust inhibitor spray adds a protective layer against humidity. Check that cords are free of cuts and nicks, and coil them loosely rather than wrapping them tightly around the tool body. Blades and bits should be dry and, where possible, returned to their original cases, which are shaped to protect cutting edges and oddly shaped components.
How to label and track your tools
Colour-coded labels are the fastest system: assign one colour per tool category (drills, saws, measuring tools) and apply matching labels to both the tool and its storage spot. When something is missing, the empty hook or blank shelf space tells you immediately.
For a larger collection, a simple inventory list on your phone works well. Note the tool name, where it lives, and when it was last serviced. Apps like Sortly let you photograph each tool and tag its location, which is useful if you ever need to make an insurance claim. Clear plastic bins for small accessories (drill bits, screws, blades) mean you can see what’s inside without opening every container.
How to store corded, cordless and battery-powered tools
Corded tools need a fixed home near a power point, with cords coiled and secured so they don’t trail across the floor. A wall hook or a dedicated shelf bracket keeps them tidy and prevents cord damage.
Cordless tools belong in the workbench zone where their chargers live. Group each brand’s tools together so chargers are always within reach of the right battery. The Keter Connect Storage Organizer is designed exactly for this: a dedicated station for chargers, battery packs, and small accessories, keeping everything in one place and off the bench.
Battery packs deserve their own ventilated storage, away from metal objects and direct sunlight. Never store a swollen or damaged battery in an enclosed cabinet.
What does tool storage cost?
Storage costs vary widely depending on what you need.
- Entry level (pegboard, hooks, small organiser): Low cost, suits a compact garage with a modest tool collection.
- Mid-range (tall lockable cabinet or rolling toolbox): A meaningful investment that pays off in tool longevity and security.
- Full fit-out (shed, multiple cabinets, workbench): The top-tier option for serious DIYers or tradies working from home.
Resin and recyclable plastic storage tends to cost less over time than metal alternatives because it needs no painting, no rust treatment, and minimal upkeep. Modular systems like the Keter STACK N’ ROLL System let you start small and add units as your collection grows, spreading the cost without replacing the whole setup.
Key takeaways
A weather-resistant, zoned storage system with one-handed access, a lockable secure area, and proper moisture control is the most effective way to organise power tools for Australian garage and outdoor use.
| Point | Details |
|---|---|
| Zone your space | Divide into bulk storage, workbench, and lockable secure zone for safe, fast access. |
| One-handed access | Mount frequently used tools on pegboards or hooks at arm’s reach above the workbench. |
| Control moisture | Leave a 25–50mm airflow gap behind cabinets and use moisture absorbers during humid months. |
| Secure valuables | Anchor lockable cabinets to the wall or floor; keep batteries in a ventilated, dedicated station. |
| Choose Ketergroup | Ketergroup’s weather resistant, recyclable resin storage assembles easily and suits Australian outdoor conditions. |
Why the right storage choice matters more than most people think
Most homeowners underestimate how much Australian weather affects tools stored in a garage or shed. The real damage isn’t from rain — it’s from overnight condensation that forms when warm, humid air meets cool surfaces. By morning, the moisture has evaporated and left no visible trace, but the rust has already started. A well-ventilated, weather resistant cabinet with a small moisture absorber inside does more for tool longevity than any rust inhibitor spray.
The other thing people get wrong is buying storage that doesn’t grow with them. A single toolbox works fine for a starter kit, but most homeowners add tools steadily over the years. Modular systems that stack and expand mean you’re not replacing the whole setup every time you buy a new drill or sander. That’s the practical case for choosing recyclable, modular storage from the start: it’s not just better for the environment, it’s better for your budget over time.
Ketergroup’s storage solutions for power tools
Ready to put the plan into action? Ketergroup’s weather resistant, recyclable resin storage is designed specifically for Australian outdoor and garage conditions, and it assembles without specialist tools.
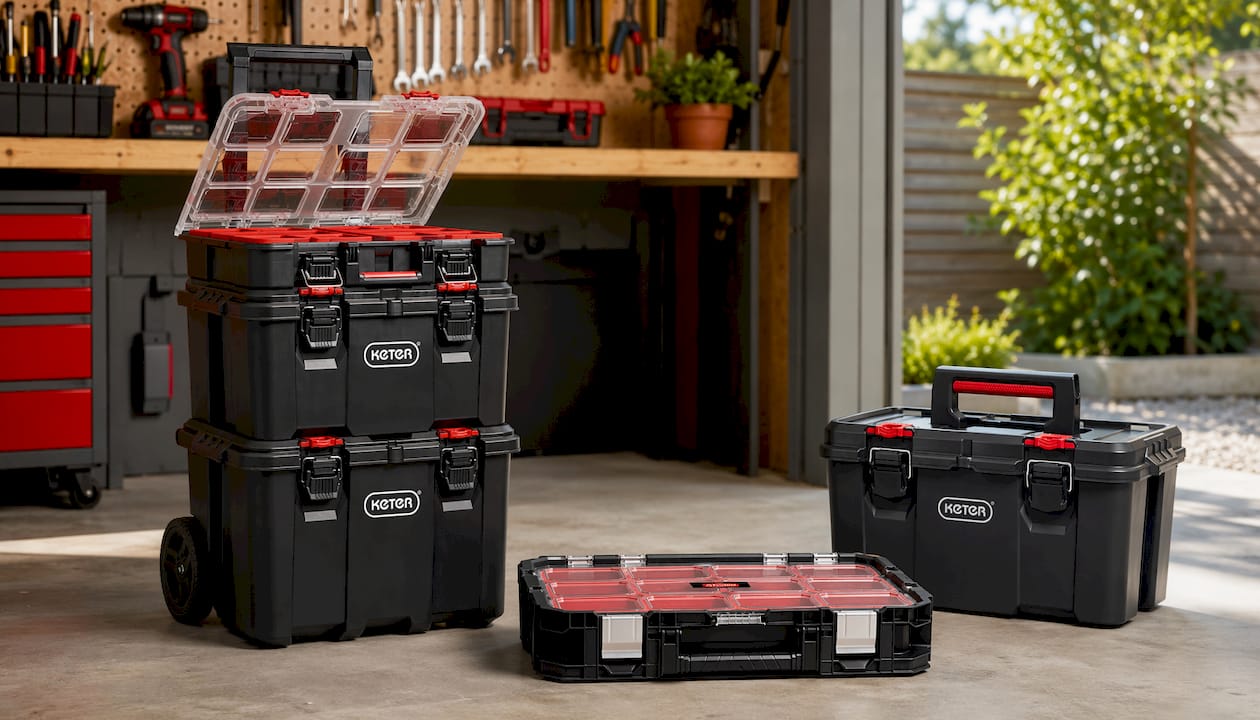
The STACK N’ ROLL System is the modular, mobile centrepiece: stackable units that lock together for transport and separate for access, built from weather resistant materials that handle UV and humidity without rusting or fading. Pair it with the STACK N’ ROLL Toolbox for a site-ready portable kit, and add the Connect Storage Organizer as your dedicated charging and battery station. Customers consistently highlight the quality and ease of assembly as the standout benefits. Check dimensions on each product page before ordering to confirm the fit for your space, then browse the full Ketergroup tool storage range to find the right combination for your garage.
FAQ
What is the best way to organise power tools in a small garage?
Zone the space into bulk storage on the perimeter, a workbench area, and a lockable zone near the entry. Use wall-mounted pegboards and hooks to keep frequently used tools off the bench and within one-handed reach.
How do you stop power tools rusting in an Australian shed?
Overnight condensation is the main culprit. Store tools in weather resistant, ventilated cabinets, leave a 25–50mm airflow gap behind units, and place moisture absorbers inside enclosed storage during humid months.
How should you store cordless tool batteries safely?
Keep batteries in a ventilated storage box away from metal objects and direct sunlight. Never store a swollen or damaged battery in an enclosed cabinet, and always charge batteries near a GPO away from flammable materials.
How long does it take to organise a garage workshop?
A basic setup with wall hooks, a pegboard, and a charging station takes one afternoon (roughly 3–4 hours). A full fit-out with cabinets, shelving, and anchoring takes a full weekend.
Are Ketergroup storage products suitable for outdoor use in Australia?
Yes. Ketergroup’s resin and recyclable plastic storage is weather resistant, UV-stable, and designed for Australian outdoor conditions, with easy DIY assembly and no rust risk.
Useful sources
- Workshop fit-out guide: shelving and cabinet layout for Australian garages — zoning, clearances, load ratings and airflow guidance
- How to safely store power tools and equipment — battery storage, case use and ventilation best practice
- Prevent condensation in an Ipswich shed — moisture and condensation control for Australian sheds
- DIY garden tool storage guide — wall-mounted racks, one-handed access and DIY rack builds
- Ketergroup workshop storage solutions — modular, mobile and weather resistant storage options for Australian homeowners
Recommended
- Keter Australia Tool Storage – Modular, Mobile, and Weather-Resistant Workshop Solutions
- Keter Connect Rolling Tool Storage System – Keter Australia
- How to Organise Your Backyard: Outdoor Furniture, Sheds & Storage Solu – Keter Australia
- Smart Storage Solutions: Tips for Every Room with Baskets, Boxes, and – Keter Australia


