
Keep rats out of your shed: practical steps for homeowners

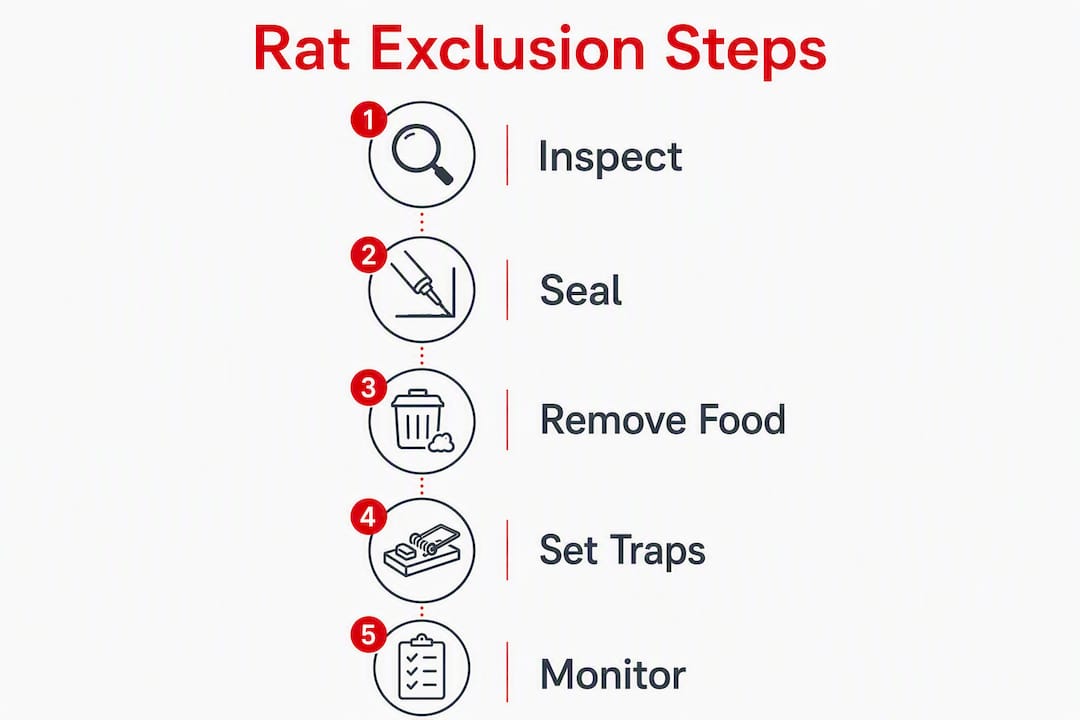
Seal entry points, remove food sources, set snap traps along runways, and monitor weekly. That’s the core of any effective plan to keep rats out of a shed, and the order matters: exclusion first, traps second. Rats need only a very small gap to squeeze through, and signs of an active infestation include thin black droppings 12–18 mm long, greasy rub marks along beams, and gnaw marks on timber or cables. A rat can survive on roughly 15 grams of food per day, which means even a half-open bag of bird seed is enough to sustain a colony.
Start today with these four steps:
- Close obvious gaps. Check the door threshold, slab edge, and any pipe penetrations. Stuff gaps temporarily with steel wool until you can fit a permanent fix.
- Move pet food and bird seed into sealed containers. Cardboard and thin plastic bags offer no real barrier.
- Set multiple snap traps along the walls where you see droppings or rub marks, baited with peanut butter or chocolate.
- Tidy outside clutter. Firewood stacked against the shed wall, leaf piles, and unused building materials are nesting invitations.
The sections below walk through each step in detail, from inspection to calling a licensed pest controller.
Table of Contents
- Why rats are drawn to your shed in the first place
- How to inspect your shed for signs of rats
- How to seal your shed against rats: entry points and materials
- Remove food and nesting sources from and around your shed
- Traps and population control: safe options for Australian homeowners
- Monitor and maintain: what to expect and when
- When to call a licensed pest controller
- Key takeaways
- The case for prevention over repeated control
- Ketergroup sheds and storage: built to keep things out
- Useful sources and further reading
- FAQ
Why rats are drawn to your shed in the first place
Rats are practical creatures. They move toward three things: food, shelter, and easy access. A garden shed often delivers all three without much effort on their part.
Food is the first draw. Bird seed left in an open bag, pet food stored in the shed, compost nearby, or even the residue from a fertiliser sack can sustain a small population. Because rats need only around 15 g of food daily, the threshold for “enough food” is surprisingly low.
Shelter and nesting material come second. Cardboard boxes, old insulation, stacked timber, and piles of fabric or hessian are ideal nesting sites. Rats chew these materials down into fine bedding, and a cluttered shed gives them dozens of undisturbed corners to do it.
Access is the third factor, and it’s where most homeowners underestimate the problem. The two most common Rattus species in Australia, the black rat (Rattus rattus) and the brown rat (Rattus norvegicus), can compress their bodies to fit through gaps as small as 20 mm. Black rats are agile climbers and often enter through eaves or roof vents; brown rats tend to burrow and enter at ground level through slab edges or pipe penetrations.
Seasonally, rat activity in Australia tends to increase during the cooler months of autumn and winter, when rodents seek warm nesting sites and food stores. Breeding can occur year-round in mild climates, so a small problem in March can become a large one by June if left unaddressed.
Pro Tip: If you’re not sure whether you have rats or mice, measure a dropping. Rat droppings are typically 12–18 mm long and tapered at one end; mouse droppings are smaller, around 3–6 mm. The distinction matters because rats require larger exclusion gaps compared to mice to be sealed.
How to inspect your shed for signs of rats
A thorough inspection takes about 20 minutes and tells you exactly where to focus your effort. Work through the following zones in order.
Exterior perimeter: Walk the full outside edge of the shed. Look for burrow holes in the soil near the slab edge, smeared grease marks at low points on the wall, and gnaw damage on timber cladding or door frames.
Under eaves and roof line: Black rats enter high. Check for gaps where the roof sheet meets the wall, damaged fascia boards, and any open vents without mesh.
Door threshold: Crouch down and look for daylight under the door. A gap of more than 6 mm is a potential entry point.
Vents and pipe penetrations: Any opening without a fine-mesh cover is a risk. Dryer vents, electrical conduit entry points, and irrigation pipe holes are commonly overlooked.
Interior floor and walls: Look along the base of walls for droppings, rub marks (dark, greasy smears at body height), and gnaw marks on timber or stored items.
Stored boxes and insulation: Rats nest inside cardboard boxes and behind insulation batts. Pull items away from the wall and check behind them.
| Sign | Likely meaning | Urgency |
|---|---|---|
| Fresh, moist droppings 12–18 mm long | Active infestation, recent activity | High — act within 24 hours |
| Dry, crumbling droppings | Past activity, may be resolved | Medium — inspect for new signs |
| Greasy rub marks on beams or walls | Regular runway in use | High — seal and trap this area |
| Gnaw marks on cables or timber | Active gnawing, structural/fire risk | High — call a professional if cables are affected |
| Burrow holes near slab edge | Established colony nearby | High — professional inspection advised |
| Shredded cardboard or fabric | Active nesting | Medium to high — remove nesting material and set traps |
Pro Tip: For a night check, use a torch with a red filter or a standard torch held low to the ground. Rats are more active after dark and will often freeze briefly in light, making runways and entry points easier to spot. Keep pets inside during the check so you don’t disturb activity patterns.
How to seal your shed against rats: entry points and materials
Exclusion is the single most effective long-term strategy for a rodent-proof shed. Traps catch individual animals; sealing stops the next wave from moving in.
Priority entry points to fix first
- Slab edge gaps: The joint between a concrete slab and the shed wall is one of the most common entry points, especially in older steel sheds. Fill with a concrete mortar mix or install metal flashing pressed firmly into the gap.
- Door bottoms: Fit a heavy-duty rubber or aluminium door sweep. Check that it makes full contact across the width of the door when closed.
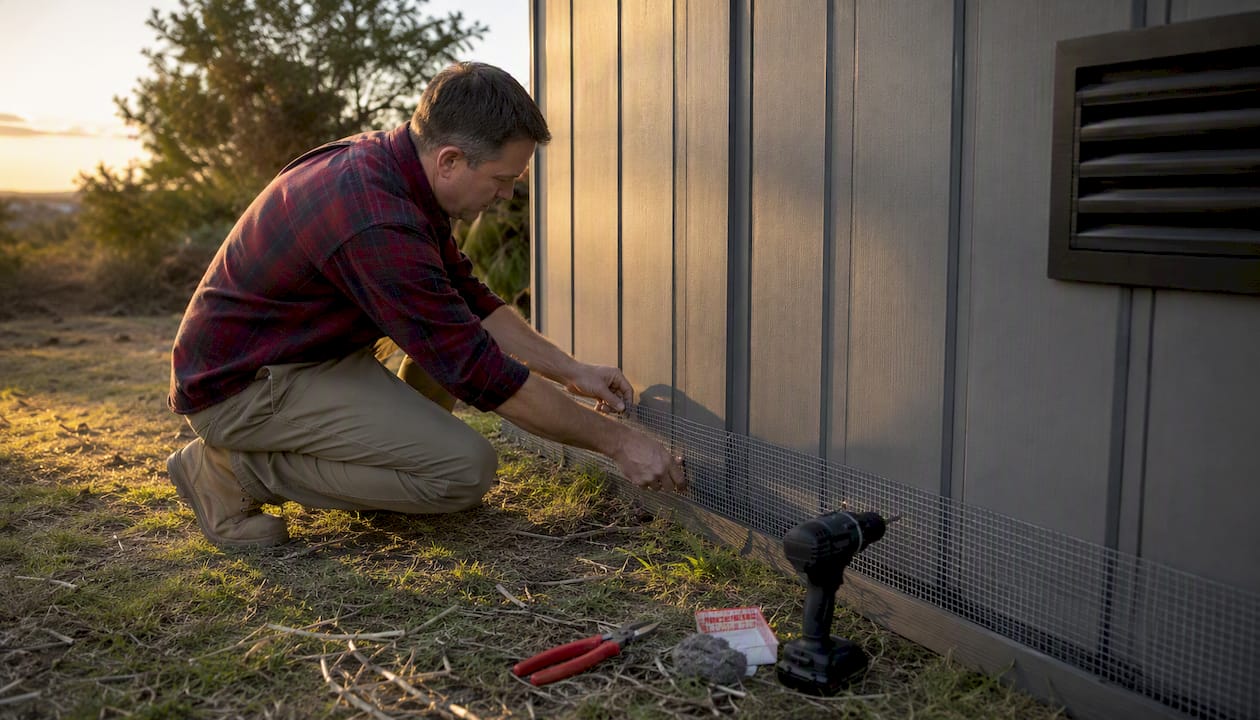
- Vents: Replace open louvre vents with purpose-built vermin-exclusion vents, or cover existing vents with galvanised hardware cloth (wire mesh) with a maximum aperture of 6 mm.
- Pipe penetrations: Pack the gap around any pipe with steel wool, then seal over it with exterior-grade silicone or expanding foam. Steel wool alone compresses over time; the sealant locks it in place.
- Eaves and damaged cladding: For steel sheds, sealed slab edges and proper flashing both deter rodents and improve thermal performance. Replace any damaged or corroded cladding panels and fit foam or rubber eave closures where the roof sheet meets the wall.
Materials that work and why
- Galvanised hardware cloth (6 mm aperture): Rats cannot chew through galvanised steel mesh. Use it to cover vents, large gaps, and any opening you cannot permanently seal with rigid material.
- Steel wool backed with silicone sealant: Effective for pipe penetrations and irregular gaps. The steel wool prevents gnawing; the sealant prevents compression.
- Metal kick plates and door sweeps: Protect the lower section of timber doors, which rats can gnaw through in a matter of days.
- Concrete mortar or flashing: Best for slab-edge gaps in steel or timber sheds.
Step-by-step exclusion process
- Measure every gap you found during inspection. Prioritise anything larger than 6 mm.
- Cut galvanised mesh to size with tin snips, leaving a 30 mm overlap on each side of the opening.
- Anchor the mesh with galvanised staples or screws and washers, not adhesive alone.
- Seal the mesh edges with exterior silicone to prevent rodents from working their fingers under the wire.
- Fit the door sweep and test it by sliding a piece of paper under the closed door. If the paper slides freely, the sweep needs adjustment.
- Revisit all sealed points after two weeks of rain or temperature change, as materials can shift.
Resin-based sheds, such as those in the Keter range, have a significant advantage here: their moulded panels have fewer natural gaps than timber or older steel construction, and there are no rotting boards for rats to exploit. That said, door thresholds and any aftermarket modifications (cable runs, shelving brackets) still need checking.
Pro Tip: If you want the mesh to look tidy rather than patched, paint it with a rust-inhibiting primer in a colour that matches your shed wall. It blends in and lasts far longer than unpainted mesh in coastal or humid climates.
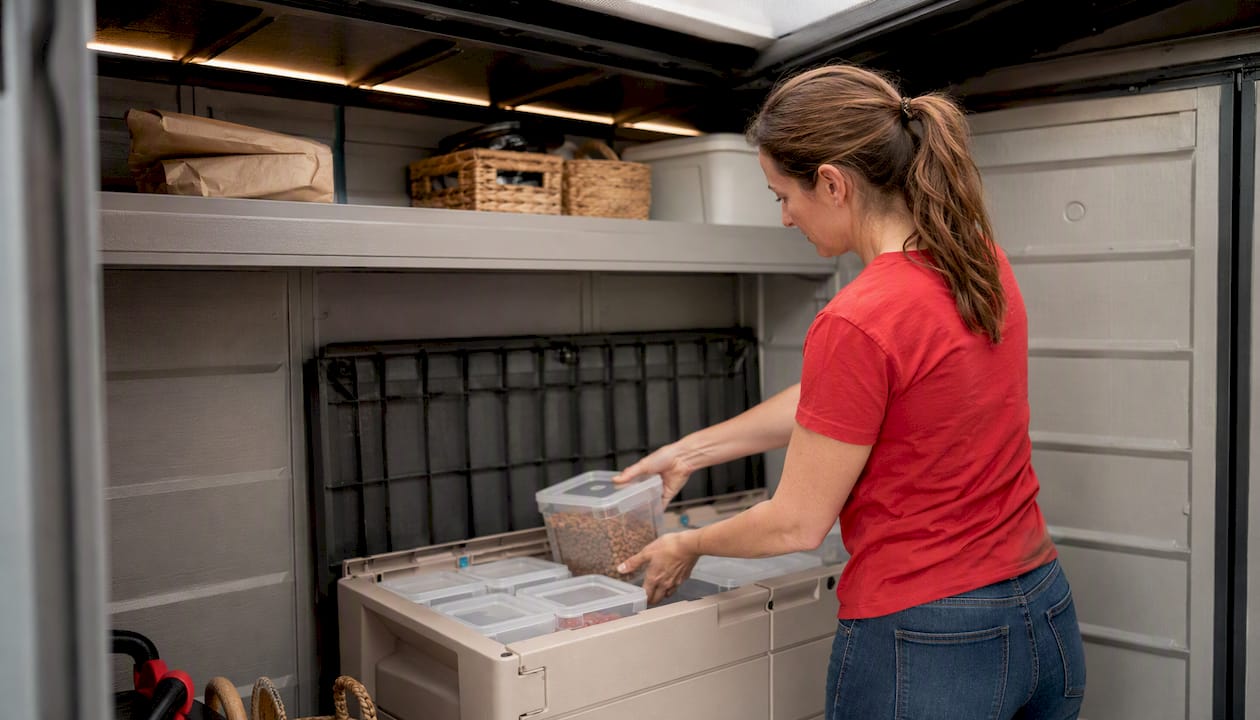
Remove food and nesting sources from and around your shed
Sealing the shell is step one. Denying rats a reason to persist is step two. Even a perfectly sealed shed can be undermined if food and nesting material remain accessible nearby.
Because rats need only around 15 g of food per day, the bar for “enough to sustain a colony” is low. A split bag of wild bird seed, a leaking compost bin, or a bowl of dry dog food left in the shed overnight is sufficient.
- Pet food and bird seed: Move all of it into rigid, airtight containers. Thin plastic bags and cardboard are not barriers. A Curver 15L/6kg pet food container or the larger Curver 54L/20kg option are purpose-built for this, with secure lids that rats cannot pry open.
- Firewood: Stack it at least 40 cm off the ground and away from the shed wall. Ground-level firewood is a classic rat hotel.
- Compost: Use a sealed, rodent-resistant compost bin rather than an open heap. Avoid adding cooked food, meat, or dairy.
- Cardboard boxes: Replace them with sealed plastic storage boxes. Practical shed pest guides consistently flag cardboard as one of the top nesting materials rats exploit.
- Leaf piles and unused materials: Clear them from within 1 metre of the shed. Rats use dense ground cover to move between nesting sites and food sources undetected.
Routine housekeeping checklist:
- Weekly: remove any food scraps, check containers are fully sealed, scan for new droppings.
- Monthly: pull stored items away from walls and inspect behind them, tidy any new clutter.
- Seasonally (before winter): audit all stored food, replace cardboard with sealed plastic boxes, check firewood stack position.
Pro Tip: Natural deterrents such as peppermint oil or eucalyptus can help during the initial exclusion phase, but they work best alongside exclusion and sanitation, not instead of them. Rats re-test areas regularly, so treat these as a temporary support measure rather than a solution.
Traps and population control: safe options for Australian homeowners
Once you’ve sealed entry points and removed food sources, traps deal with any rats already inside. The recommended approach is multiple snap traps set along active runways, checked daily until activity stops.
Step-by-step trap placement
- Identify runways. These are the paths rats travel repeatedly, usually along walls, behind stored items, or under shelving. Look for droppings and rub marks to confirm.
- Set traps perpendicular to the wall, with the trigger end closest to the wall. Rats run along edges and will cross the trap naturally.
- Use peanut butter, chocolate, or nesting material (cotton wool) as bait. Secure bait to the trigger so rats can’t take it without springing the trap.
- Set at least 2–3 traps in each active area. A single trap is rarely enough.
- Pre-bait for 2–3 days without setting the trap if rats are trap-shy. Once they’re feeding confidently, set the mechanism.
- Check traps daily. A dead rat left in a trap deters others and creates a hygiene risk.
Safe disposal of carcasses
- Wear disposable gloves. Do not handle carcasses with bare hands.
- Place the carcass in a sealed plastic bag, then a second bag, and dispose of it in your general waste bin.
- Disinfect the trap and the surrounding area with a diluted bleach solution before resetting.
A note on rodenticides and glue traps
Rodenticide baits can be effective but carry real risks: secondary poisoning of owls, kookaburras, and other wildlife that eat poisoned rats is a documented problem in Australia. Many second-generation anticoagulant rodenticides are restricted to licensed pest controllers for exactly this reason. If you choose to use bait products, read the label carefully, use a tamper-resistant bait station, and keep them completely inaccessible to children, pets, and native wildlife.
Glue traps cause prolonged suffering and are not recommended for general homeowner use. Several Australian states have restrictions on their use, and they pose a risk to non-target animals including lizards and small birds.
A rat needs only around 15 g of food per day. This is why removing every food source matters as much as setting traps. A well-fed rat is harder to lure to a baited trap and more likely to persist despite control efforts.
Monitor and maintain: what to expect and when
Clearing an active infestation takes time. Here’s a realistic timeline so you can plan and stay consistent.
| Phase | Timeframe | Key actions |
|---|---|---|
| Initial response | Days 1–7 | Inspect, seal critical gaps, set traps, remove food sources |
| Active monitoring | Weeks 1–4 | Check traps daily, dispose of carcasses, close secondary gaps |
| Consolidation | Months 1–3 | Review storage, replace cardboard, confirm no new droppings |
| Ongoing prevention | Monthly/seasonal | Inspect shed perimeter, refresh traps if needed, tidy yard |
Check traps every day until you’ve had seven consecutive days with no catches and no new droppings. After that, shift to a weekly check for the first month, then monthly. If activity resumes, restart the daily monitoring phase.
In terms of cost, DIY exclusion materials (mesh, door sweeps, sealant, snap traps) typically run to a modest outlay for most sheds. The bigger investment is time: a thorough initial inspection and seal-up takes a few hours, but it pays off by avoiding repeated control costs and the ecological harm that comes with repeated rodenticide use.
When to call a licensed pest controller
Most rat problems in a garden shed respond well to the DIY approach above. Some situations genuinely need a professional.
- Persistent droppings despite trapping for two or more weeks. This usually means the entry point hasn’t been found, or the population is larger than expected.
- Visible burrows under the shed foundation. Established burrow systems indicate a significant colony and potential structural risk.
- Gnawed electrical cables. This is a fire hazard. Stop using the shed and call a licensed electrician and pest controller.
- Large numbers of rats seen in daylight. Daytime activity often signals a very high population density.
- Exposure risk for children, pets, or immunocompromised household members. A professional can use baits and methods not available to the general public, in a controlled and safe way.
Questions to ask a licensed pest controller
- Can you show me your pest management licence and public liability insurance?
- What methods will you use, and are they safe for pets and native wildlife?
- Will you remove carcasses as part of the service?
- What exclusion work do you recommend, and will you carry it out or advise only?
- Do you offer a follow-up visit or guarantee?
A licensed operator can legally apply second-generation anticoagulant baits in tamper-resistant stations, carry out professional-grade exclusion work, and provide a written monitoring plan. Expect an initial inspection, a treatment phase, and at least one follow-up visit.
Key takeaways
Sealing entry points and removing food sources are the two highest-impact steps to prevent rats in a shed; traps and monitoring reinforce those gains over time.
| Point | Details |
|---|---|
| Exclusion comes first | Seal all gaps larger than 6 mm with galvanised mesh, steel wool, and sealant before setting any traps. |
| Food removal is critical | Rats survive on roughly 15 g of food per day, so move pet food and bird seed into rigid, airtight containers immediately. |
| Inspect using known signs | Fresh droppings 12–18 mm long, greasy rub marks, and gnaw marks confirm active infestation and tell you where to focus. |
| Traps need daily checks | Set multiple snap traps along runways and check them every day until seven consecutive days pass with no catches. |
| Call a professional when needed | Burrows under foundations, gnawed cables, or persistent activity after two weeks of DIY effort warrant a licensed pest controller. |
| Ketergroup storage and sheds | Weather-resistant resin sheds and sealed storage boxes from Ketergroup reduce nesting sites and food access, supporting long-term prevention. |
The case for prevention over repeated control
Most of the advice you’ll find on shed rodent control focuses on what to do once rats have moved in. That’s understandable, but it misses the more useful question: why did they move in, and what would make the shed genuinely unattractive to them long-term?
The honest answer is that traps and baits are maintenance, not solutions. They manage a symptom. The underlying conditions, gaps in the shell, food stored in cardboard, clutter that creates undisturbed corners, remain until you change them. A homeowner who seals their shed properly, upgrades their storage, and keeps the yard tidy will deal with rats far less often than one who relies on bait stations alone.
There’s also an ecological argument worth making plainly. Repeated rodenticide use in suburban gardens is a known driver of secondary poisoning in raptors and other wildlife. Barn owls, boobook owls, and kookaburras all eat rodents, and they accumulate the toxins from poisoned prey. Choosing exclusion and snap traps as your primary tools isn’t just safer for your household; it’s better for the birds hunting in your neighbourhood.
The low-toxicity, DIY-first approach outlined in this guide isn’t a compromise. It’s the more durable and responsible option, and for most Australian homeowners with a standard garden shed, it’s entirely achievable without professional help.
Ketergroup sheds and storage: built to keep things out

A well-built shed does a lot of the exclusion work for you. Ketergroup’s weather-resistant resin garden sheds, including the spacious Keter Cortina 11x7 (3.4 x 2.2m), the mid-sized Keter Cortina 9x7 (2.8 x 2.2m), and the compact Keter Manor 4x6 in Grey (1.3 x 1.9m), are moulded from durable resin with fewer natural gaps than timber or older steel construction. There’s no rotting cladding for rats to exploit, and the panel joins are tight by design.
Inside the shed, the storage you choose matters just as much as the shell. The KIS Scuba Box XLarge in White and the Curver Style Storage Box Set (S+M+L) in Brown give you rigid, sealed storage that replaces the cardboard boxes rats love to nest in. For bulk pet food or bird seed, the Curver pet food container range handles everything from small daily portions up to 20 kg bags, all with secure lids.
Ketergroup also offers outdoor sofas and lounge sets, including the Rosalie 2 Seater Sofa, Keter Salta 2 Seater Sofa with Oat Cushions, and the Emma 2 Seater Sofa, so once your shed is sorted, the rest of your outdoor space can be too.
Browse the full range of Ketergroup garden sheds and storage boxes to find the right fit for your space and start building a shed setup that rats simply won’t find worth the effort.
Useful sources and further reading
Good information makes the difference between a fix that lasts and one that doesn’t. These Australian resources are worth bookmarking:
- HealthyWA: Keeping rats and mice under control — Western Australia’s Department of Health guide covering signs, traps, and safe disposal.
- Allstate Pest: How to get rid of rats — practical Australian pest control advice including the defence-in-depth approach.
- Cure All Pest: Shed pest control homeowner’s guide — covers storage upgrades and gap sealing for Australian conditions.
- Envirobug: What is the most effective rodent deterrent? — balanced look at natural deterrents and where they fit in a broader control plan.
- Ketergroup: Shed security ideas for homeowners — practical shed security and maintenance tips from the Ketergroup blog.
For region-specific advice on bait disposal schemes or local pest management regulations, check your state or territory health department website, or contact your local council directly.
FAQ
What is the best rat deterrent for sheds?
Physical exclusion is the most effective deterrent: sealing all gaps larger than 6 mm with galvanised mesh, steel wool, and sealant removes the entry points rats rely on. Snap traps set along active runways are the best control method once exclusion is in place.
What smell do rats absolutely hate?
Rats are strongly averse to peppermint oil and eucalyptus, but these work best as a short-term support measure during exclusion work, not as a standalone fix. Rats re-test areas regularly and will return once the scent fades.
What repels rats immediately?
Bright light and disturbance can cause rats to temporarily vacate an area, but neither provides lasting protection. The fastest effective action is removing food sources and setting snap traps along runways, which disrupts activity within a day.
How common are rats in sheds in Australia?
Rats are among the most frequent shed invaders across Australia, particularly in autumn and winter when they seek warm nesting sites. Both the black rat and the brown rat are widespread in suburban areas, and a garden shed with food, clutter, or gaps in the shell is a reliable target.
Recommended
- Shed security ideas for homeowners: practical fixes – Keter Australia
- Top 8 Things You Need to Know Before Buying a Garden Shed from Keter – Keter Australia
- From Bikes to BBQs: What Fits In A Keter Shed – Keter Australia
- How to Organise Your Backyard: Outdoor Furniture, Sheds & Storage Solu – Keter Australia


