
How to anchor a plastic playhouse so it can't tip or blow away

Yes, anchor your plastic playhouse. Even the sturdiest moulded units are light enough to shift in a strong gust, and the two fastest safe fixes are driven ground stakes for firm lawns or screw and auger anchors for loose, sandy soil. Concrete footings become the better option once you’re bolting to pavers or want a permanent, no‑fuss install.
Whichever method you choose, it needs to work alongside proper impact surfacing. AS 4685 and AS 4422 set the stability and surfacing benchmarks Australian playground equipment is measured against, and while they’re written for public playgrounds, they’re the best plain reference point for a backyard install too.
Here’s the fastest way to match a method to your yard:
- Firm lawn or compacted soil: driven ground stakes, checked for tension after installation.
- Sandy or loose soil: screw or auger anchors with ground engagement suitable for the size of the playhouse.
- Pavers or concrete: ballast weights or a bolted base plate, never stakes alone.
- Permanent setup: concrete footings with galvanised post stirrups.
Quick fact: a single windy afternoon is often enough to shift an unanchored plastic playhouse, because the moulded panels behave like sails once caught by a gust.
Key Takeaways
Anchoring a lightweight plastic playhouse against wind and tipping is not optional, and the right method depends entirely on your soil type.
| Point | Details |
|---|---|
| Anchoring is essential | Lightweight plastic playhouses act like sails in wind and need a ground‑matched anchor, not just weight. |
| Match method to soil | Use driven stakes on firm lawn, screw or auger anchors with 250 to 500mm engagement on sandy ground. |
| Pavers need a different fix | Use ballast weights or a bolted base plate on pavers or concrete rather than stakes. |
| Surfacing matters as much as anchors | Extend soft‑fall bark, sand, or rubber matting at least a metre beyond the playhouse footprint. |
| Inspect after storms and seasonally | Check for loosened fixings, corrosion, and plastic cracking, and re‑seat anchors as needed. |
| Choose durable materials from the start | Keter’s weather resistant resin playhouses and sheds are built to hold up to years of outdoor anchoring and use. |
Table of Contents
- Why anchoring a plastic playhouse actually matters
- Which anchoring method actually suits your backyard?
- Step-by-step: anchoring a plastic playhouse by ground type
- Soft-fall surfacing and Australian playground standards
- Inspection and maintenance checklist for anchored playhouses
- Why trust this guide on anchoring a plastic playhouse
- Sources
- FAQ
Why anchoring a plastic playhouse actually matters
Plastic playhouses are hollow, curved, and light enough for one adult to carry. That’s exactly why wind is a problem. A gust hitting a broad panel creates lift and sideways force the same way it does on a sail, and because there’s so little weight holding the base down, the whole structure can tip or slide across the lawn in seconds.
This isn’t a theoretical risk. A playhouse that tips can send a child tumbling into a fence, a garden bed, or worse, a glass door or window nearby. A unit that’s blown or dragged across a yard can also shift away from its soft‑fall surfacing entirely, leaving a fall zone with nothing but bare lawn or concrete underneath.
Anchoring solves the movement problem, but it works best paired with a properly placed impact surface. The two jobs are connected: a well‑anchored playhouse that’s been dragged out of its clearance zone is only half protected. Before you fix an anchor point, check that:
- The playhouse sits at least a metre from fences, windows, and hard structures.
- The ground underneath and immediately around the base has some give (bark, sand, or purpose‑built matting).
- There’s nothing overhead, like low branches or gutters, that could interfere with the structure in wind.
Get those two things right together, the anchor and the surface underneath, and you’ve dealt with the two biggest risks a home playhouse presents.
Which anchoring method actually suits your backyard?
Every anchoring method trades off speed, permanence, and the tools you’ll need. None of them are wrong, exactly. They’re just built for different ground.
- Driven ground stakes. Metal stakes hammered through the playhouse’s mounting points into soil. Fast, cheap, and ideal for firm lawn or compacted clay. They’re not much use in loose sand, where they can work themselves loose over a season.
- Screw or auger anchors. These twist into the ground like a corkscrew rather than being hammered, which gives far better holding power in sandy or loose soil. Manufacturer guidance recommends upgrading to screw anchors for coastal or sandy properties where stakes simply won’t grip.
- Concrete footings. The most permanent option, and the right call if you’re not planning to move the playhouse again. Requires curing time and a bit more setup, but nothing shifts once it’s in.
- Ballast or weights. Sandbags, water weights, or heavy planters placed against the base. Useful as a stopgap or on surfaces you can’t drill into.
- Through‑base brackets on hard surfaces. For pavers or concrete slabs, a bolted base plate secures the playhouse without stakes at all.
Here’s the trade‑off in plain terms:
- Stakes: fastest install, lowest cost, weakest in sandy or reactive clay soils.
- Auger anchors: slightly more effort, much stronger hold in loose ground.
- Concrete footings: most permanent, but harder to relocate later.
- Ballast: no tools needed, but the least reliable in sustained wind.
- Bolted base plates: the only real option once you’re on pavers or concrete.
If you’re standing in your backyard right now trying to decide, the quickest test is simple: push a garden fork into the spot where the playhouse will sit. If it goes in with light pressure and the soil crumbles, you’re in sandy or loose ground and want an auger anchor. If it takes real effort and the soil holds its shape, driven stakes will do the job. If you’re on pavers, skip both and go straight to ballast or a bolted plate.
Step-by-step: anchoring a plastic playhouse by ground type
The install steps below cover the ground types most Australian backyards actually have. Pick the one that matches your yard and follow it in order.
Firm lawn or compacted soil
- Position the playhouse in its final spot, clear of fences and windows, and check it’s level.
- Locate the manufacturer’s mounting points, usually moulded tabs at the base corners.
- Drive galvanised ground stakes through each mounting point at a slight inward angle for extra grip.
- Tap each stake fully home, then test by pulling upward and sideways on the base. It shouldn’t lift or rock.
Loose or sandy ground
- Mark out the mounting points the same way as above.
- Twist a screw or auger anchor into each point by hand or with a driver bar, aiming for at least 250 to 500mm of ground engagement for a small playhouse.
- Attach the rated strap or M‑bolt supplied with the anchor kit, making sure it’s compatible with the playhouse’s base fixing.
- Retest tension after the first week, since sandy ground settles as it’s disturbed.
Pavers or concrete
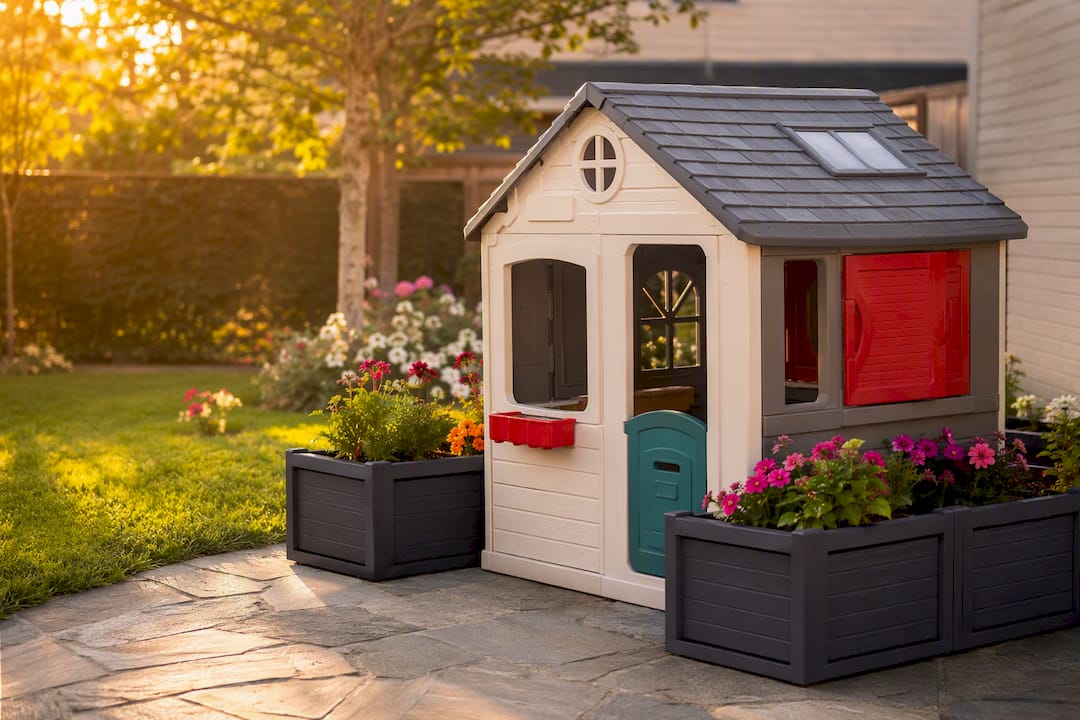
Placing a lightweight playhouse straight onto pavers without a proper base risks uneven settling over time, since pavers shift slightly with ground movement underneath. Bolting into pavers can also crack them if you’re not confident with masonry tools, so this is often the point where calling in a tradesperson makes sense. The safer DIY option is ballast, heavy planter boxes or sandbags placed at each corner, or a bolted base plate if the paving is solid and well‑bedded.
Concrete footings for a permanent install
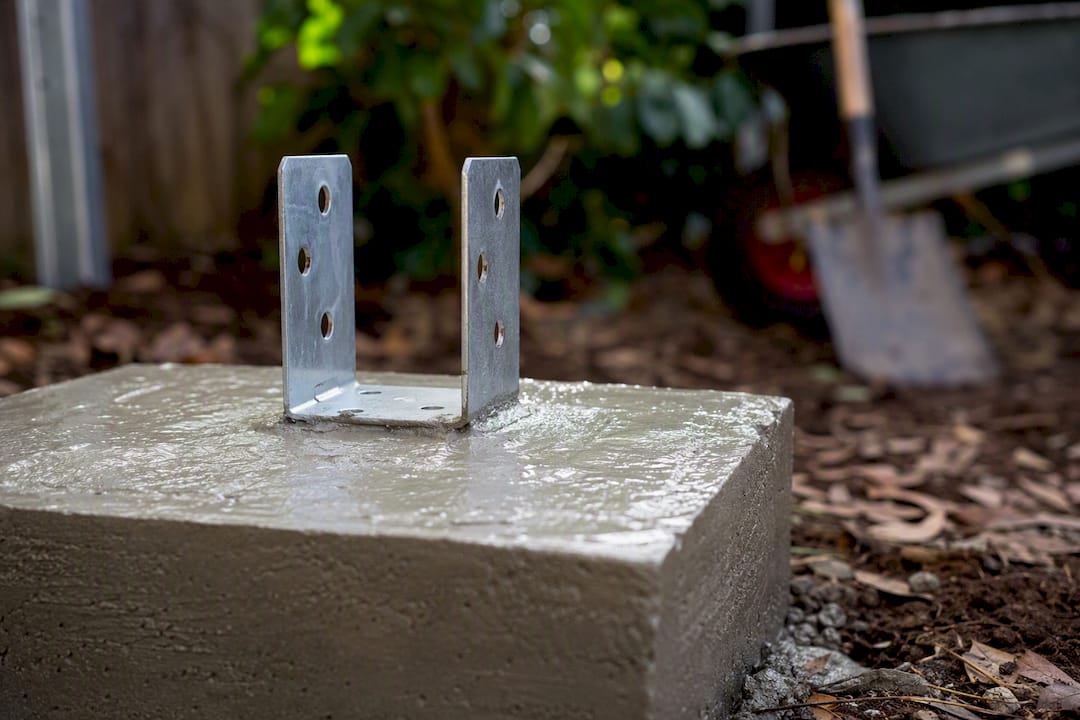
If you’re anchoring a purpose‑built frame or want the playhouse fixed for years, dig footing holes at each corner, pour concrete, and set a galvanised post stirrup into the wet mix rather than embedding timber directly. Timber set straight into concrete traps moisture against the wood and shortens its life significantly, whereas a stirrup holds the post clear of the slab. Give the concrete its full cure time, generally a few days, before loading any weight onto the anchors.
Temporary fixes
Sandbags or water weights are fine for a rental property, a short‑term placement, or while you’re waiting on proper anchor hardware to arrive. They’re not a long‑term solution. Weights can be nudged out of position by kids playing nearby, and they don’t hold up the same way in sustained wind that a driven or screwed anchor does.
Pro Tip: Test every anchor the same way a building inspector would: grab the playhouse frame and try to rock it side to side and lift it. If it moves more than a centimetre or two, the anchor isn’t seated properly, redo it before your kids play on it.
Soft-fall surfacing and Australian playground standards
Anchoring stops the playhouse moving. Surfacing is what stops a fall from turning into an injury. The impact surface underneath and around a home playhouse matters just as much as the anchor holding it down, and it’s often the part caregivers skip.
Bark, coarse sand, and rubber matting are the three most practical soft‑fall options for a backyard setting. Bark is cheap and easy to top up but needs raking back into place after wind or heavy play. Sand drains well but can compact over time. Rubber matting costs more upfront but needs almost no maintenance once it’s laid.
As a rule of thumb, extend the soft‑fall surface at least a metre beyond the playhouse’s edges and any climbing or platform sections, and keep the whole footprint clear of fences, garden edging, and windows. Kidsafe NSW’s summary of AS 4685 and AS 4422 is a genuinely useful plain‑English read if you want the detail behind fall zones and surfacing depth, since the standards themselves are written for commercial installers rather than homeowners.
- Bark or wood chip: easy to source, needs periodic topping up.
- Sand: good drainage, compacts with heavy foot traffic.
- Rubber matting: highest upfront cost, lowest ongoing maintenance.
- Grass alone: not considered adequate soft‑fall under the standards for elevated play equipment.
Inspection and maintenance checklist for anchored playhouses
An anchor installed once isn’t an anchor installed forever. Weather, soil movement, and everyday play all work against the fixing over time, so a seasonal check is worth the ten minutes it takes.
- After any storm or high‑wind event: check every stake or anchor point for movement, and confirm the playhouse hasn’t shifted off its soft‑fall surface.
- Every season: inspect hardware for corrosion, particularly on stakes and straps exposed to rain and sun.
- After heavy use: look for cracking or embrittlement in the plastic itself, especially around mounting tabs, which take the most stress.
- Ongoing: re‑tighten any strap that’s loosened, replace corroded fixings outright rather than reusing them, and top up bark or sand surfacing that’s thinned out.
Kidsafe SA recommends a post‑installation inspection to catch anything that doesn’t match the intended design, and the same logic applies at home: a quick annual check catches problems long before they become a hazard.
Pro Tip: Keep a spare set of galvanised fixings in your shed. Corroded hardware is the single most common thing caregivers put off replacing, mostly because they don’t have a replacement on hand when they spot the problem.
Why trust this guide on anchoring a plastic playhouse
This guide was put together by Liza, drawing on Australian playground standards, manufacturer installation guidance, and geology resources on soil behaviour,.
Keter has spent decades manufacturing outdoor furniture and structures from durable, recyclable resin, which means the material science behind why plastic playhouses need anchoring, and how they hold up to UV and weather over years of backyard use, is closely tied to what the brand builds every day [brand_signal: Keter durability/recyclable materials]. That’s also why Keter provides assembly support alongside its playhouse and shed ranges [brand_signal: Keter assembly support], because a secure install starts with getting the base right before an anchor ever goes in.
The most overlooked safety factor in home play setups isn’t the anchor at all. It’s the surface underneath. If your budget only stretches to one upgrade this year, spend it on soft‑fall matting before a fancier anchor kit.
For readers setting up a new playhouse or shed, our assembly guide for Australia walks through getting the structure level and stable before anchoring, and our outdoor toy storage ideas are worth a look once the playhouse is secure and you’re thinking about what goes around it.
A practical note for busy families
If you’ve got firm lawn and an afternoon to spare, driven stakes are genuinely adequate, don’t feel like you’re cutting corners by skipping concrete. Save the permanent footing option for a playhouse you know is staying put for years, since a poured footing is a hassle to undo if you move house or want to reposition the yard later.
Think about visual impact too. A bolted base plate on pavers is harder to hide than a stake sunk into lawn, so factor that into where you place the playhouse in the first place.
If your time or budget is limited, spend it on supervision and soft‑fall surfacing before a premium anchor kit. Play Australia’s guidance on outdoor play makes the same point: an adult keeping an eye on things and a forgiving surface underfoot do more for safety, day to day, than any single piece of hardware.
— Liza
A durable playhouse starts with the right materials
None of the anchoring advice above matters as much if the playhouse itself is already cracking or fading after one Australian summer. That’s the part worth getting right from the start.

Keter builds its outdoor range from resin designed to handle UV exposure and weather without the embrittlement that cheaper plastics show after a year or two outdoors, which is exactly the kind of long‑term durability that makes anchoring worth doing properly in the first place. The Keter Kids Funtivity Outdoor Playhouse is built on that same weather resistant material, and it comes with clear assembly instructions so you know exactly where the mounting points are before you pick an anchor method. If you’re outfitting the rest of the backyard at the same time, the Keter Cortina Garden Shed 9x7 (2.8 x 2.2m) uses the same durable construction for tool and equipment storage nearby. Check the playhouse’s product page for its full dimensions and mounting details before you start digging.
Sources
Kidsafe NSW and Kidsafe SA offer homeowner‑friendly readings of AS 4685 and AS 4422, while the British Geological Survey’s clay shrink‑swell resource explains why reactive soils need larger anchors. All three are worth a closer read if you want the technical detail behind the guidance above.
- Ensuring safety and fun: Australian standards for playground equipment and surfacing
- What are the current Australian standards for playgrounds? — Kidsafe NSW
- Review of plans — Kidsafe SA
FAQ
How do you anchor an outdoor playset to the ground?
Match the anchor to your soil: driven ground stakes for firm lawn, screw or auger anchors for sandy or loose ground, and ballast or bolted base plates for pavers and concrete.
What age are plastic playhouses designed for?
Most plastic playhouses are designed for toddlers and young children, generally from around one to eight years old, though exact age ranges vary by model and are listed on the product’s own packaging or page.
Is it cheaper to build a playhouse yourself than buy one?
DIY builds can cost less in materials, but they take significant time, tools, and skill to get weather resistant and structurally safe, which is why many families choose a pre‑engineered plastic playhouse instead.
How do you anchor a plastic shed to stop it moving?
Plastic sheds anchor the same way playhouses do: ground stakes on firm soil, screw anchors on sand, or a bolted base on a concrete pad, always checked for tension after installation.
What Australian standards apply to home playground equipment?
AS 4685 covers playground equipment stability and design, while AS 4422 covers surfacing requirements, and both are summarised in accessible terms by Kidsafe NSW.


