
For Sheds Over 6 Square Metres in Australia, Combine Tie Down Methods

Concrete slabs call for wedge or expansion anchors bolted through L‑brackets into the base rail. Timber floors and skids need screw‑in or helical ground anchors backed up by tensioned straps. Soft soil or lawn sites do best with helical anchors or small concrete piers holding cable or strap tension. Wind loading under AS/NZS 1170.2 decides how heavy‑duty you go, and if you’re in a cyclone‑prone region, get an engineer to check your plan before you drill anything.
TL;DR:
- Concrete slab anchors provide the strongest, permanent fixing and are essential for sheds over six square meters on solid foundations.
- Combining two methods, such as helical anchors with tension straps, is standard practice for larger or high-wind sites, especially in cyclone-prone regions.
- Always verify anchor kits specify load ratings in kilonewtons and use corrosion-resistant hardware suitable for your climate before purchase.
- Proper installation involves precise drilling, tightening to manufacturer specifications, and regular inspections after storms to maintain effectiveness.
- DIY is suitable for small sheds on solid slabs in low-wind areas, but larger or exposed sites benefit from professional assessment and engineered solutions.
Table of Contents
- Which shed tie down methods actually work?
- What’s actually in a shed anchor kit?
- How do I install shed anchors step by step?
- How do you choose the right tie down system?
- How do you secure a resin or plastic shed properly?
- When should you DIY this and when should you call a professional?
- Keep everything organised once your shed is secured
- Sources
- FAQ
Which shed tie down methods actually work?
Every shed tie down method does the same job from a different angle: keeping wind uplift from turning your shed into a kite. The trick is matching the method to your foundation and your local wind exposure, not just grabbing whatever kit is cheapest at the hardware store.
Concrete anchors (wedge or expansion bolts) are the gold standard for slab foundations. They drill directly into cured concrete and hold with serious shear and pull-out strength. Downside: they’re permanent. Once you’ve drilled the slab, that shed isn’t moving without a fight.
Screw and helical ground anchors suit timber floors, skids, and soft ground alike. You twist them into the earth like a giant corkscrew, which makes them one of the few genuinely portable options if you ever relocate the shed.
Strap tie-downs wrap over the roof or around the frame and anchor to the ground or a slab edge. They’re affordable and easy to install, but a strap system alone rarely satisfies higher wind ratings, it works best paired with another anchor method.
Wire cable systems function similarly to straps but handle higher tension loads, useful for larger sheds or exposed sites.
Concrete piers go in around the shed perimeter and give cable or strap systems something immovable to anchor to on ground where helical anchors can’t get enough grip.
For anything over about six square metres, or a site that copes with regular strong wind, combining two methods (say, helical anchors plus straps) is standard practice rather than overkill.
What’s actually in a shed anchor kit?
Anchor kits differ depending on what you’re anchoring into, and reading the fine print matters more than the price tag.
A concrete slab kit typically includes L-brackets, expansion or wedge bolts, washers, and nuts, everything needed to fix the base rail directly to cured concrete. A timber floor kit usually swaps the bolts for screw-in or helical anchors, plus joist hangers if you’re tying into bearers rather than a slab edge. Foundation type genuinely dictates the correct anchor system, so don’t assume one kit suits every base.
Strap and cable kits bring their own hardware: ratchets or turnbuckles for tensioning, and either galvanised steel (fine for most inland sites) or stainless steel (worth the extra cost near the coast, where salt air chews through cheaper coatings fast).
Pro Tip: Check the kit’s rated capacity in kilonewtons (kN) before you buy. AS/NZS 1170.2 is the standard engineers use to calculate wind loads on structures, and a kit with no stated kN rating is a kit you can’t verify against your local wind region.
Before you check out, run through this shortlist:
- Does the kit state a load or uplift rating in kN?
- Is the hardware galvanised or stainless, and does that suit your climate?
- Does it include enough anchors for your shed’s full perimeter, not just the corners?
- Are strap or cable lengths adjustable for your specific shed height?
How do I install shed anchors step by step?
The steps below cover the three most common foundations. Read through the whole sequence before you start, because a rushed anchor point is often worse than none at all.
Tools and PPE: hammer drill with masonry bit (for slabs), socket set or spanner, tape measure, safety glasses, gloves, and a torque wrench if your kit specifies a tightening spec.
- Concrete slab: Mark bracket positions evenly along the base rail. Drill to the depth stated on the anchor packaging, using the correct masonry bit size, then insert the wedge or expansion anchor and tighten to the manufacturer’s torque guidance. Bolt the L-bracket to the base rail last, once every anchor point is set.
- Timber floor or skids: Locate the floor joists first; anchoring into a joist beats anchoring into thin decking every time. Fit joist hangers or base plates where needed, drive the screw or helical anchors into the ground alongside the frame, then attach straps and tension them with a ratchet or turnbuckle until firm, not overtight.
- Soft ground or lawn: Drive auger or helical anchors to their full rated embedment depth, usually deeper than you’d expect for a light structure. In genuinely loose or sandy soil, pouring a small concrete pad around each anchor point adds meaningful holding power.
Once installed, give every strap and cable a firm hand-check for tension and inspect anchors for early corrosion after the first few storms.
Stop and call a structural engineer if your shed is large, sits in a mapped cyclone region, or you’re not confident about what’s underneath the topsoil. Kit shed engineering is frequently generic and doesn’t always account for unusual site conditions.
How do you choose the right tie down system?
Start with four questions: how big and heavy is the shed, what’s your roof profile, what wind region are you in, and what’s underneath it (slab, timber, or soil)?
Larger sheds and higher-pitched roofs catch more wind, which pushes you toward combined methods rather than a single strap system. If your council falls under a cyclone-rated wind region, expect to need heavier anchors regardless of shed size.
Watch for these red flags when comparing kits or quotes:
- No stated uplift or load rating in kN.
- Straps or cables with no rated tensile strength listed.
- No mention of corrosion grade or material spec.
- Vague or missing installation instructions.
If you’re getting a supplier or installer to help, ask directly: what’s the rated capacity, does it reference AS/NZS 1170.2, is there an installation template supplied, and what does the warranty actually cover?
On permits, most sheds under roughly 10 square metres and under 3 metres high are exempt from council approval, though local overlays for bushfire or flood zones can still change that. Anything bigger typically needs a permit, and a permit usually triggers a requirement for engineered drawings.
Inspect straps and anchors at least once a year, and always after a significant storm. Replace anything frayed, rusted, or loosened, straps are cheap compared to a shed that ends up in the neighbour’s yard.
How do you secure a resin or plastic shed properly?
Resin sheds behave differently to steel or timber ones, and generic tie-down advice doesn’t always translate. Keter designs its sheds with a reinforced base rail specifically because that’s where anchoring loads should go, not the wall panels themselves.
- Always anchor through the base rail or designated anchoring points, never straight through a wall panel, resin flexes under load in a way that panel-only fixings can’t handle.
- For coastal or humid areas, stainless steel fasteners resist corrosion far better than standard galvanised hardware over time.
- If you’re retrofitting an already-assembled shed, check that original attachment points haven’t loosened during assembly, and reinforce them before adding external anchors.
- Refer to your model’s assembly instructions for the exact base rail anchor points, they vary between shed sizes.
Manufacturer guidance on securing outdoor items from wind applies the same underlying principle: attach to structural points, not decorative panels.
When should you DIY this and when should you call a professional?
Small sheds on a solid slab, or simple timber-skid setups in low-wind regions, are genuinely within reach of most confident DIYers with a hammer drill and an afternoon. That’s not false modesty, it’s just an accurate read of the risk involved.
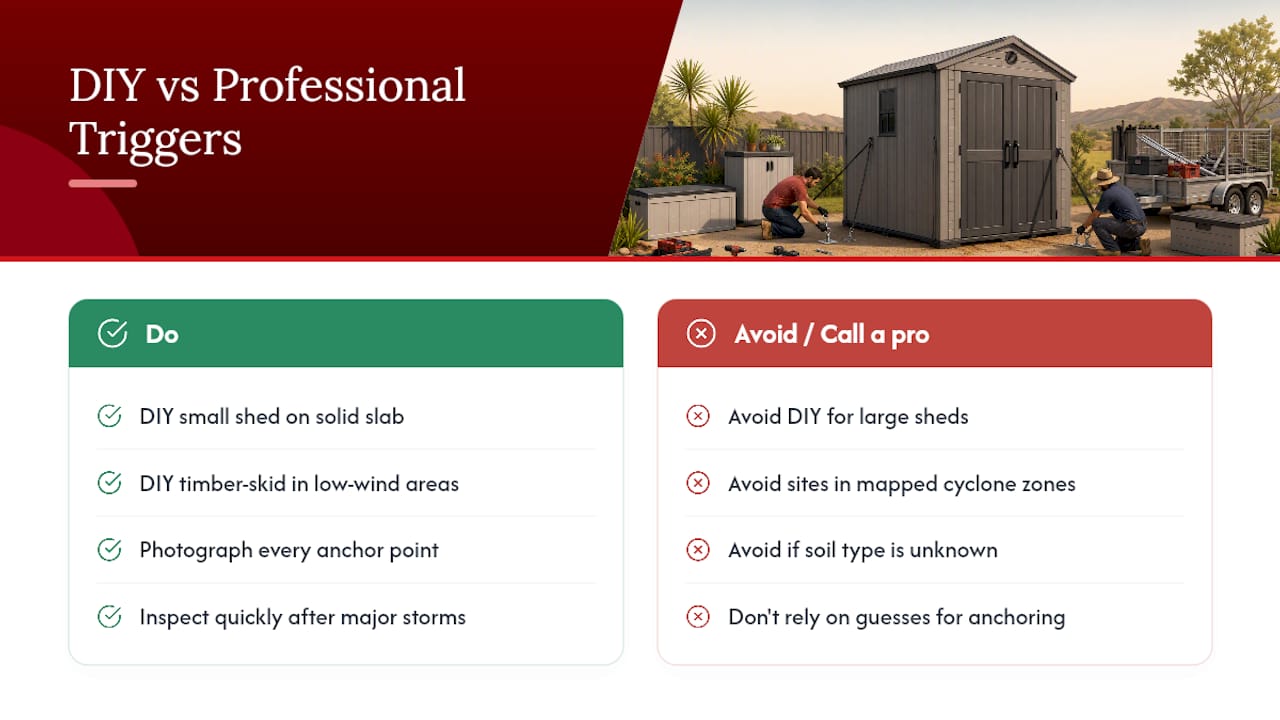
The red lines are large sheds, mapped cyclone zones, and soil you can’t identify with confidence. Past that point, a wrong guess isn’t a wasted Saturday, it’s a shed roof in next door’s pool.
Photograph every anchor point once installed, and log a quick inspection after major storms. It costs nothing and saves an argument with an insurer later. Also weigh permanence against flexibility: concrete anchors are brilliant until you want to move the shed, and then they’re a Saturday of chisel work.
— Liza
Keep everything organised once your shed is secured
A well-anchored shed still needs sensible weight distribution inside it, heavy items piled in one corner puts uneven strain on the very base rail your anchors are bolted to. The Keter Storage Shed Shelf Kit helps spread gear evenly across shelving rather than stacked against one wall, which makes for a more stable structure overall and a lot less digging through boxes to find the mower blade.
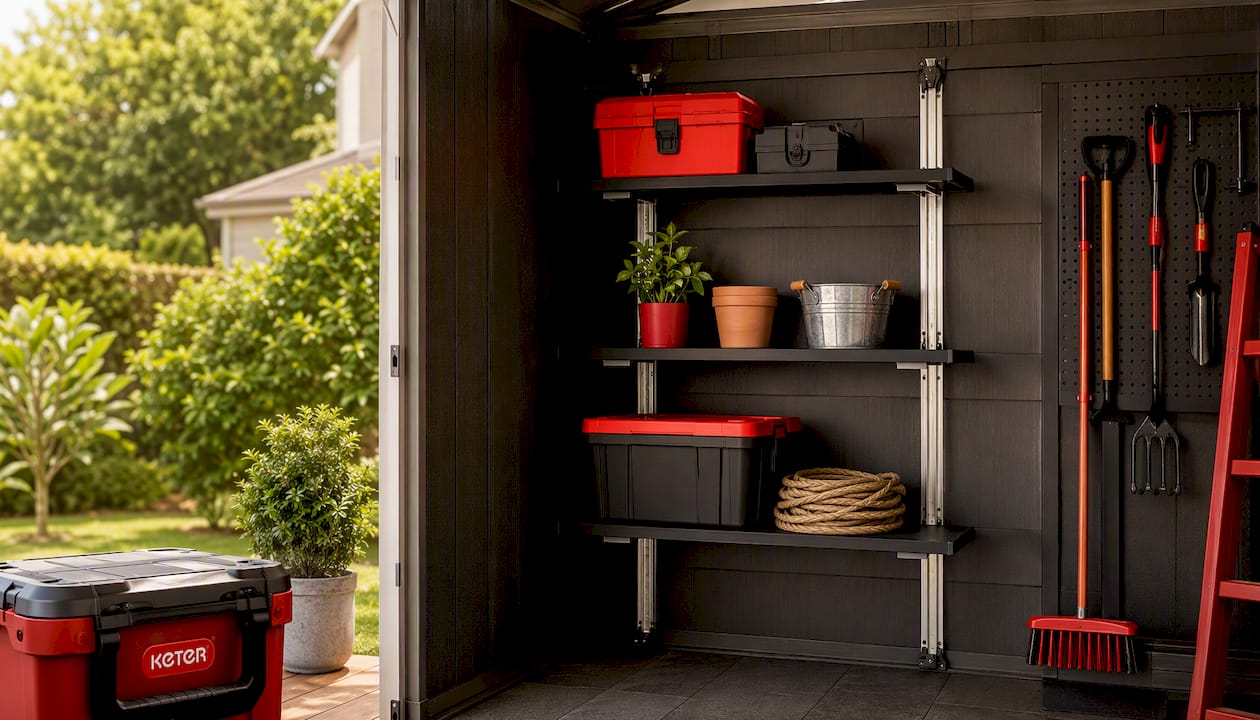
It’s currently available for pre-order for August, and it’s designed to work with Keter’s weather resistant resin sheds without extra drilling into panels. If you’re setting up a new shed or tidying an existing one, browse the shelf kit on ketergroup.com.au and get your order in before the next batch arrives.
Sources
- Building a shed - approvals and requirements | Brisbane City Council
- Garden shed brackets: anchors, tie‑downs, and accessories for Australian conditions
- Sheds
FAQ
How do I anchor down my shed?
Match the anchor to your foundation: expansion bolts and L-brackets for slabs, screw or helical anchors with straps for timber floors, and helical anchors or concrete piers for soft ground.
Does Bunnings offer garden shed anchor kits?
Major hardware retailers commonly stock basic strap and screw-anchor kits, but always check the stated kN rating and material grade rather than assuming any kit suits your wind region.
How do I keep my shed from blowing away?
Use anchors rated for your local wind region under AS/NZS 1170.2, tension straps evenly around the perimeter, and combine two methods (such as helical anchors plus straps) for larger or exposed sheds.
What is the best shed anchor kit?
There’s no single best kit, it depends on your foundation and wind exposure, but a good kit always states its load rating in kN and specifies corrosion-resistant hardware suited to your climate.


