
Shed base options for DIY homeowners: quick guide

For a small plastic or resin shed, a modular interlocking floor or compacted paver base is your fastest and most practical choice. A medium-to-large shed or backyard workshop needs a reinforced concrete slab, with typical thickness between 75–100mm as set by AS 2870 guidance. Use 100mm thickness with steel mesh for a standard 3×3m shed on stable soil; increase thickness or edge beams for heavier use or reactive sites. On a sloping block or a rental property, a timber raised base or adjustable screw piers will save you significant earthworks cost and effort.
Key trade-offs to weigh before you commit:
- Cost vs durability: Gravel and pavers cost the least upfront but need re-levelling over time. Concrete costs more initially and lasts decades with minimal maintenance.
- Termite risk and compliance: Any timber touching or near the ground in Australia must meet AS 3660 clearance and treatment requirements. Concrete and modular resin floors sidestep this risk entirely.
- Council approval and DIY difficulty: Sheds above certain size or height thresholds, or those close to boundaries, typically trigger a building approval. A reinforced slab on reactive soil also usually needs an engineer’s sign-off.
Stop DIY and call a structural engineer or private certifier if your soil is reactive clay (Class H or E), your site sits in a cyclonic wind region, or your shed footprint exceeds your council’s exempt-development threshold.
Pro Tip: Before you buy a single bag of cement, download your local council’s shed checklist and confirm the size and setback limits. Discovering you need approval after the slab is poured is an expensive lesson.
Table of Contents
- How do the common shed base options compare at a glance?
- What you need to know about concrete slabs for sheds
- When does a timber raised base make sense?
- Are plastic or modular resin floors a good shed base?
- Can you put a shed on pavers?
- Gravel and crusher-dust bases: the quickest option
- When do pier and beam systems beat a concrete slab?
- How to choose the right base: a decision checklist
- Typical costs, DIY timelines and what people underestimate
- Australian compliance, termite controls and when to involve an engineer
- Quick DIY pre-install checklist
- Key takeaways
- A practical note on getting the base right
- What most DIYers get wrong (and how to avoid it)
- Ketergroup sheds and the base that suits them
- Useful sources for Australians planning a shed base
- FAQ
How do the common shed base options compare at a glance?
The table below maps each base type to the situations where it performs best, so you can quickly narrow down your shortlist before reading the detail sections. Foundation type suitability varies considerably by shed size, soil, and how permanent you want the structure to be.
| Base type | Best for | Durability / lifespan | Termite resistance | Soil & slope suitability | Cost & DIY difficulty | Wind / uplift performance | Maintenance |
|---|---|---|---|---|---|---|---|
| Reinforced concrete slab | Permanent medium-to-large sheds, workshops | Long lifespan | Excellent (no timber contact) | Flat to gently sloping; poor on steep slopes or reactive soils without engineering | Higher cost; moderate-to-hard DIY | Excellent with certified hold-downs | Very low |
| Timber raised base (bearer/frame) | Sloping sites, access-limited lots, temporary installs | 15 years with H3/H4 timber | Moderate (requires AS 3660 compliance) | Good on slopes up to ~600mm fall; poor in high-termite zones without barriers | Low-to-moderate cost; moderate DIY | Good with galvanised hold-downs | Annual inspection needed |
| Modular plastic / resin floor | Small resin or plastic sheds up to ~3×3m, renters | 10–20 years | Excellent (no timber, no soil contact) | Flat or near-flat sites; not for heavy loads | Low cost; easy DIY | Limited without additional anchoring | Very low |
| Pavers on compacted base | Light storage, small sheds, removable installs | 10–20 years | Good (no timber) | Flat sites; can shift on clay or poorly compacted sub-base | Low cost; easy DIY | Poor without perimeter anchors | Periodic re-levelling |
| Gravel / crusher-dust pad | Very small, light sheds; temporary use | 5–10 years before re-levelling | Good (no timber) | Flat, well-drained sites only | Lowest cost; easiest DIY | Poor | Re-levelling every few years |
| Pier & beam / screw piers | Steep slopes, flood-prone sites, reactive soils | 20 years | Good with treated timber above piers | Excellent on slopes and reactive soils; suits most soil classes | Moderate-to-high cost; hard DIY | Good with engineered connections | Low; inspect piers annually |
A few quick rules from this comparison:
- Concrete wins on permanence and wind performance, but it commits you to the site.
- Modular resin floors and pavers are the go-to for renters or anyone who may relocate the shed.
- Timber bases and screw piers are the slope specialists, handling what a flat slab cannot without expensive retaining work.
What you need to know about concrete slabs for sheds
Concrete is the most durable shed base you can build, and for any shed you plan to keep for more than a decade, it is usually worth the extra upfront effort. The key is getting the specs right from the start.
Flat slab vs rebated slab
A flat slab sits level with or slightly above the surrounding ground and the shed walls rest directly on top. This suits most garden sheds and is the simpler pour. A rebated slab (sometimes called a recessed slab) has a perimeter step or recess so the shed walls sit inside the edge, giving a cleaner finish and better weather seal at the base. Rebated slabs are more common for steel-framed sheds where the wall cladding needs a positive stop.
Thickness and reinforcement
AS 2870 guidance and practitioner recommendations set the typical baseline for a small garden shed slab at 75–100mm. For a small shed on stable soil, a typical slab thickness reinforced with steel mesh is the standard starting point. Step up to 125mm or add thickened edge beams when:
- The soil is reactive clay (Class M, H, or E under AS 2870)
- You plan to store heavy machinery or a vehicle
- The shed is larger than about 15m²
Wire mesh vs rebar: Steel mesh (SL72/SL82) is adequate for most small garden sheds on stable ground. Rebar (deformed bar, typically N12 at 200mm centres) is preferable when the slab carries column loads, sits on reactive soil, or the engineer specifies it. Mesh is faster to lay; rebar gives more control over placement and cover.
Sub-base, vapour barrier and drainage
A compacted sub-base of 100–150mm of road base or graded hardcore is non-negotiable under any concrete slab. Skipping it is the single most common cause of cracking and settlement, regardless of how thick the concrete is. Compact in layers no greater than 75mm for reliable consolidation, and extend the sub-base at least 100mm beyond the slab edge.
Lay a 200-micron polyethylene DPM (damp-proof membrane) directly under the slab to block rising moisture. For more detail on moisture management under and around your shed, the shed moisture barrier guide covers vapour barriers and DPC strips in practical terms.
Set the slab with a minimum fall of 1:100 away from the shed (or toward a drainage point) so water does not pond at the base of the walls.
Pro Tip: For a slab under 10m², bagged concrete mixed on-site is manageable for a fit DIYer with a hired mixer. Above that, order ready-mix — the time saving and consistency are worth the delivery cost, and you avoid cold joints from mixing in batches.
Slab thickness at a glance: 75–100mm is the standard thickness range for small garden sheds on stable soil; for a 3×3m shed with mesh reinforcement, 100mm is typical.
When does a timber raised base make sense?
Timber raised bases are the practical answer for sloping blocks, sites with restricted vehicle access, and anyone who wants a lower-cost foundation that can be adjusted or removed. On a site with a fall of up to around 600mm, timber-framed bases or adjustable pier systems handle the level difference without the expensive retaining and earthworks a slab would require.
Termite protection in Australia
Termite management is mandatory in many northern and tropical Australian regions, and AS 3660 sets the requirements. For timber bases, that means:
- Use H3 treated timber for above-ground members exposed to weather; use H4 for any timber in contact with or close to the ground.
- Install a physical termite barrier (metal cap or chemical-treated zone) at each post or pier before the bearer sits on top.
- Keep a clear inspection zone of at least 75mm around each post base so a licensed inspector can check for termite activity annually.
- Never pack soil, mulch, or garden beds against the base frame — this conceals termite entry and traps moisture.
Maintenance checklist
- Inspect all bearers and joists annually for soft spots, discolouration, or frass (termite debris).
- Check fasteners for corrosion — use galvanised or hot-dip galvanised bolts and joist hangers throughout.
- Confirm DPC (damp-proof course) strips between bearers and any masonry or concrete contact points are intact.
- Re-check ground clearance after heavy rain or soil movement.
Timber bases are not suitable when the site is in a high-termite-risk zone without a full AS 3660 management system in place, when the shed will house heavy machinery, or when the shed is large enough to require a structural engineer’s design (which will typically specify concrete or steel).
Pro Tip: When cutting H3/H4 treated timber on site, seal all cut ends immediately with an end-grain preservative. Exposed cut ends are the most common entry point for moisture and decay.
Are plastic or modular resin floors a good shed base?
For small resin or plastic sheds, a modular interlocking floor system is often the most practical shed base for plastic shed owners. These systems are quick to install, fully portable, and drain freely, making them ideal for renters or anyone who wants a base they can take with them.
How they work
A typical modular resin floor build-up goes like this:
- Clear and level the site; remove any vegetation or topsoil.
- Lay a geofabric weed mat over the prepared ground.
- Spread and compact 75–100mm of road base or crusher dust.
- Interlock the resin grid panels across the footprint, trimming edge pieces as needed.
The panels sit on the compacted base, distribute load across the grid, and allow water to drain through rather than pool.
Pros and cons
Pros:
- Fast to install — a 3×3m footprint can be done in a morning.
- Fully removable and reusable.
- No concrete, no curing time.
- Permeable drainage keeps the base dry.
Cons:
- Point-load capacity is lower than concrete — not suitable for heavy machinery, ride-on mowers, or very large sheds.
- Generally suited to sheds up to around 3×3m; larger footprints may flex under uneven loads.
- Requires a flat or near-flat site; significant slope needs correction before laying.
Anchoring and wind
Modular floors need anchoring to resist wind uplift, especially in exposed Australian backyards. Check the manufacturer’s anchor specifications and wind rating before installation. For a resin shed foundation on a modular floor, perimeter ground anchors or screw-in stakes through the panel edge are the most common approach. In higher wind regions, confirm the combined shed-and-base anchor system meets your local wind classification under AS/NZS 1170.2.
Can you put a shed on pavers?
Yes, and for a light storage shed it works well — provided the sub-base preparation is done properly. A paver base for a shed is affordable, DIY-friendly, and removable, which makes it popular for garden sheds that may need to move.
Build-up steps
- Excavate 150–200mm below finished level across the full footprint plus 100mm on each side.
- Lay geofabric weed mat across the excavated area.
- Spread and compact 75–100mm of road base in two lifts, checking for level as you go.
- Add 20–30mm of coarse sand as a bedding layer and screed it level.
- Lay pavers tightly across the footprint, keeping the surface plane level in all directions.
- Fill joints with dry jointing sand and compact lightly.
Pro Tip: Use a long straight edge and spirit level diagonally across the paver surface before placing the shed. Even a 10mm variation across a 2.4m span can cause shed doors to bind or gaps to appear at the base.
Edge restraint and levelling
Edge restraint is the part most DIYers skip, and it is why paver bases shift over time. Timber sleepers or concrete edging around the perimeter hold the pavers in place and prevent lateral spread. Without them, pavers migrate outward under load and the surface loses its level.
The entire paver plane must be level for shed doors to operate correctly. A slight fall (1:100) away from the shed is fine for drainage, but any twist or dip in the surface will show up as a sticking door or a gap at the base rail.
Limitations
Pavers suit light storage sheds. They are not appropriate for workshops, heavy machinery, or sheds in high wind regions without additional perimeter anchoring. Over clay soils, even a well-prepared paver base can shift seasonally as the ground swells and shrinks.
Gravel and crusher-dust bases: the quickest option
A gravel or crusher-dust pad is the cheapest and fastest shed base option, and for a small, light shed on a well-drained site, it does the job. The trade-off is long-term stability.
Installation steps
- Mark out the footprint and excavate 150–200mm below finished level.
- Lay geofabric weed mat across the base and up the sides of the excavation.
- Spread crusher dust or compacted road base in two lifts of no more than 75mm each, compacting each layer with a plate compactor before adding the next.
- Check for level across the full surface and adjust before placing the shed.
- Add a gravel perimeter around the outside edge to assist drainage and keep the base edge defined.
What to expect long-term
Drainage is the main advantage of a gravel base. Water passes through rather than pooling, which reduces moisture under the shed floor. The limitation is that crusher dust and gravel can shift, especially on clay soils or in areas with heavy rainfall. Expect to re-level the base every few years, and check for soft spots or settlement after prolonged wet weather.
Gravel is not appropriate for:
- Heavy loads or workshop use
- Large sheds where a level, rigid base is needed for structural integrity
When do pier and beam systems beat a concrete slab?
On a sloping block, in a flood-prone area, or on highly reactive soil, screw piers and pier-and-beam systems often outperform a flat slab on both cost and practicality. Thickened-edge slabs with pier footings are a standard engineering response for reactive clay sites, but on a steep slope, a raised pier system avoids the earthworks and retaining costs entirely.
Installation precision
Each pier must be set to the same datum level, checked with a laser level or water level across all pier tops before the bearers go on. Pier depth varies by soil class — on reactive clay, piers typically need to reach well below the zone of seasonal moisture change, which an engineer or geotechnical report will specify for your site.
Screw piers can be installed with a small machine in a day for most residential shed footprints, with minimal soil disturbance compared to excavating for a full slab.
Advantages over slabs on slopes
Good airflow under the shed floor reduces moisture and termite risk. Minimal earthworks mean lower cost on sloping sites. Post heights can be adjusted if minor settlement occurs. The system is also easier to remove or relocate than a poured slab.
Pro Tip: For a pier-and-beam system, always use galvanised or stainless steel post bases and connectors. In coastal or humid Australian climates, standard zinc-plated hardware corrodes within a few years and compromises the structural connection.
When the shed is large, in a cyclonic wind region, or on Class H or E soil, pier designs should be engineer-specified rather than DIY-estimated. The cost of an engineering drawing is small compared to the cost of a failed footing.
How to choose the right base: a decision checklist
Work through these steps in order and you will have a clear answer for your site before you spend a dollar on materials.
- Confirm shed size and weight — Small resin shed under ~3×3m? Modular floor or pavers are fine. Larger or heavier? Go to concrete or timber raised base.
- Confirm council approval requirements. Check your local council’s shed checklist. Size, height, setbacks, and proximity to easements all affect whether you need approval. The City of Gold Coast shed page is a useful example of the triggers councils typically apply.
Questions to ask a professional before you build
- What is the soil classification on my block?
- What wind region am I in, and what anchor hold-downs does that require?
- Does my shed size or location trigger a council approval?
Red flags that mean you should stop DIY
- Soil classified as Class E (highly reactive clay)
- Wind region C or D (cyclonic zones in northern Australia)
- Shed within 900mm of a boundary or over an easement
- Any shed requiring a building permit in your council area
Typical costs, DIY timelines and what people underestimate
DIY vs professional timelines
| Task | DIY weekend estimate | Professional turnaround |
|---|---|---|
| Mark-out and excavation | 1–2 days | Half day (machine) |
| Sub-base and compaction | 1 day | Half day |
| Formwork and reinforcement | 1 day | Half day |
| Concrete pour and finish | 1 day | 1 day |
| Curing before loading | 7 days minimum | 7 days minimum |
| Modular / paver base (full) | 1 day | 1 day |
| Timber raised base | 2–3 days | 1–2 days |
Where saving on labour creates long-term risk
Skipping proper sub-base compaction is the most common DIY mistake, and it causes cracking and settlement regardless of what goes on top. Inadequate anchoring in a wind-exposed site is the second. Both are invisible until something goes wrong, and fixing them after the shed is built is far more expensive than doing them right the first time.
Australian compliance, termite controls and when to involve an engineer
Getting the compliance side right protects your investment and keeps your shed insurable. Three Australian Standards are directly relevant to shed bases.
Key standards explained
- AS/NZS 1170.2 (Wind actions): — Defines wind loads by region and terrain category. Your shed’s hold-down anchors must be specified to resist the uplift forces for your wind region. In cyclonic areas (Wind Region C and D), this is a structural engineering matter, not a DIY calculation.
Council approval checklist
Most councils exempt small sheds from building approval if they meet size, height, and setback criteria. Typical triggers that force an approval include:
- Floor area exceeding the council’s exempt threshold (commonly 10m² but varies by council)
- Height above a specified limit (often 2.4m to the eave)
- Location within the front setback or within a specified distance of a boundary
- Proximity to an easement, stormwater infrastructure, or heritage overlay
- Load-bearing use or attachment to the main dwelling
The rule of thumb: If your shed is bigger than a standard garden shed, sits close to a boundary, or will be used as a workshop or habitable space, assume you need approval and check with your council before you pour anything. Getting approval after the fact is possible but costly, and some councils require demolition of non-compliant structures.
When to get engineering certification
Engage a structural engineer or private certifier when:
- The shed is on Class H or E reactive soil
- The site is in Wind Region C or D
- The shed footprint exceeds your council’s exempt threshold
- The base design includes thickened-edge slabs, piers, or hold-downs that are not covered by a standard manufacturer’s specification
- Your building permit requires certified structural drawings
The storage shed floor guide reinforces that for steel sheds in particular, a reinforced concrete slab with certified anchors is the recommended approach when permanence and wind performance matter.
Quick DIY pre-install checklist
Follow these steps on the weekend before your shed arrives and you will avoid the most common mistakes.
- Mark out the footprint with string lines and pegs. Make the base the same size as or very slightly smaller than the shed floor — never larger, or the shed walls will overhang the edge and create a trip hazard and water trap. Community DIY experience consistently flags this as a common error.
- Check square by measuring both diagonals. They must be equal. A base that is out of square will cause misaligned panels and doors that will not close properly.
- Excavate to the required depth for your chosen base type (typically 150–200mm for a concrete or paver base).
- Lay geofabric weed mat across the excavated area and up the sides.
- Spread and compact sub-base in two lifts of no more than 75mm each, using a plate compactor between lifts.
- Check level across the full surface with a long straight edge and spirit level. Correct any high or low spots before proceeding.
- Lay DPM (for concrete slabs) or proceed to panel/paver installation for other base types.
- Place reinforcement (mesh or rebar) on chairs at the correct cover depth before pouring concrete.
- Pour, screed and finish the concrete with a minimum 1:100 fall for drainage.
- Allow full cure time before placing the shed — at least 7 days for foot traffic, longer before heavy loads.
Tools and safety
- Plate compactor (hire from most tool hire outlets)
- Long straight edge (2.4m aluminium rule)
- Spirit level and laser level
- String lines and timber pegs
- PPE: steel-capped boots, gloves, safety glasses, and a dust mask when cutting or compacting
Short reminders:
- Keep the base the same size as or slightly smaller than the shed floor.
- Add a gravel perimeter around the outside edge to assist drainage.
- Keep ventilation clear under any bearer or frame — never pack soil against the base.
Key takeaways
The right shed base comes down to three things: shed size and use, soil and termite risk, and whether you want a permanent or moveable structure.
| Point | Details |
|---|---|
| Match base to shed size and use | Small resin sheds suit modular floors or pavers; workshops and large sheds need a reinforced concrete slab. |
| Sub-base compaction is non-negotiable | Compact 100–150mm of road base in 75mm lifts under any base type to prevent settlement and cracking. |
| Termite and wind compliance matter | Use H3/H4 treated timber and AS 3660 barriers for timber bases; confirm anchor hold-downs meet AS/NZS 1170.2 for your wind region. |
| Check council approval early | Size, height, setbacks, and soil class can all trigger a building permit requirement before you start. |
| Ketergroup resin sheds and modular bases | Ketergroup’s weather resistant resin sheds pair well with modular plastic floors or compacted paver bases for a fast, compliant, low-maintenance install. |
A practical note on getting the base right
What most DIYers get wrong (and how to avoid it)
The two mistakes that show up most often in Australian backyard shed builds are skipping the sub-base and getting the base out of square. Both are easy to avoid and both are expensive to fix after the shed is up.
On sub-base: it is tempting to spread a thick single layer of crusher dust and call it done. A single thick layer does not compact evenly, and within a season or two you will see the surface shift and the shed floor develop a twist. Two thinner lifts, each compacted before the next goes down, take an extra hour and make the difference between a base that lasts and one that does not.
On square: measure both diagonals before you do anything else. If they match, you are square. If they do not, adjust the string lines until they do. A base that is even 20mm out of square across a 2.4m span will cause shed panels to rack and doors to bind, and there is no easy fix once the concrete has cured.
For Keter shed owners specifically, the pre-installation tips guide walks through the base preparation steps that apply directly to Keter kit assembly, including how to size the base correctly for each shed model.
Ketergroup sheds and the base that suits them
Ketergroup’s weather resistant resin sheds are designed with DIY assembly in mind, and the good news is that most of them pair naturally with the simpler, lower-cost base options covered in this guide.
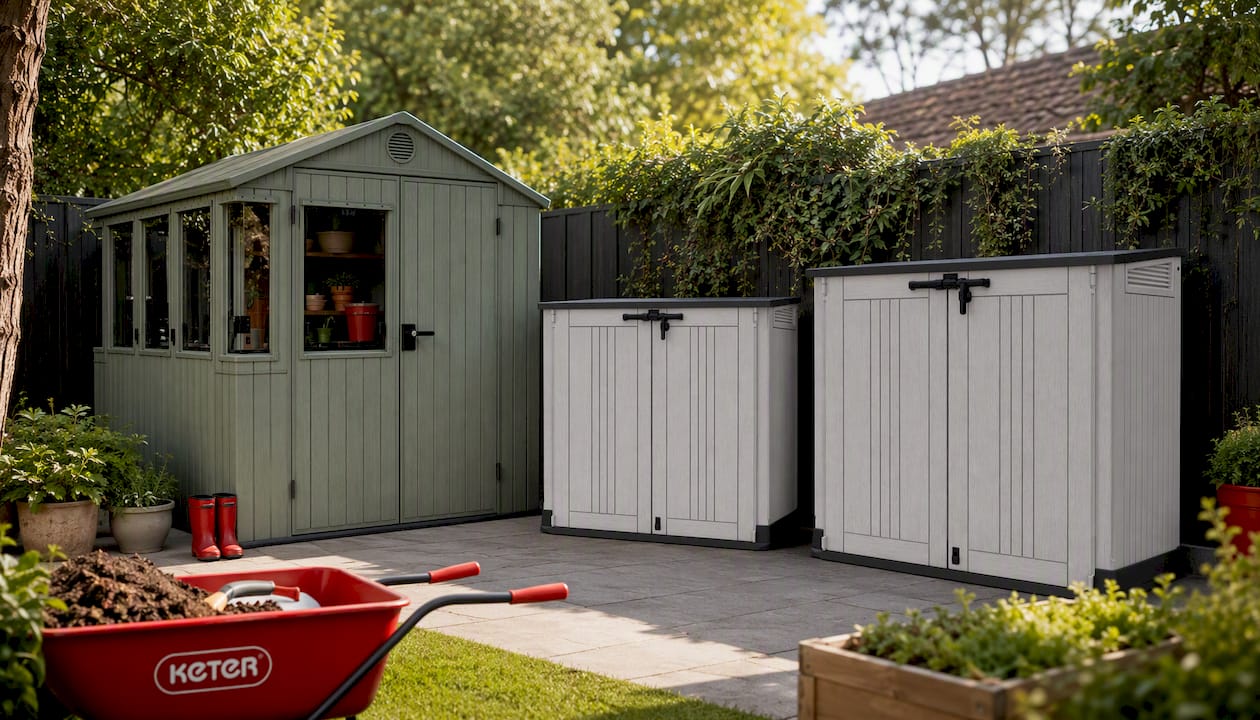
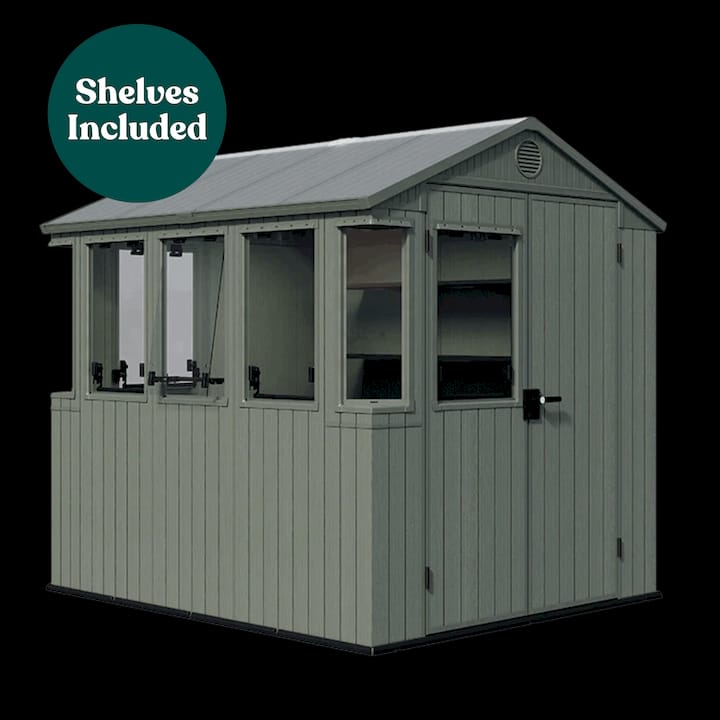
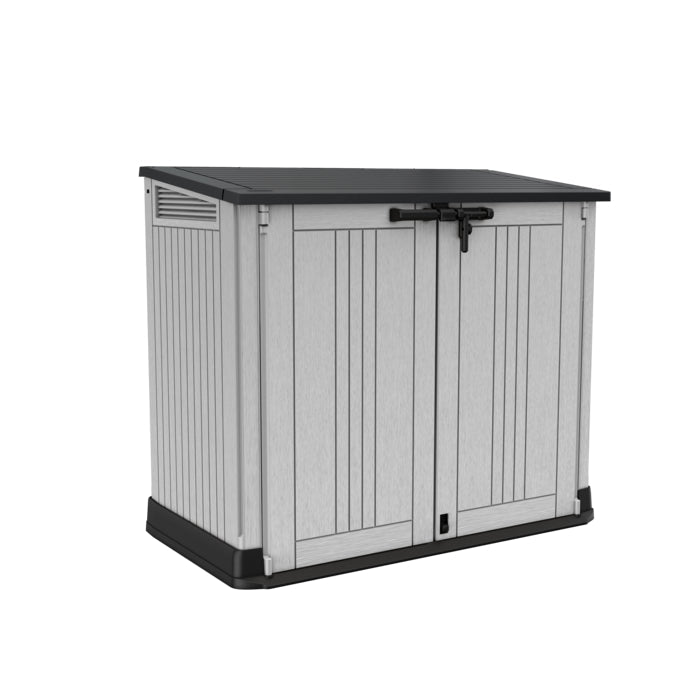
The compact Keter Potting 6x8 Shed (1.9×2.4m) is a great example. Its lightweight resin construction means a modular plastic floor or a well-prepared paver base is all it needs. No concrete, no curing time, and the whole base can be ready in a morning. For a mid-sized storage option, the Store It Out Prime 880L sits comfortably on a compacted paver base or a small reinforced slab, depending on how permanent you want the setup to be. The Store It Out Prime Shed 880L with gas-piston lid is another practical choice for garden storage that does not need a heavy foundation.
All Ketergroup sheds are built from durable, recyclable resin that resists moisture and UV without the maintenance timber demands. If you are ready to choose your shed and match it to the right base, browse the full range at Ketergroup Australia and check the step-by-step assembly guide for base-compatibility notes specific to each kit.
Useful sources for Australians planning a shed base
The sources below are worth bookmarking if you want to go deeper on any of the technical or compliance topics covered in this guide.
- Concrete floor for garden shed: Australian guide to specs, costs, and council approval — SmallTrades
- Shed foundation Australia guide — SmallTrades
- Sheds | City of Gold Coast
- Build a garden shed base — ShunTool
- Shed slab & footing design — Sheds.design
- Storage shed floor: the complete Australian guide — SmallTrades
- DIY shed foundation: concrete vs timber installation — Gardening Hub
- Suggestions for small shed foundation? — Workshop (Bunnings) discussion
FAQ
What is the cheapest way to base a shed?
A compacted crusher-dust or gravel pad is the cheapest shed base option, requiring only excavation, geofabric, and compacted road base. It suits small, light sheds on flat, well-drained sites, but expect to re-level it every few years.
What is the best base for a plastic or resin shed?
A modular interlocking resin floor on a compacted sub-base is the best base for a plastic shed, offering fast installation, good drainage, and full portability. A compacted paver base is a close second for slightly larger resin sheds.
Do plastic sheds need a base at all?
Yes. Even a lightweight plastic shed needs a flat, stable base to prevent the floor from flexing, doors from binding, and moisture from entering underneath. A bare lawn or uneven ground will cause problems within one season.
Can you put a shed on pavers?
Yes, a paver base for a shed works well for light storage sheds, provided the sub-base is properly compacted and edge restraints are in place to stop the pavers shifting. Pavers are not recommended for heavy loads or high wind regions without additional perimeter anchoring.
When do you need council approval for a shed base?
Council approval is typically required when the shed exceeds the local exempt-development size or height threshold, sits within the front setback, or is located close to a boundary or easement. Check your council’s specific criteria before you start, as thresholds vary across Australian states and territories.
Recommended
- 6 Essential Pre-Installation Tips for Your Keter Shed – Keter Australia
- Top 8 Things You Need to Know Before Buying a Garden Shed from Keter – Keter Australia
- What Is a Shed Kit? The Complete Guide to Quick and Easy Outdoor Storage – Keter Australia
- Shed Kits vs. Traditional Sheds: Find Your Ideal Aussie Outdoor Storage | Keter Australia


