
Shed moisture barrier: your complete Australian guide

A shed moisture barrier is a layer of material installed to block water vapour and ground moisture from entering your shed’s walls, floor, and roof. Without one, condensation builds up inside the structure, leading to mould, rot, rusting tools, and damaged stored goods. In Australia’s varied climate zones, from the humid tropics of Queensland to the cold winters of the Victorian highlands, the right vapour barrier for your shed makes a genuine difference to how long your shed lasts and how dry your gear stays. Getting the placement and material right from the start saves you costly repairs down the track.
How does a shed moisture barrier prevent moisture problems?
A shed moisture barrier works by interrupting the path that water vapour and ground moisture travel into your shed. Moisture enters a shed in two main ways: it rises from the ground beneath the floor, and it moves through walls and roof as airborne vapour driven by temperature and pressure differences.
Ground moisture is the more persistent threat. Soil holds water year-round, and without a physical barrier between the ground and your shed floor, that moisture wicks upward into timber framing, concrete slabs, and stored items. Airborne vapour is trickier because it moves invisibly through small gaps, around pipe penetrations, and through unsealed joints.
The building science term for the barrier that controls vapour movement is a vapour control layer, or VCL. A high-performing VCL is rated by its Equivalent Air Layer Thickness, known as the Sd value. High-performance VCLs carry an Sd value of approximately 50 metres, meaning vapour must travel the equivalent of 50 metres of still air to pass through. That level of resistance stops condensation from forming on cold surfaces inside your shed.
Continuous air sealing is just as important as the barrier material itself. A VCL with small holes or unsealed seams loses much of its effectiveness. Every joint, penetration, and edge needs to be taped or sealed with compatible mastic to maintain a continuous layer.
Key moisture entry points to address:
- Ground contact: under concrete slabs, timber bearers, and floor joists
- Wall base: where wall framing meets the floor or slab
- Roof penetrations: around vent pipes, skylights, and fixings
- Door and window frames: gaps at reveals and flashings
- Service penetrations: electrical conduits and water pipes
What are the best materials and where should you place a moisture barrier?
Moisture barrier placement and type depend on your local climate and how you use your shed. A one-size-fits-all approach does not work across Australia’s diverse regions.
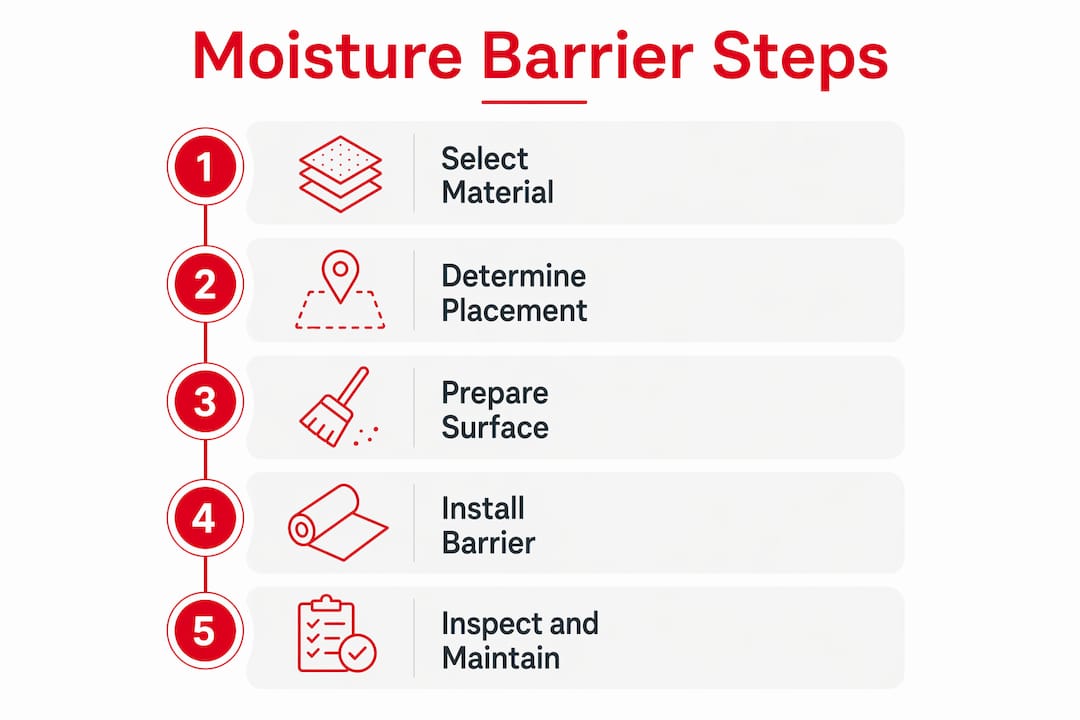
Choosing the right material
6-mil polyethylene sheeting is the most widely used moisture barrier material for sheds. It carries a permeance rating of approximately 0.06 perms, which classifies it as a Class I vapour barrier under standard building science categories. It suits cold and temperate climates where you want to stop vapour from moving inward. Aluminium foil VCL membranes offer higher resistance and are well suited to sheds where you want both vapour control and radiant heat reflection, which is useful in hot Australian summers.
For hot and humid climates, such as coastal Queensland or the Northern Territory, a vapour-permeable or “smart” vapour retarder is a better choice. Smart vapour retarders adjust their permeance with seasonal humidity, allowing the shed to dry outward in summer while blocking inward vapour in cooler months. Locking in a fully impermeable layer in a hot-humid climate can trap moisture inside the wall assembly and cause more damage than it prevents.

| Climate zone | Recommended material | Placement |
|---|---|---|
| Cold/temperate (VIC, TAS, ACT) | 6-mil polyethylene or foil VCL | Warm interior side of insulation |
| Hot-humid (QLD coast, NT) | Smart vapour retarder | Exterior side or omit wall barrier |
| Mixed/subtropical (NSW, SA) | Smart vapour retarder or 6-mil poly | Warm interior side, assess per season |
| Slab-on-grade (all zones) | 6 or 15-mil polyethylene | Under slab, seams taped |
Placement rules by shed type
In a heated or insulated shed in a cold climate, the barrier goes on the warm interior side of the insulation. This keeps the barrier above the dew point and prevents condensation from forming within the wall cavity. In an unheated shed, the priority shifts to the floor: a continuous sheet under the slab or over the ground beneath a timber floor is the single most effective step you can take.
For sheds built on a concrete slab, a continuous barrier under the slab with taped seams limits ground moisture migration effectively. For vaulted or skillion roofs, the barrier goes directly under the roofing material, above any insulation, to stop warm interior air from reaching the cold roof surface.
Pro Tip: In coastal areas, check your local council’s building guidelines before choosing a permeance class. Some coastal zones in Australia have specific requirements for vapour control in outbuildings.
How to install a shed moisture barrier step by step
Good installation starts before you unroll a single sheet of plastic. The site itself must be prepared correctly, or the barrier will fight a losing battle.
-
Grade the ground around the shed. Slope soil away from the shed base at a minimum fall so that rainwater drains away rather than pooling under the floor. Poor site drainage causes more moisture problems than the shed or barrier construction itself.
-
Raise the shed base. Set the shed on a concrete slab, concrete piers, or treated timber bearers that lift the floor clear of direct ground contact. A raised base creates an air gap that reduces moisture wicking.
-
Lay the floor barrier. Roll out 6-mil or 15-mil polyethylene across the entire floor area, including under any slab. Overlap sheets by at least 300mm and tape every seam with moisture-resistant tape. Run the sheet up the inside of the formwork or wall base by 150mm to create a continuous seal at the edges.
-
Install wall barriers. Starting from the bottom, fix the VCL sheet to wall studs with staples or battens. Overlap horizontal runs by 150mm, with upper sheets lapping over lower sheets so any condensation that forms runs down and out. Tape all seams, corners, and joins.
-
Seal every penetration. Use compatible mastic or pre-formed grommets around electrical conduits, water pipes, and any other service entry points. Unsealed penetrations are the most common cause of barrier failure.
-
Install the roof barrier. Fix the VCL under roof battens, running sheets from eave to ridge with 150mm overlaps. Tape all joins and seal around any roof penetrations such as vent pipes or skylights.
-
Maintain ventilation paths. Leave eave vents, ridge vents, or wall vents clear and unobstructed. The barrier controls vapour movement; ventilation removes moisture-laden air.
Pro Tip: Use a foil-faced VCL on shed walls in hot Australian summers. The reflective surface reduces radiant heat gain as well as vapour transfer, keeping the shed cooler and drier at the same time.
For sheds with timber floors rather than concrete slabs, lay the barrier directly over the ground beneath the floor joists, extending it up and over the bearer plates. This stops ground vapour from rising into the floor cavity. You can find more guidance on shed kit assembly that covers moisture management during construction.
Common mistakes when installing moisture barriers
Most moisture barrier failures come down to a handful of avoidable errors. Knowing them before you start saves you from pulling everything apart later.
- Over-sealing without ventilation. Airtight sheds without ventilation trap humidity and accelerate rot. The barrier controls where vapour moves; ventilation removes it. Both are needed.
- Stacking two impermeable layers. Placing a VCL on both sides of a wall cavity creates a moisture trap. Any vapour that gets in has nowhere to go and accumulates until it causes damage.
- Ignoring the ground. Homeowners often focus on walls and roofs while leaving the ground beneath the floor unprotected. Ground moisture is a constant, year-round source of vapour.
- Skipping penetration sealing. A single unsealed pipe or conduit can allow enough vapour through to cause mould growth within months.
- Using the wrong material for the climate. Installing an impermeable 6-mil poly sheet in a hot-humid coastal shed traps moisture inside the wall assembly. Match the material to your climate zone.
You can also look at moisture-resistant materials for garages for a broader view of material options that apply equally well to shed construction.
Effective moisture control requires combining vapour barrier installation with deliberate venting strategies to sustain air movement and dryness. Many DIY installations fail by focusing solely on sealing gaps without adequate ventilation, creating a moisture trap instead of solving one.
Signs that your current barrier has failed include swelling doors, soft floor edges, mould smells, and tool rust despite the roof being dry. These symptoms point to persistent ground or wall moisture intrusion rather than a roof leak.
How to maintain your shed’s moisture control over time
A moisture barrier is not a set-and-forget solution. Regular upkeep keeps it working for the life of the shed.
- Inspect the barrier annually. Check for holes, tears, or lifted tape, especially after heavy rain or storms. Even small gaps allow significant vapour transfer over time.
- Keep ventilation openings clear. Eave vents and wall vents block up with dust, spider webs, and debris. Clear them every six months to maintain airflow.
- Use a dehumidifier or moisture absorber in enclosed sheds where ventilation is limited, such as a fully sealed workshop. Reusable silica gel containers work well for smaller spaces.
- Maintain ground drainage. Check that soil around the shed base still slopes away from the structure. Settling soil can reverse the grade and direct water toward the shed over time.
- Trim vegetation. Plants growing against the shed wall hold moisture against the cladding and reduce airflow. Keep a clear gap of at least 300mm between plants and the shed.
Pro Tip: After heavy rain, open the shed and check the floor edges and wall bases for any dampness. Catching a small leak early costs far less than replacing rotted framing or ruined stored goods.
Pairing good moisture control with well-organised storage also helps. When items are stored off the floor on shelving or in sealed containers, even minor moisture events cause less damage. A shed storage organiser keeps gear elevated and sorted, reducing contact with any residual floor moisture.
Key takeaways
A shed moisture barrier combined with proper ventilation and site drainage is the most effective way to prevent condensation, rot, and mould in any Australian shed.
| Point | Details |
|---|---|
| Match material to climate | Use 6-mil polyethylene in cold zones; use smart vapour retarders in hot-humid coastal areas. |
| Seal every penetration | Tape all seams and seal around pipes and conduits to maintain a continuous barrier. |
| Prioritise the floor | A continuous barrier under the slab or ground is the single most effective moisture control step. |
| Pair sealing with ventilation | An airtight shed without airflow traps humidity and causes rot; both elements are required. |
| Inspect and maintain annually | Check for tears, clear vents, and monitor ground drainage every year to sustain protection. |
What I’ve learned about shed moisture barriers in Australian backyards
Homeowners often ask me whether they really need a moisture barrier if their shed already has a concrete slab. My answer is always yes, and here is why. Concrete is porous. Without a polyethylene sheet under the slab, ground moisture migrates upward through the concrete and into the shed floor. I have seen tool chests rust from the bottom up in sheds with perfectly sound roofs, simply because the slab was laid without a barrier beneath it.
The other thing I see constantly is homeowners who seal every gap they can find and then wonder why the shed smells musty within a year. Sealing without ventilation creates a closed system where any moisture that gets in stays in. The fix is not more sealing. It is adding a ridge vent or a pair of wall vents so that air can move through and carry moisture out.
For Australian homeowners, the climate zone question matters more than most guides acknowledge. A product that works perfectly in a Melbourne workshop can cause serious problems in a Cairns garden shed. If you are unsure about your zone, check the Australian Building Codes Board climate zone map before you buy materials.
The good news is that getting this right is not complicated. Prepare the site, choose the right material for your climate, seal every seam and penetration, and leave ventilation paths open. Those four steps cover the vast majority of moisture problems I have seen in Australian sheds.
— Liza
Ketergroup’s weather resistant storage solutions for Australian gardens
If you want to sidestep the moisture barrier challenge altogether, Ketergroup’s range of weather resistant shed kits offers a practical alternative. Ketergroup sheds are built from durable, recyclable resin materials that do not rot, rust, or require painting, making them naturally resistant to the moisture problems that plague timber and metal sheds.

Ketergroup’s storage solutions are designed for Australian conditions, with UV-stable materials that hold up through hot summers and wet winters. You can also pair any shed with a Keter Connect Storage Organizer to keep gear off the floor and well organised. Explore the full range at ketergroup.com.au and find the right outdoor storage solution for your backyard.
FAQ
What is a shed moisture barrier?
A shed moisture barrier is a sheet of vapour-resistant material installed under floors, on walls, or under roofing to block water vapour and ground moisture from entering the shed structure.
Where does a vapour barrier go in a shed?
In cold and temperate climates, the barrier goes on the warm interior side of insulation. Under concrete slabs, it goes directly beneath the slab with taped seams to stop ground moisture rising into the floor.
What is the best material for a shed moisture barrier?
6-mil polyethylene is the most common choice for cold and temperate Australian climates. In hot-humid coastal areas, a smart vapour retarder that adjusts permeance with seasonal humidity is a better option.
Do I need ventilation if I install a moisture barrier?
Yes. Balancing vapour control with ventilation is essential. A sealed shed without airflow traps humidity and accelerates rot, so eave vents or wall vents must remain open alongside any barrier installation.
How do I know if my shed moisture barrier has failed?
Signs of failure include swelling doors, soft or spongy floor edges, a musty smell, and tools rusting despite the roof being intact. These symptoms point to ground or wall moisture intrusion rather than a roof leak.


